How to Build A Barn Door - the Easy Way!
When I was first starting making I was so curious about how things went together, especially barn doors. I would see all these pretty pictures of barn doors on Instagram, but people would never show the backs. So I always wondered were they just gluing boards together, was there actual joinery in there, what does the back look like, what is this made out of, etc? And now that I have been doing it, woodworking, for a while I can let you know that the answer to the questions…. and the answers are yes, yes, flat and decorated, wood plywood and mdf! So needless to say, there is not one right way or wrong way to build at barn door… at least in my opinion.
This post IS sponsored by Diablo. All opinions are my own. This post DOES contain affiliate links. To learn more about my affiliate programs, see my DISCLOSURES page.
Today I am going to show you how to build a super simple and AWESOME barn door. It only requires two tools: a pin nailer and a miter saw… but a hand saw would do just fine! Oh and a drill, but the drill is only for attaching the hardware and hanging the door not for actually making the door! So this is a beginner project that I think just about anybody could do!
Wanna see this build in action? Check it out on my YouTube channel!
Since I am going to be painting this door, I made it from MDF. MDF is Medium-density fiberboard and it rivals the affordability and versatility of plywood and other wood products. I like using it when I am painting a door because the surface is super smooth and takes paint well… so I would say it gives a more modern look. MDF is also super stable meaning it doesn’t move and is less likely to warp over time. Plus, it is cheaper than plywood and real wood. So now that we know what we are making it out of, let’s get started.
Step 1:
Have your big box store cut your 3/4” 4x8 sheet of mdf down to your final dimensions you want your door. They will generally do two cuts for free, so this shouldn’t cost anything. Also, be sure to pick up as many bender boards (1/4” x 3 3/4”W x 96”T) as your door calls for.

Bender Boards were originally for creating curved concrete forms.
Need help figuring out how big to make your door?
In general I add 6" to the opening width so the door overhangs the opening by at least 3" on either side. This gives more privacy if looking at the door from an angle. I also add 1-2" on the opening height, if space above door allows for it. Be sure to review your area and hardware before sizing your door!
Step 2:
Cut your bender boards down to the exact size as the height your door using your miter saw or hand saw.
Step 3:
Since your door width might not be the same size as mine, you need to find the center of your door and the center of a bender board which should be 1 7/8”. Place a mark on both end of each the 3/4” mdf and the bender board. Apply wood glue to back of the bender board. I like this glue from Titebond because it dries quickly and goes on thick so it doesn’t run all over the place when you flip the boards over. Once you have it in place attach it to the base using 3/4” 23ga pin nails. The pin nails hold the board in place while the glue dries. And since it leaves such a tiny hole you don’t really even need to fill them. I generally just make sure to put a little extra primer in those spots.

My door was 38”W, so 19” was my middle starting point. Mark line on top and edge so can see when placing board on top.

Bender Boards are 3 3/4”W, so center is 1 7/8”.

You don’t need a ton of glue.

Love this glue… almost ran out!

Can you find the pin nail hole?
Step 4:
Install the two outside bender boards flush with the sides of the 3/4” mdf using glue and the 3/4” 23ga pin nails. No measurements needed for these.

Install center first and then both outside pieces.
Step 5:
Now find the center of each side area and mark it as well as the middle of a bender board and attach the same way as above. And repeat until you have all bender boards evenly spaced.

Almost there!
I did it this way, measuring before each board, so that I could ensure each of the gaps would be the exact same width. You can also use a spacer block, but I have found that doing that way leaves the last gap a little too big or small because of miscalculations or inconsistencies in the wood.
Then repeat the same process on the other side because you want both sides of your barn door to look AWESOME, right?

Step 6:
Sand the ends and sharp edges of the bender boards. I used my new Diablo Reusable Hand Sanding Block with sandnet paper. I love this thing because it has a dense foam side that is good for breaking the edges on the corners.

Dense foam on the bottom is great for breaking edges on the mdf so they aren’t sharp.
And then the other side is soft foam which is great for sanding uneven surfaces or curves. Plus, the sandnet sand paper last forever and is easily cleanable by vacuuming the dust or blowing it off. And when it is done, just toss the paper and reuse the foam!

The soft side is great for sanding pieces that have more of a contour to them.

And it is reusable! Diablo Reusable Sanding Block
Step 7:
Prime door! Since I painted my door black I used a tinted primer. I also ended up brushing and rolling the primer and paint on because I have found spraying shiplap it is really hard to get paint in all the grooves without drips. So brush the paint in the grooves and then roll over the shiplap. You also might want to add some Floetrol in your paint to help minimize brush marks. This is definitely and two handed painting process.

Brush the grooves, roll the shiplap, brush the grooves, roll the shiplap!

I stood up the piece to finish the backside so it wouldn’t make dents on the front side.
Step 8:
Paint! I choose to paint mine my favorite color of black, Tricorn black from Sherwin Williams.

I have the cutest painting partner around!

Loving how it looks! This is Tricorn Black from Sherwin Williams.
Step 9:
Install your barn door hardware per the manufacturers instructions. When hanging the track on your wall be sure to install the track directly into studs. I like this hardware set I got off of Amazon because the track is one piece and it comes with the door handles stops and everything you need.
If your studs don’t line up with the holes on the track you will need to install a backer board into the studs first and then the track onto the backer board. Make sure to use real wood for the backer board, it is stronger than mdf! I like using these pre-prime boards.

This is tough by yourself, but not impossible. I get the header lined up on one side and shoot a brad nail in it to hold it, then level it and shot another one it and then go back and install screws.

So stoked on how this door came out. Love this barn door hardware… super simple to install and comes with everything you need!
And BOOM… just like you made an AWESOME barn door! I honestly love how this door turned out, I don’t care how easy it was to make. Just because something is easy to make does not mean it isn’t AWESOME. And if vertical shiplap isn’t your style you could easily make a different pattern with the bender boards and make a barn door that fits your space.
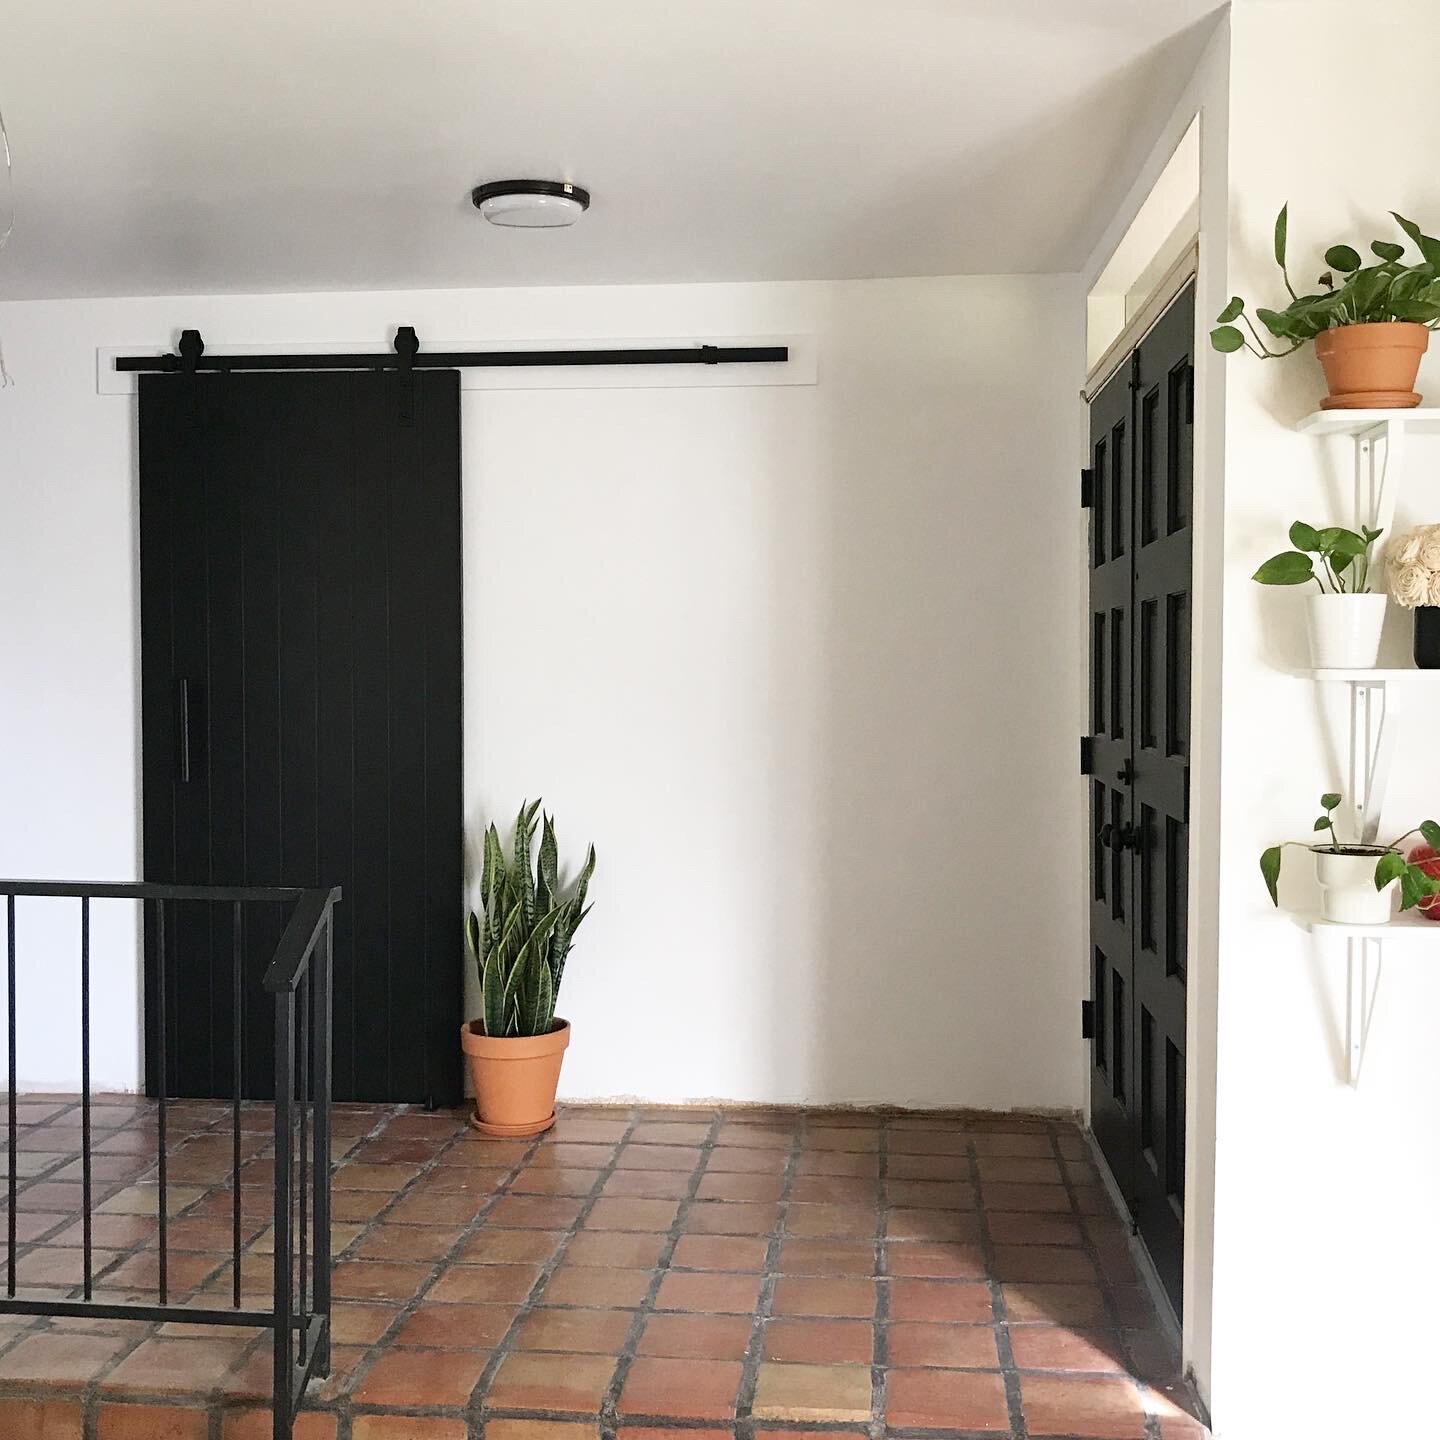
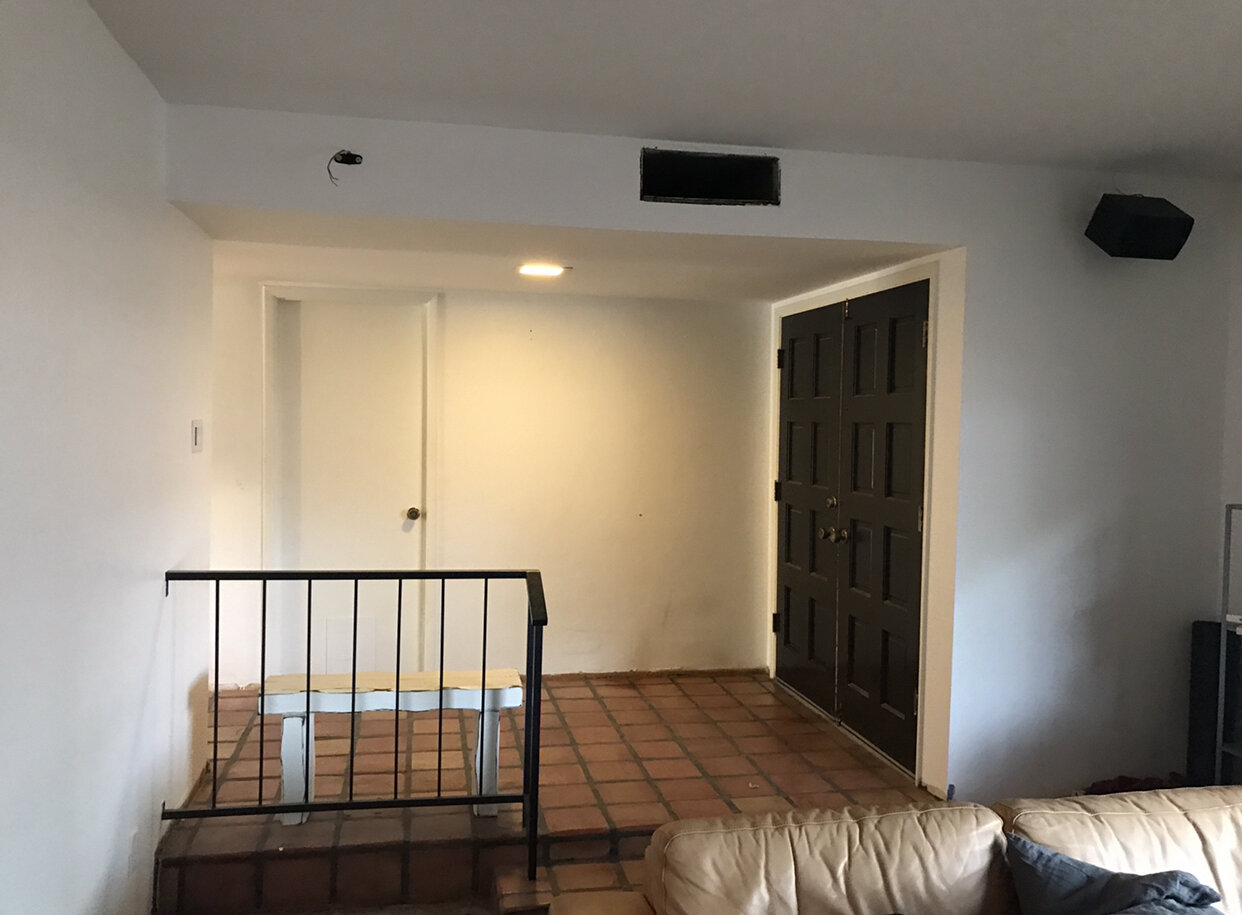
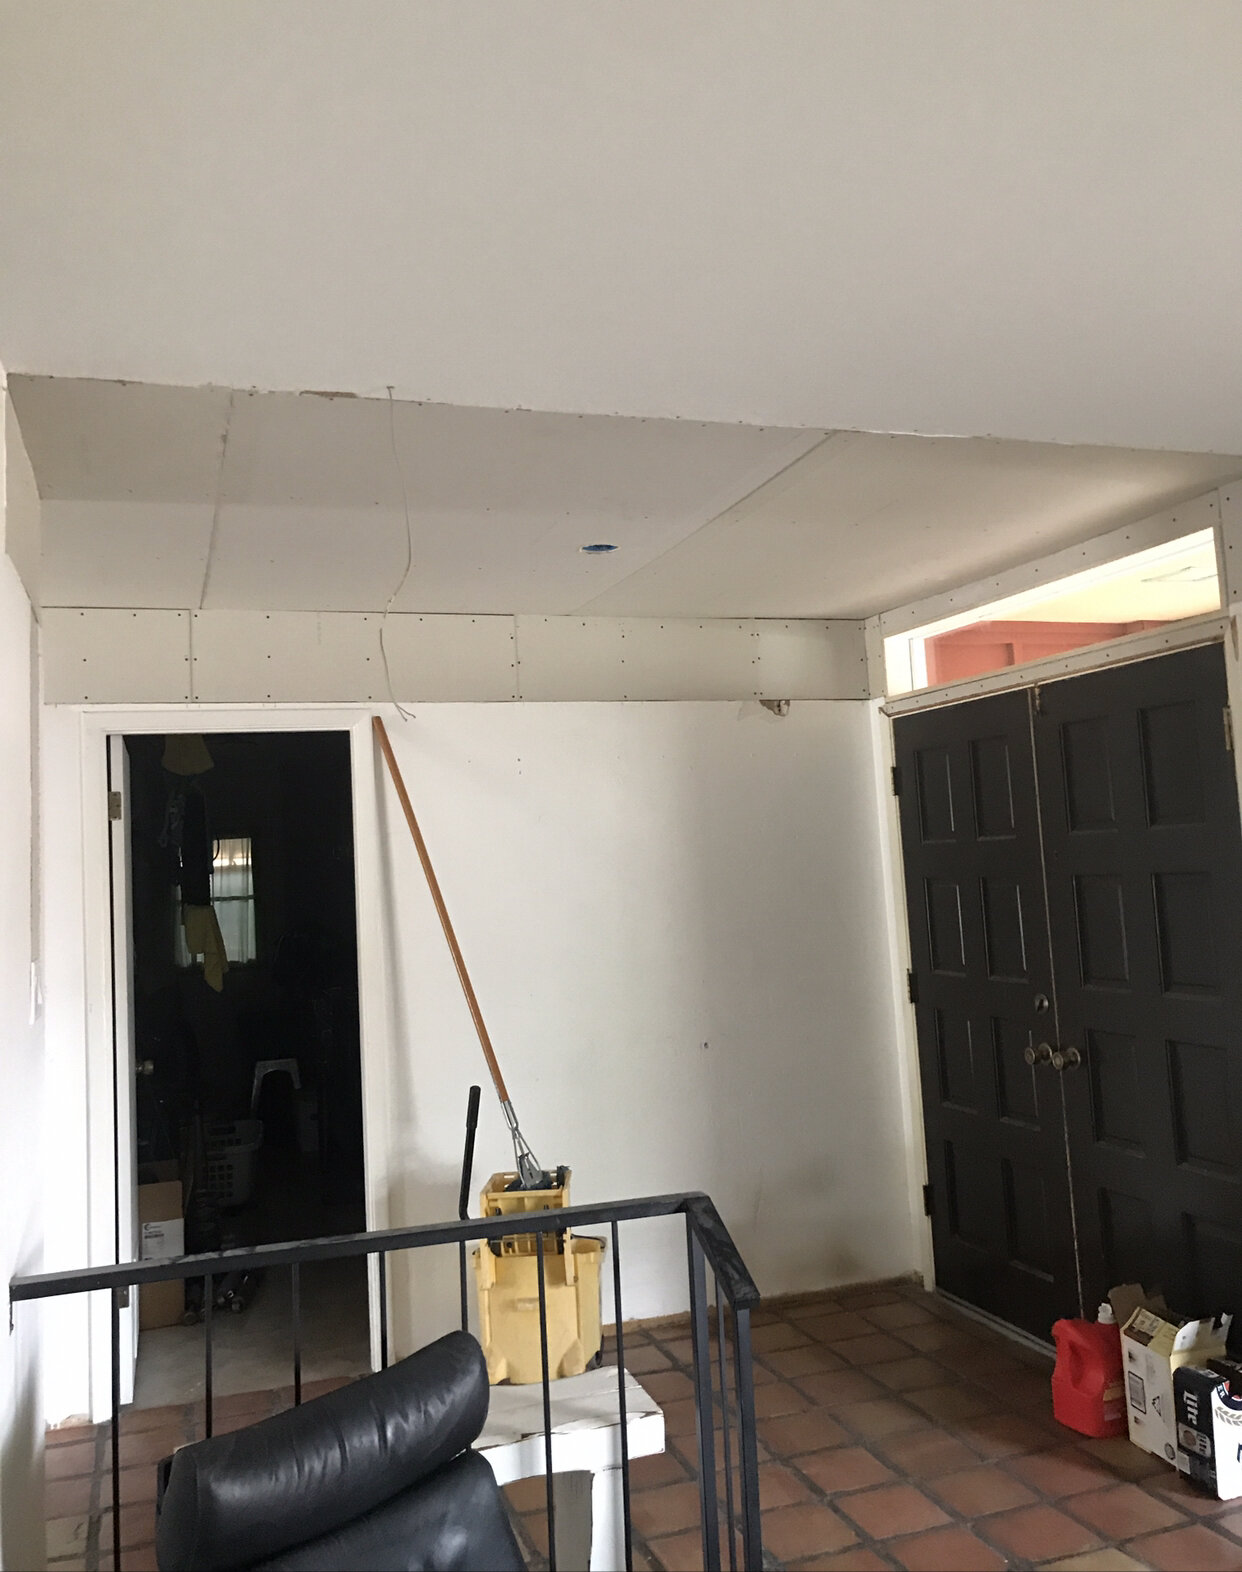
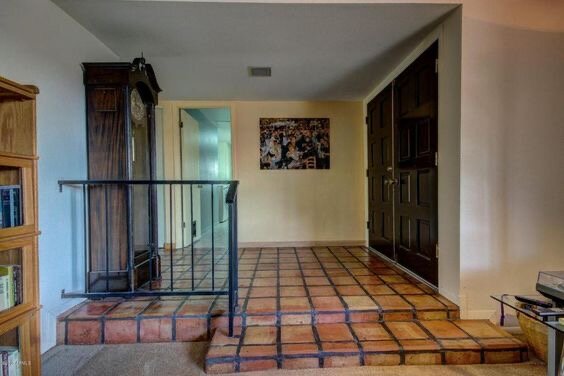
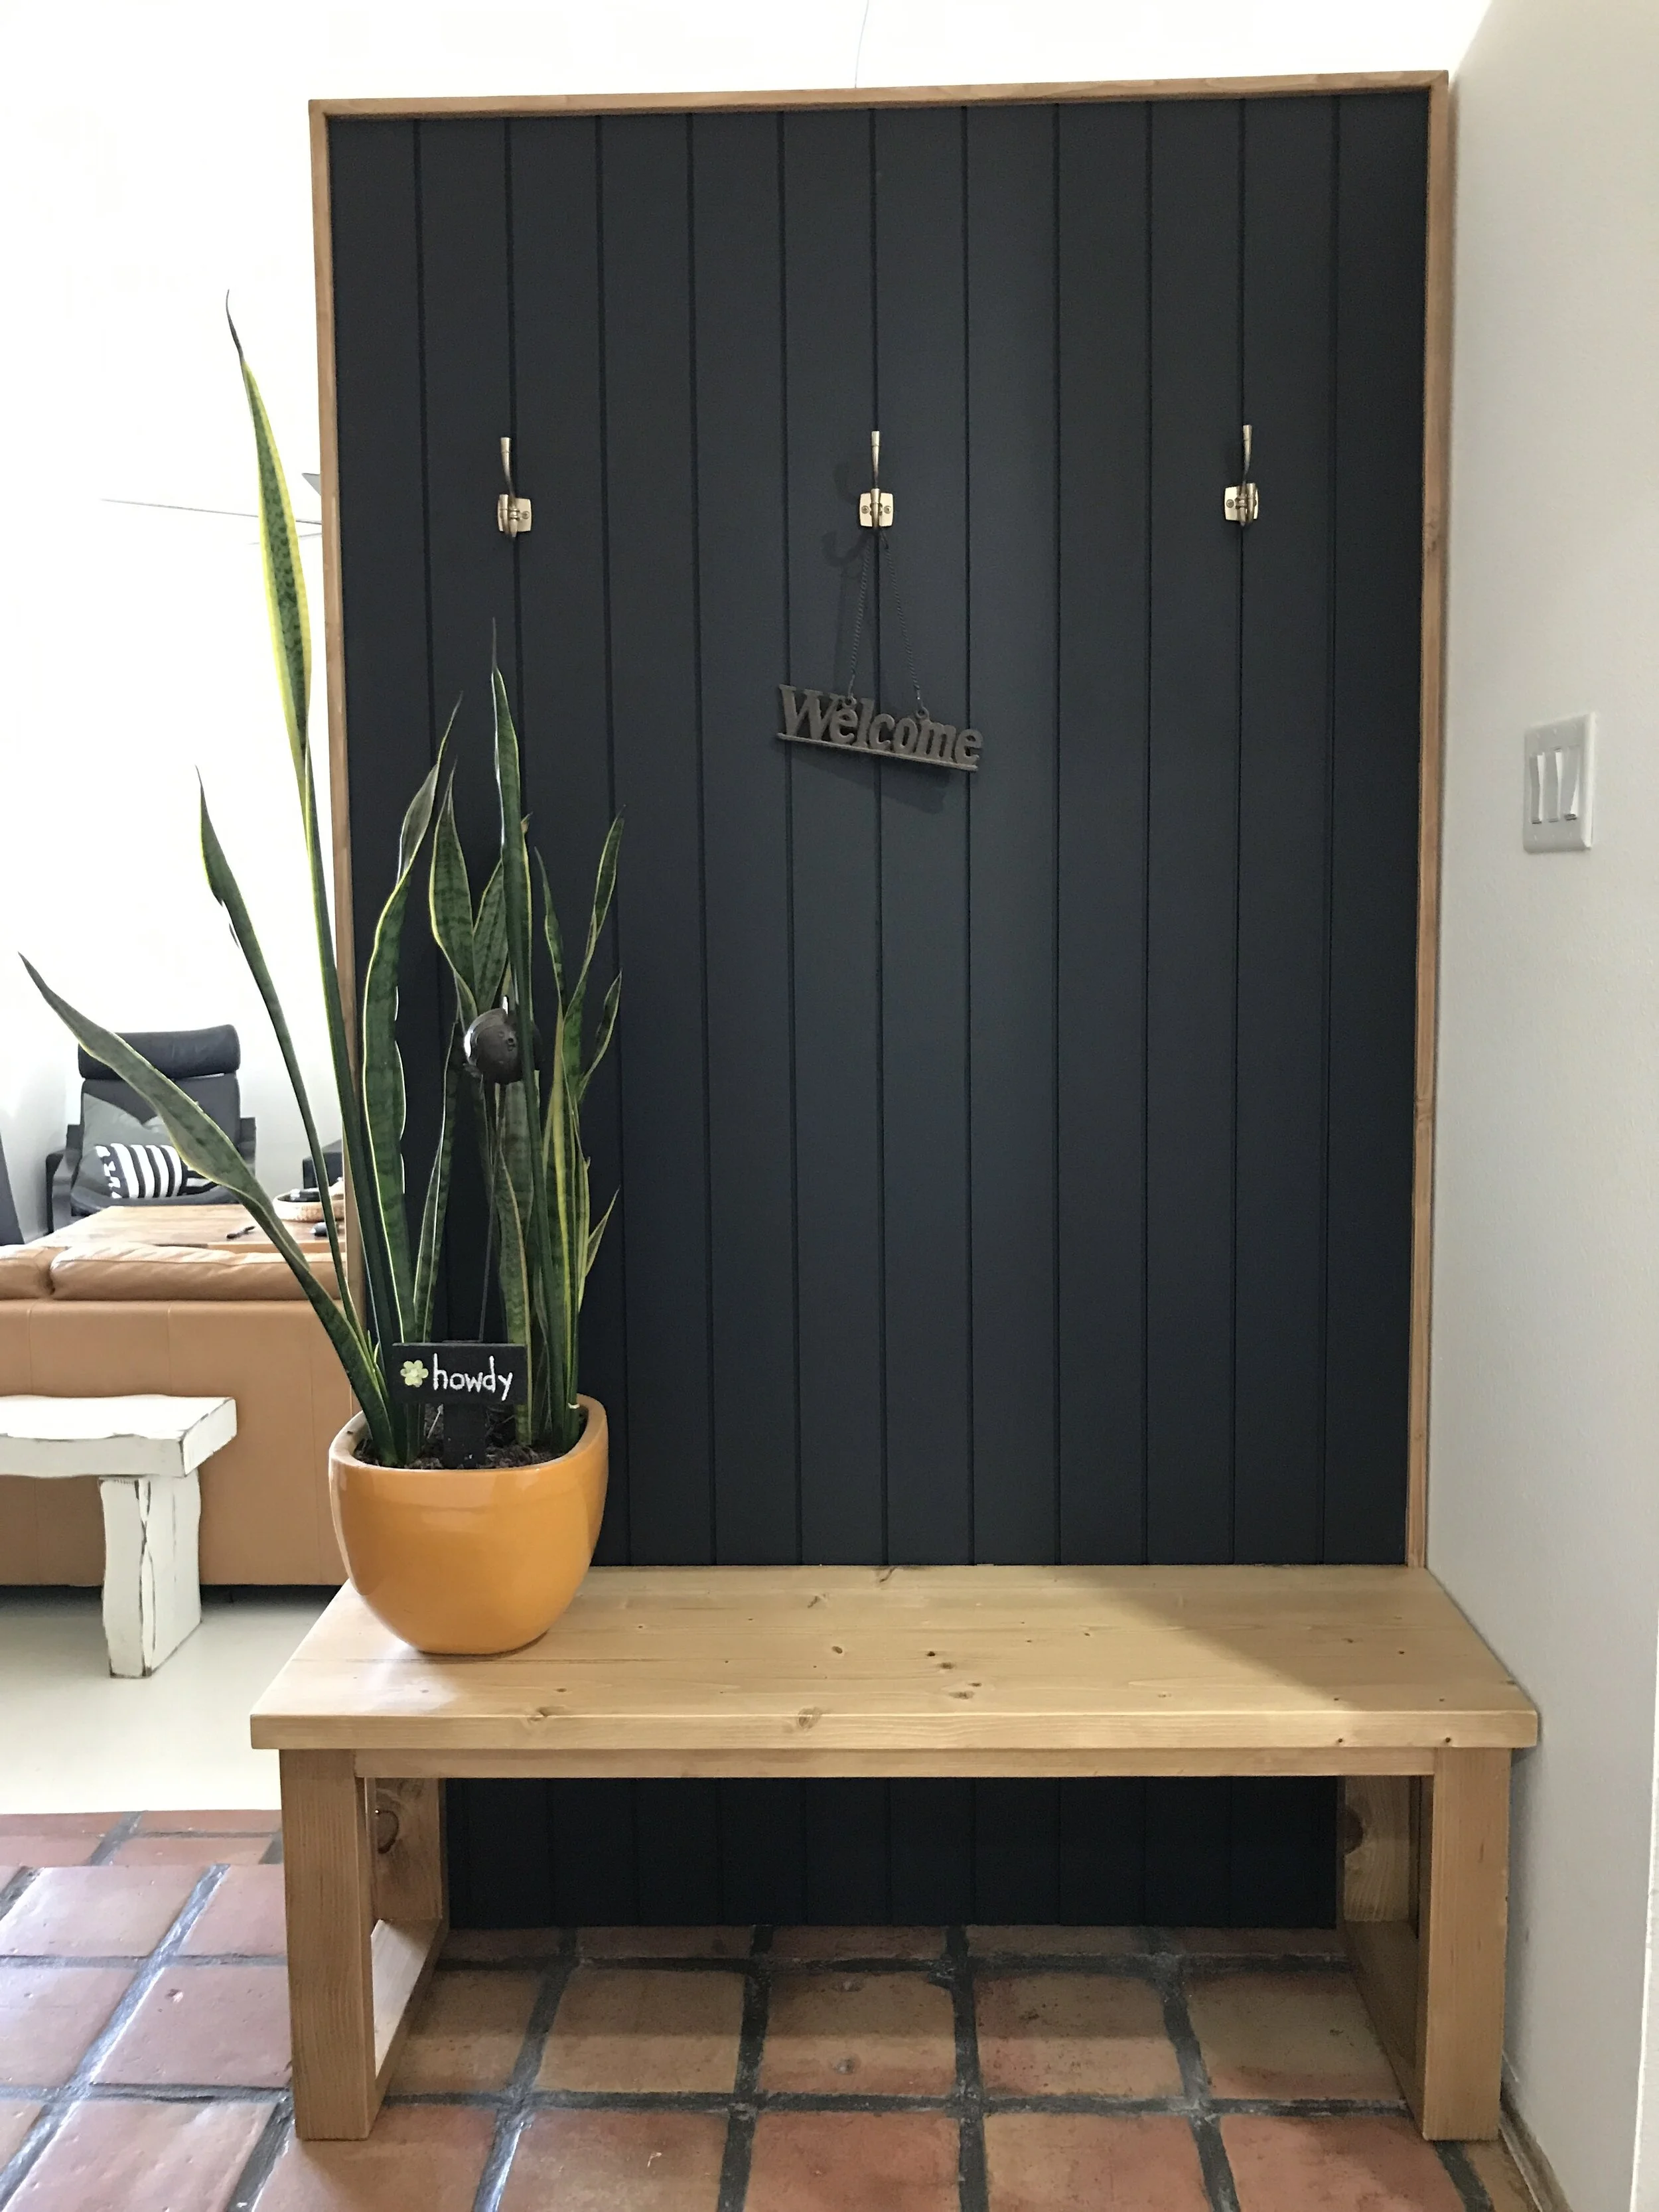
Progression of our entryway makeover!
We raised the ceilings, added a transom window, painted and added a barn door!
Still need base boards, trim, light fixture and new front doors… someday!
I hope you found this tutorial helpful and that it gives you the confidence to get out there and build yourself one! If you do end up building yourself one, please tag me in your post… I’d love to see your work.
But if this barn door wasn’t your style or you want a little bit more of a challenge in the building department, check out this post… How to Build a Barn Door - with Tongue & Groove Joinery!
Thank you so much for following my journey! Remember Build Loud, Build Wild.. just go for it and have fun! OH… and have an AWESOME day!
Sadie Mae