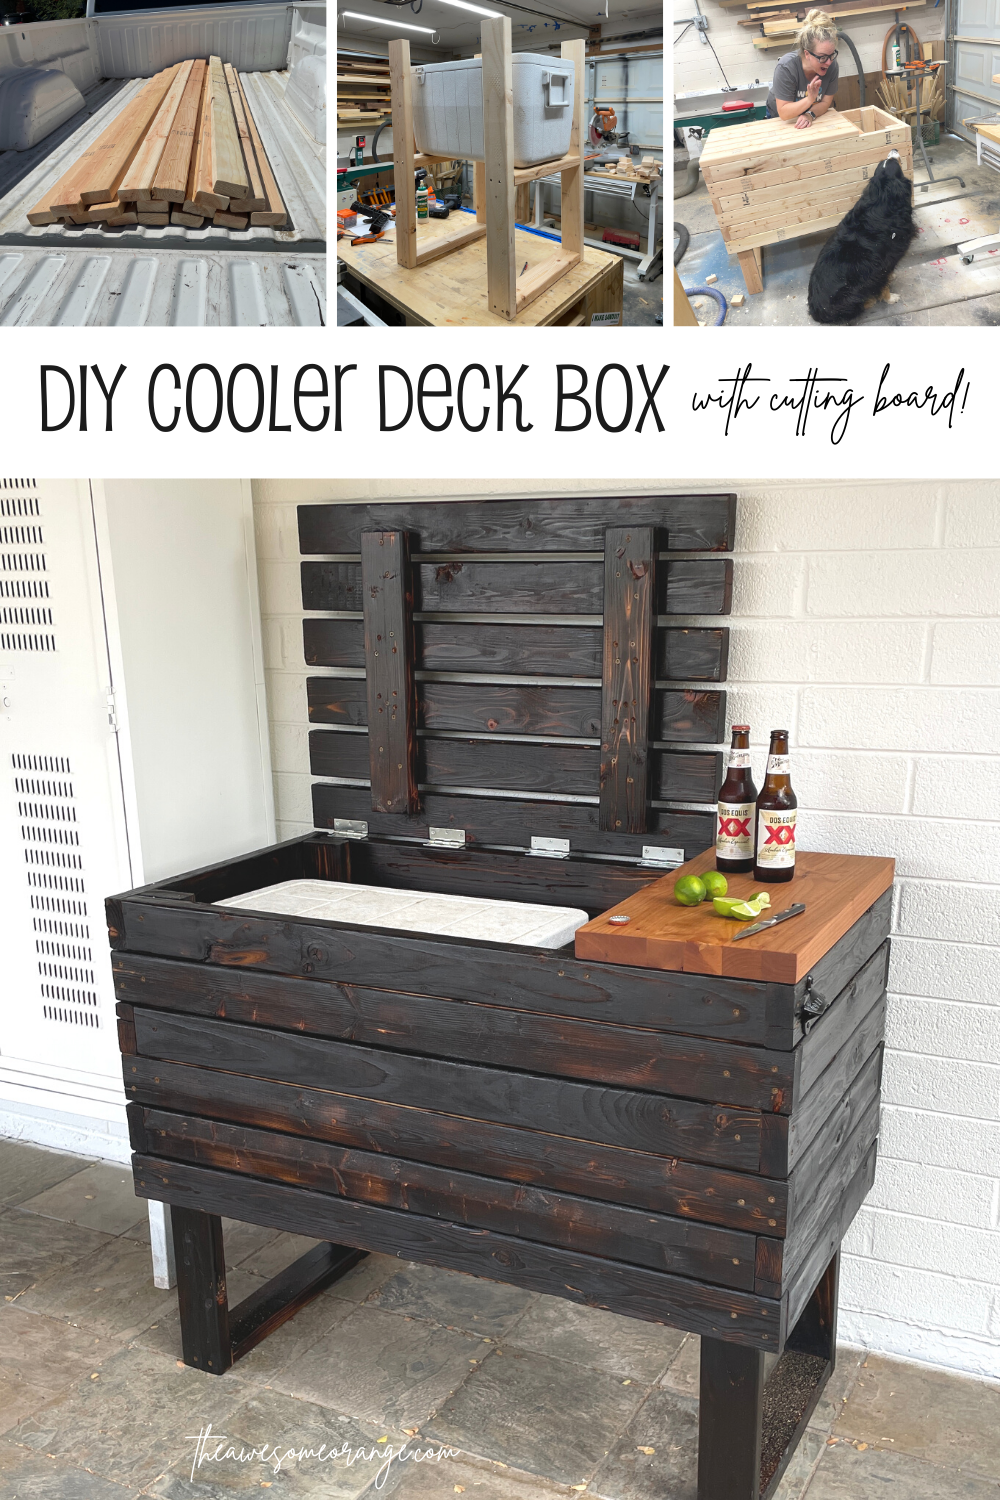
DIY Cooler Deck Box With Cutting Board
Who is ready for a pool party or spending more time in the backyard with friends and family? I know I am! And this week I am sharing the perfect build that will be the life of the party all centered around the drink cooler! Yup, I am building a DIY Cooler Deck Box. It is not only going to look AWESOME and give you an elevated place to keep your drinks cold and hidden, but it also has a cutting board! You know for those snacks or to cut up some limes for your favorite summer beverage. So let’s get started building!
This post IS SPONSORED by Simpson Strong-Tie. All opinions are my own. This post DOES contain affiliate links. For more information on my affiliate programs, please see my DISCLOSURES page.
I designed this build to fit my cooler, but there is wiggle room for larger coolers or you can make it smaller to fit your cooler. And if you don’t want it to house a cooler you can always store whatever outside stuff you need, like pillows!
Plus, it is a simple design that only takes 17 - 2x4’s and some outdoor screws!

2x4’s

Deck Screws - I used two of these contains approximately 150 screws.
For all outdoor projects you need to make sure you are using screws that are rated for the outdoors, like Simpson Strong-Ties DSVT212 Deck Screws! They have a Quik Guard® coating that provides corrosion resistance for exterior and certain preservative-treated wood applications.
I’ve used a lot of Simpson Strong-Tie’s screws on different projects over the years and they have all stood the test of time and I am sure these are no exception. Check out these projects for some of their other hardware I’ve used:


Okay let’s build!
Step 1:
Cut 2x4’s to length per cut sheet. Get complete build plans here… DIY Cooler Deck Box Plans!

3 with short sides and then 3 with long sides
Step 2:
Assemble what I am calling the side pieces, basically 6 rectangles, using exterior rated wood glue and 2 1/2” outdoor screws! With the deck screws no pre-drilling is required, but I did pre-drill when the screw was going to close to the end up the board to help prevent splitting.

Starting to assemble the long sides.
Note: I alternated the length of the side and the front pieces of the rectangles to give the piece more visual interest.
Step 3:
Assemble legs using exterior rated wood glue and 2 1/2” outdoor screws. I cut and used some scraps as spacer blocks to ensure the height of the cross support was at the same height.

Leg assemblies

There is wiggle room up and down depending on the size of your cooler. All measurement will be in the full plans!

She’s got legs!!!!
Step 4:
Attach cross supports between the legs to create a platform for the cooler. There will be gaps in between the boards to make it possible to drain the cooler without taking it out of the deck box when complete. I just eyeballed the spacing… nobody is ever going to see it.

Cutest little fluffy supervisor!!!!

You end up with approximately 1/2” spacing between slats.
Note: I didn’t do this, but I recommend you place the rectangle side pieces around the legs and then attach the cross supports to ensure that you aren’t making the box too big. Like I said I didn’t do this and it was a very tight fit to slide the side pieces onto the legs…. it took patience, hammer and a second set of hands.
Step 5:
Add top support. I made my lid 32 1/2” wide and the cutting board approximately 12” wide, so the top support was center where they meet to support the lid when it is closed and to hold the cutting board.
Step 6:
Assemble the lid using 6 - 2x4’s with 2 supports screwed in from underneath. The support need to be approximately 6” in from each side to miss the legs of the box and should span about 1 1/2” from each end. The lid with have gaps in it. If you don’t want gaps you can mill or rip your boards to fit perfectly, but since this will be outside there will be expansion and contraction of the wood depending on the weather so I left the gaps.

Step 7:
Attach lid using some basic 2 1/2” door hinges. I think you can get away with using just three of them, but since they came in packages of two I ended up using all four for this project.

Step 8:
Shou-Sugi-Ban DIY Cooler Deck Box or burn/charr the wood. This process is used to give the wood a darker look and to help preserve it. By burning the wood it makes it more resistant to water and bugs and more fire retardant. Oh and it is a super fun process.

I like a heavy char, but you can finish the piece however you like. I think a nice paint job with the texture would look awesome as well.
To watch me build this project and more details on the Shou-Sugi-Ban process watch here:
Step 9:
Build cutting board… mill boards, glue them up, trim them to final dimensions, sand thru the grits 80,120,180,220, water pop the grain, sand to 400 and then finish with several coats of mineral oil. I used some alder scraps that I had on hand. If you don’t have the tools to make the cutting board you can use leftover pieces of 2x4 and create more of shelf for this step.

Love these Cabinet Master parallel clamps from Jorgensen for everything!

Diablo SandNet sandpaper is awesome…. no holes to line up, lasts forever and works great!

I used Howards Food Safe Mineral Oil… 4-5 coats.
Step 10:
Apply outdoor oil to the cooler deck box. After Shou-Sugi-Banning the wood if you don’t seal it the char with come off on your hands and clothes, but by sealing it with oil this won’t happen. And like anything outdoors it will require maintenance. But maintenance will be easy because you will simply just add another coat of oil when the wood looks like it is drying out. The oil penetrates the wood and hardens.

I used General Finishes Outdoor oil - 2 coats.
Step 11:
Add lid hardware/pull and bottle opener and any other accessories to fit your space… I might end up adding a hook for a towel and I definitely think the inside of the lid needs a “It’s 5 o’clock Somewhere” sign. That way when the lid is open you know it is party time!

It’s 5 o’clock somewhere!
I love the way this DIY Cooler Deck Box turned out. It is super sturdy and I will definitely be around for a long time. I hope you enjoyed this build… and if you did let me know in the comments what you thought of it or if I missed anything.

Ready for a good time!
Complete Build Plans Available HERE…. DIY Cooler Deck Box Plans!
Plans include material, tool and cut lists,
plus all dimensions and step-by-step assembly instructions!

Open for business!
Thanks for following my building journey…. oh and remember Build Loud, Build Wild and have an AWESOME day!
Sadie
Can’t make this now? PIN it and SAVE it for later!