

Building A Covered Patio With a 30ft Span!
We added a covered patio onto our house and not just any patio… a patio with a 30 ft span!
Feels so good to be writing this post because that means that patio is finished! This journey started just after the beginning of the year with a little dreaming, then lots of planning and then finally lots of nights and weekends of hard work. Yup, this wasn’t an overnight or even a weekend project! Since we were doing it all ourselves we had to do it in phases. Well not all by ourselves… we did team up with Simpson Strong-Tie for some AWESOME hardware, Paul’s Ace hardware supplied the lumber and we had some friends and neighbors helps along the way!
This post is sponsored by Simpson Strong-Tie. All opinions are my own. This post contains affiliate links.
Rather watch us build our new patio? Check it out on YouTube!


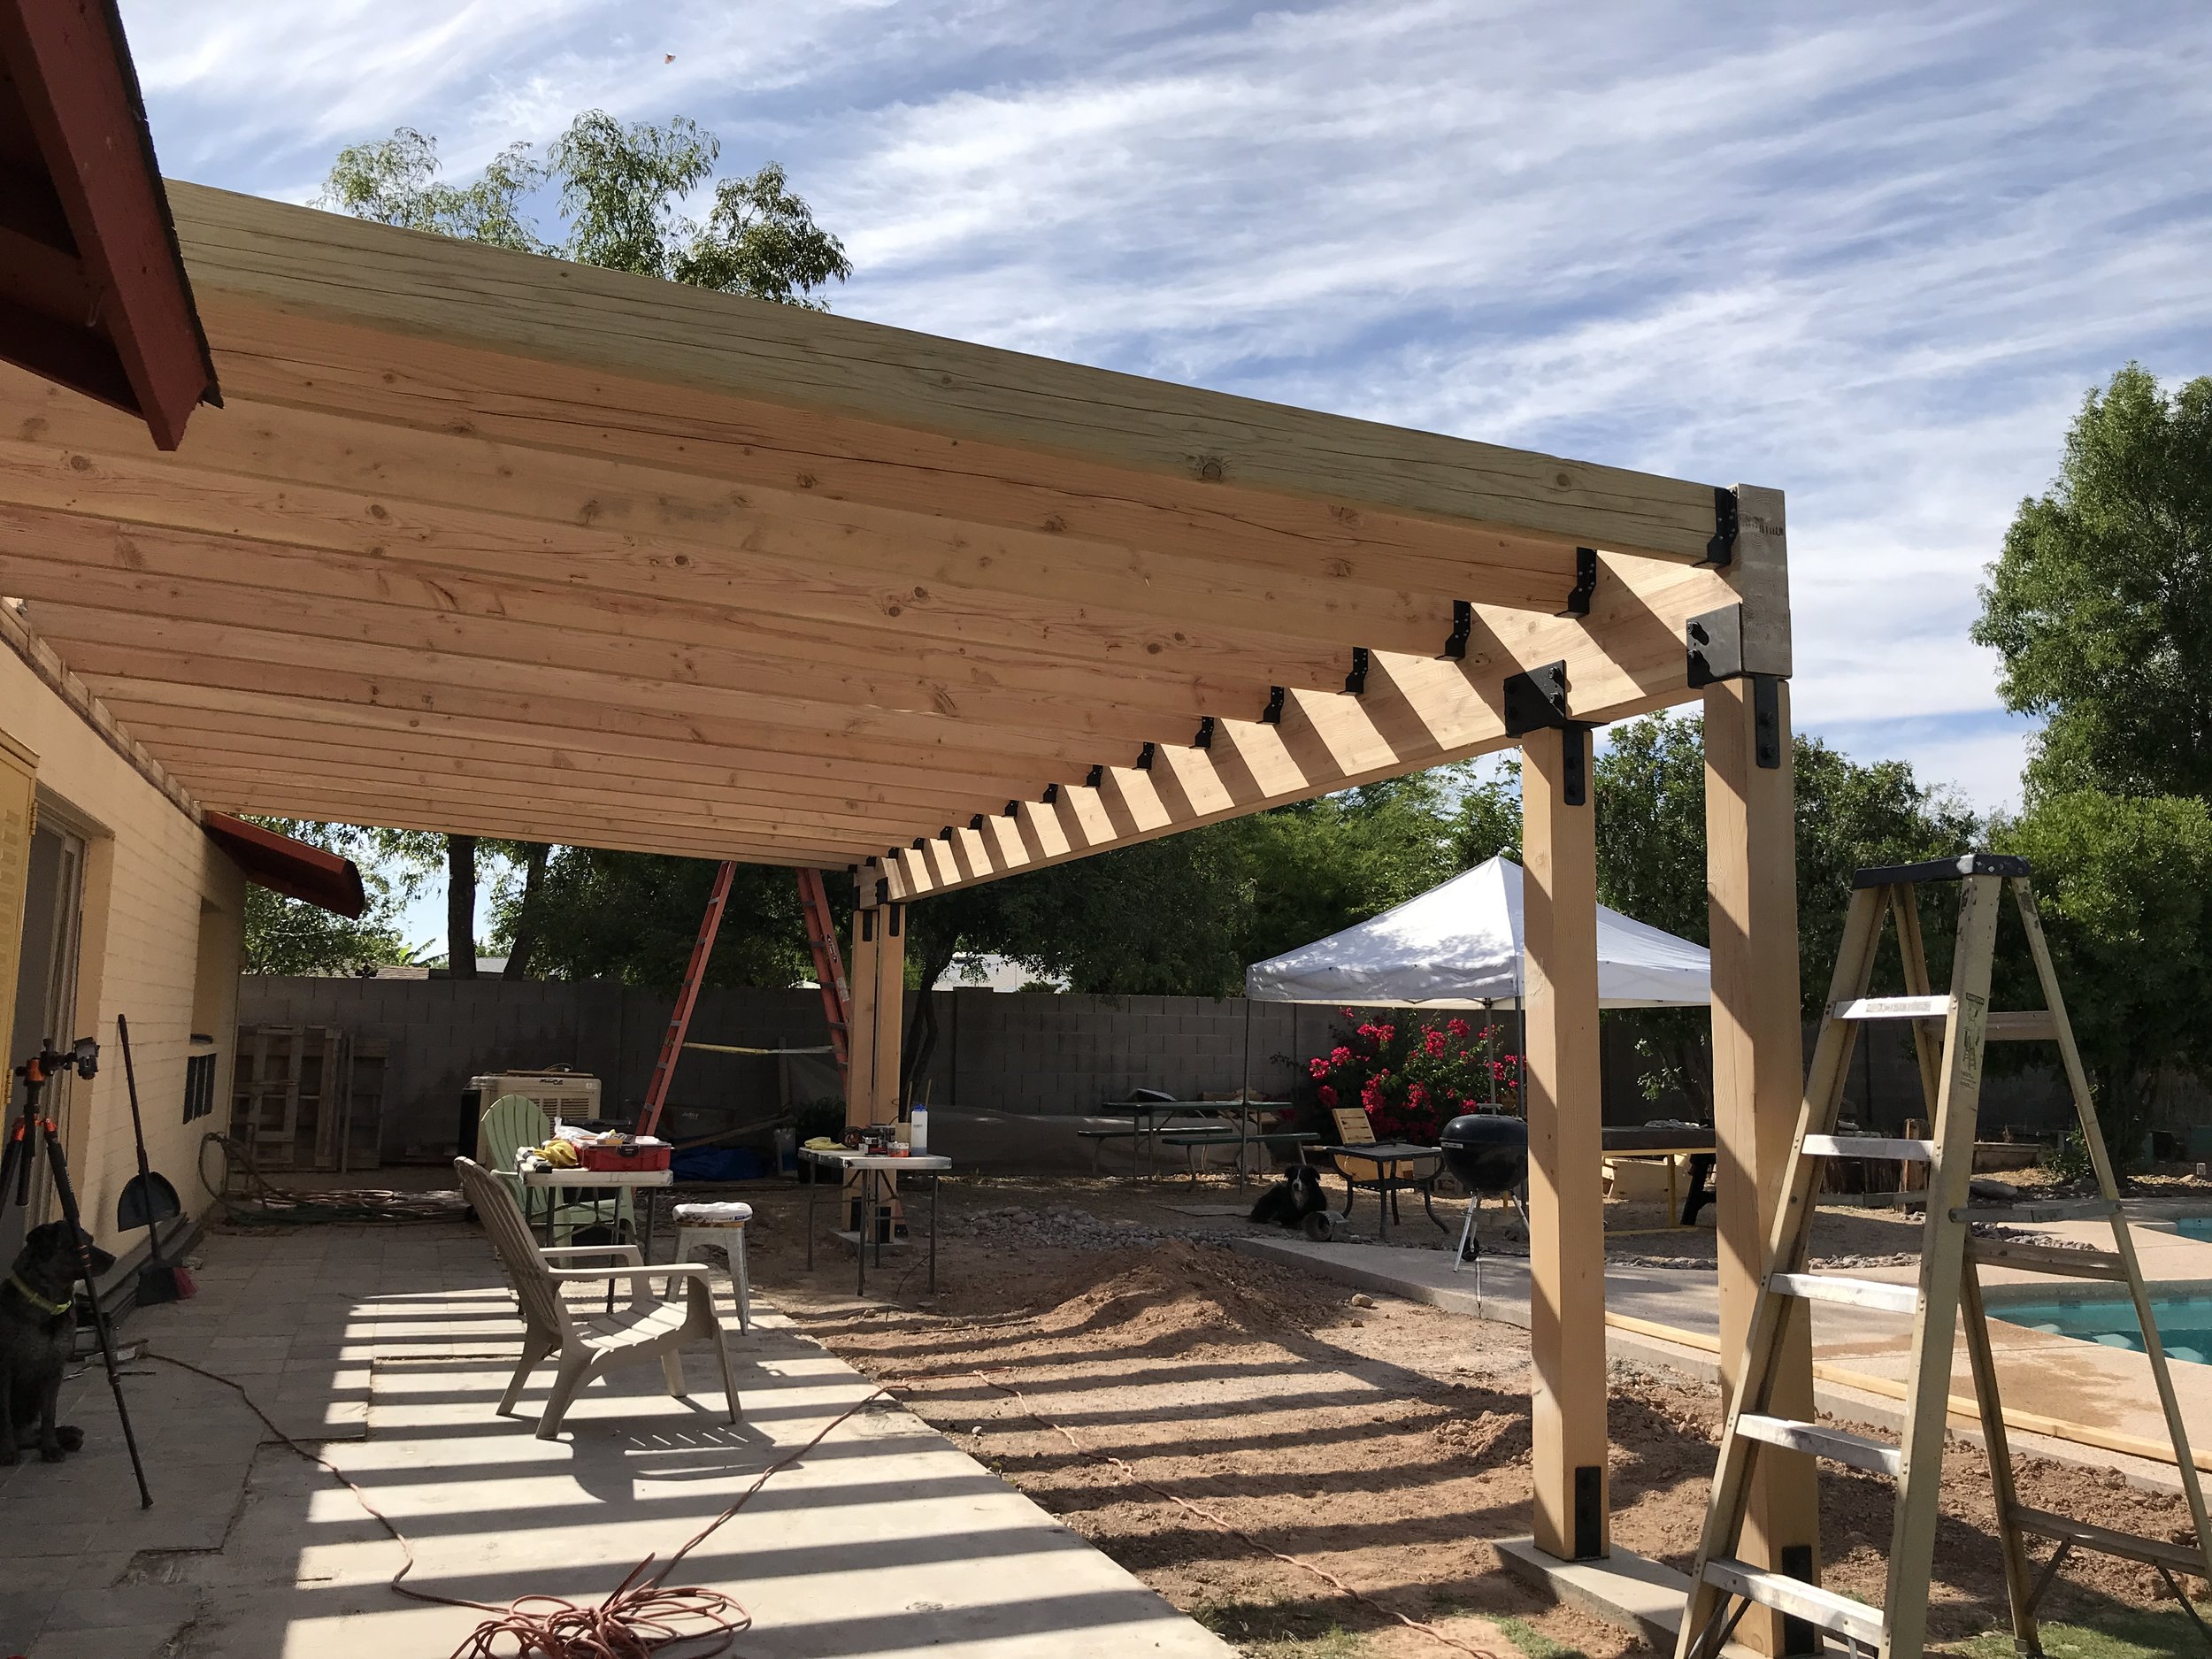
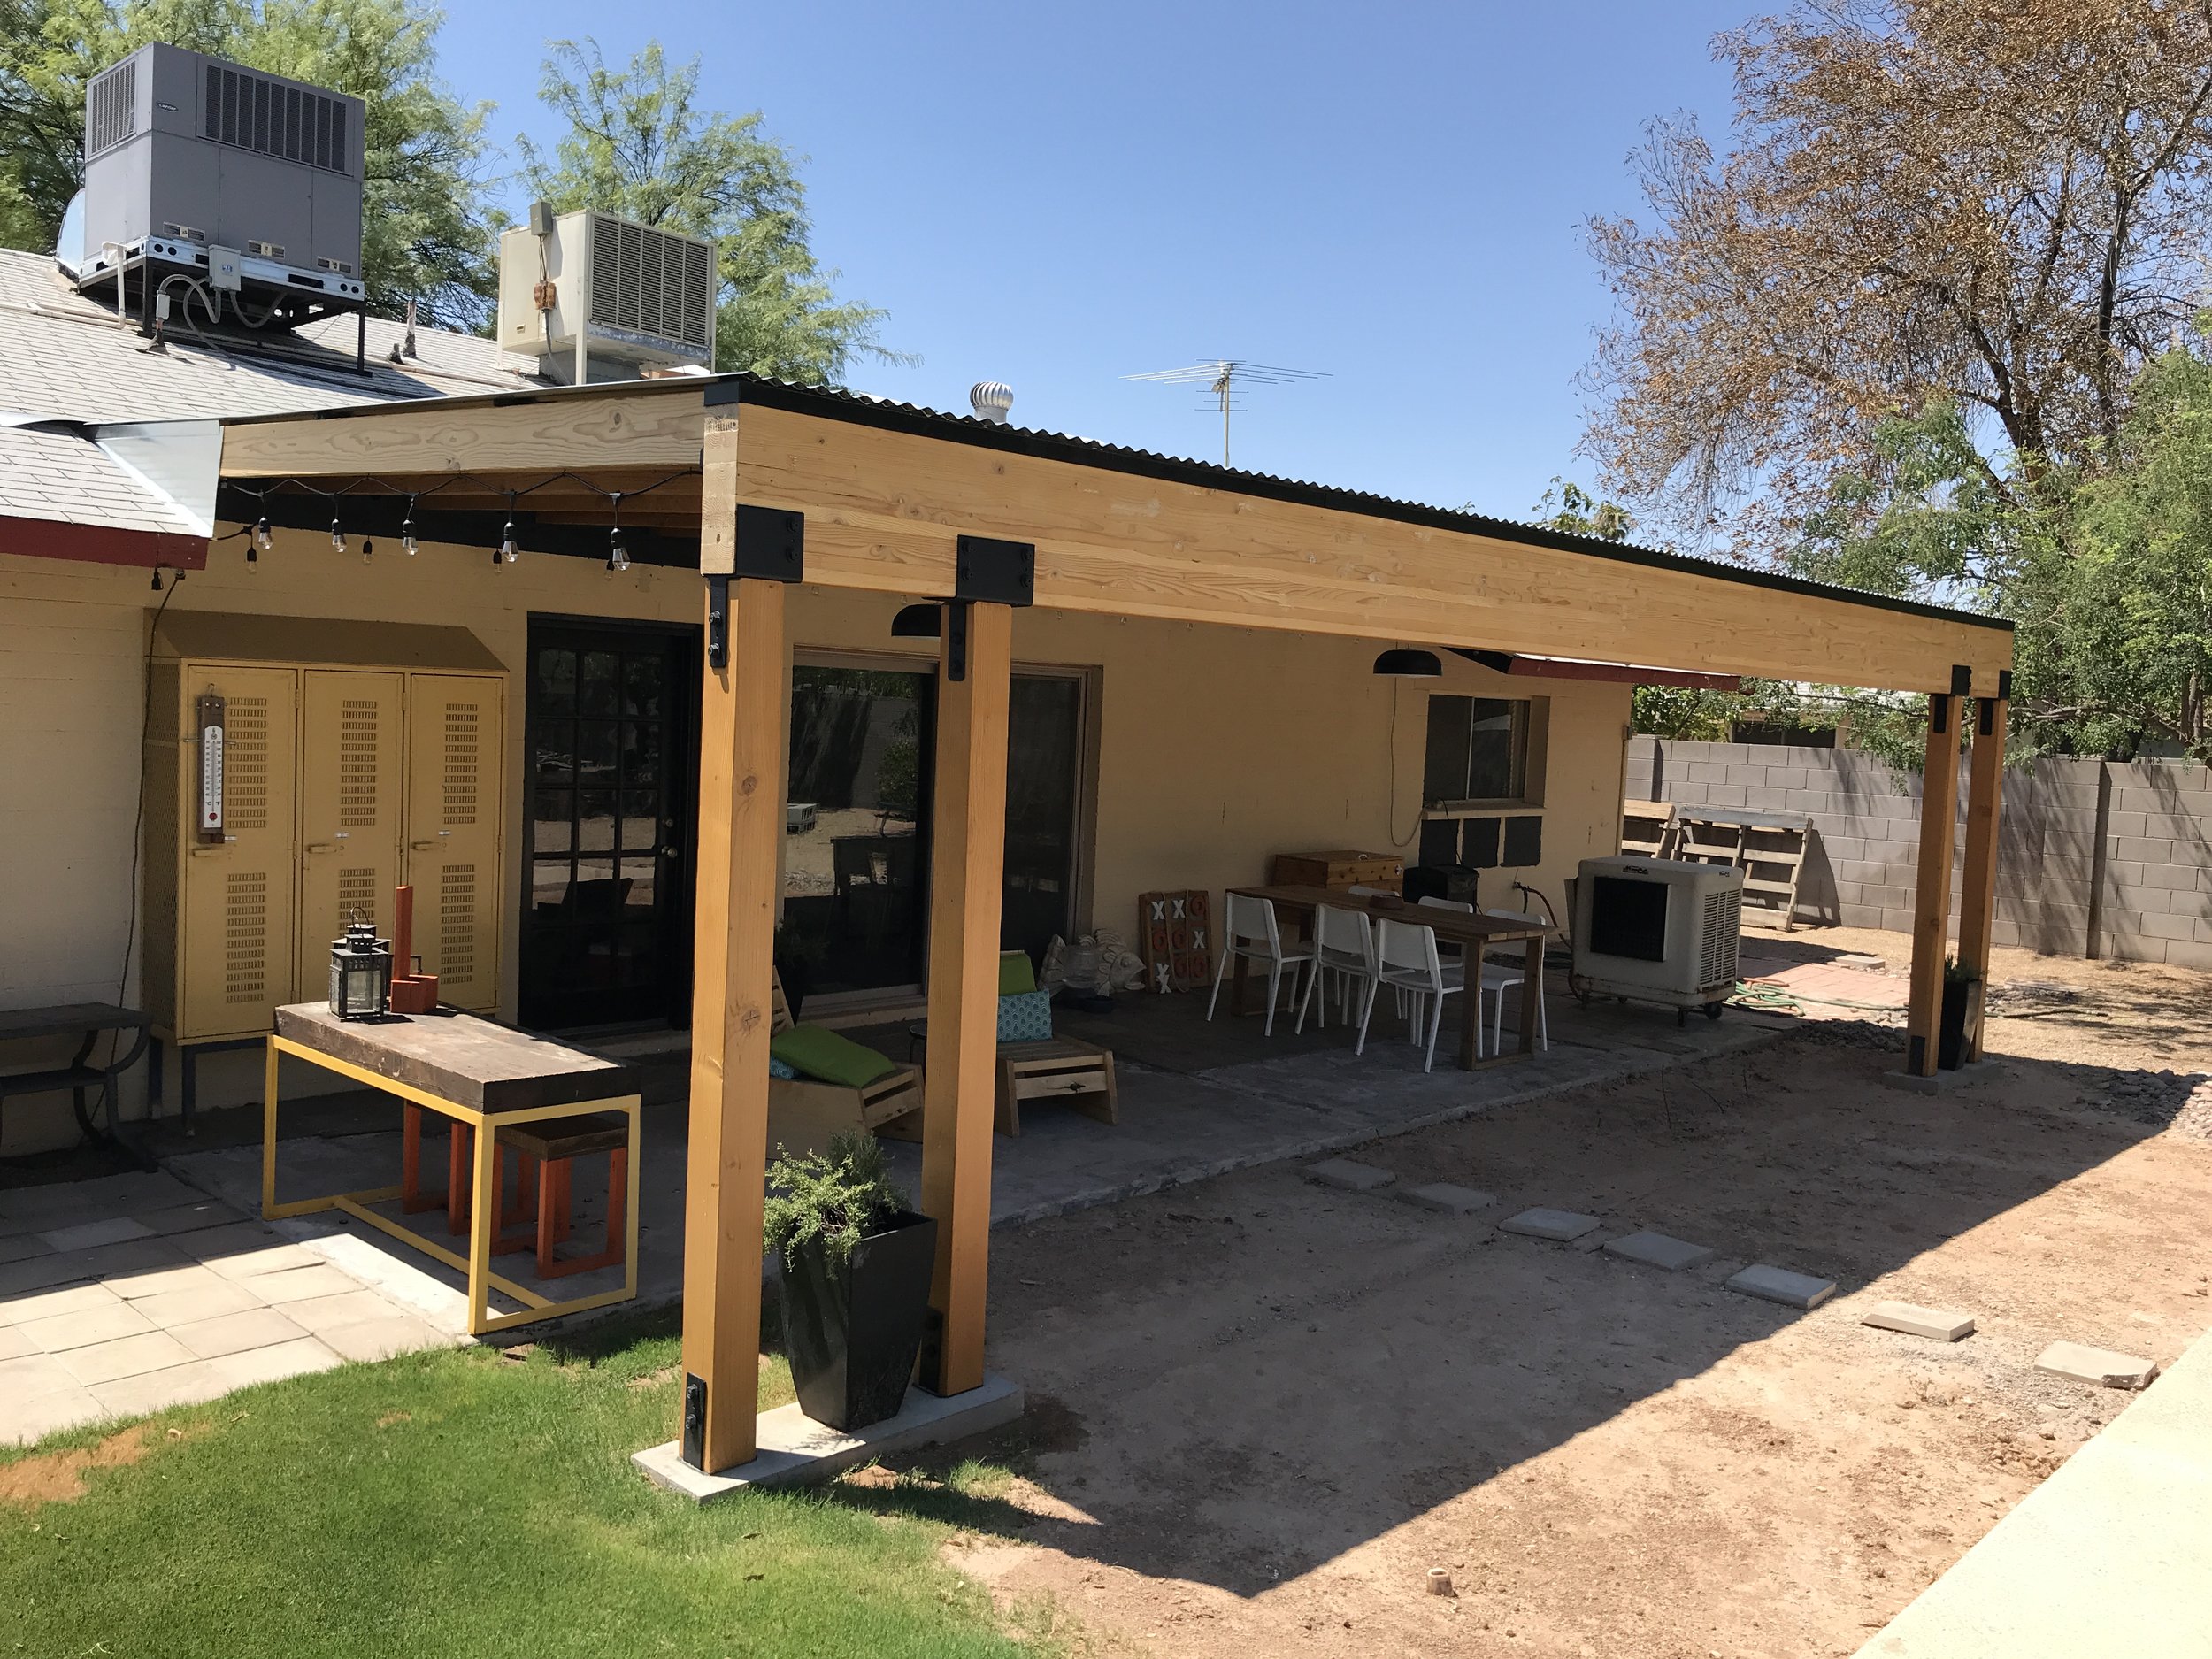
So let’s start from the beginning with the design. My husband wanted the biggest deepest patio we could get with unobstructed views. Our current patio was 30’ long and that length was good so that we didn’t cover the windows to two of our bedrooms. Our house is already on the darker side and we wanted to keep as much natural light inside as possible. So we knew 30’ long, but how were we going to that big of a span without posts in the middle? I didn’t think it was possible, but my husband wouldn’t give up on it. So I went and talked to an architect friend and he said it would be possible with an 18” glulam. He also suggested adding another set of posts close to the outside that wouldn’t block any views but would help balance the look. I totally agreed and is one of our favorite features. He also said we could get away with smaller joists, but because we were leaving them exposed, I went with 3x8’s to again balance the look. As far as the depth, we settled on 14’ so that we could use standard 16’ joists rather than having to up the joist size to 20’ and then cut them down to size.
We got all the lumber for this build from our local Paul’s Ace hardware. They aren’t your typical Ace in that they offer a full line of lumber and full house packages. But what I like about them the most is their customer service. It doesn’t matter who you talk to there, everybody is knowledge and cares about the success of your project! If you are local to me, I highly recommend you check them out for your next project.

Now on to building… I’m not gonna pretend to be able to tell you how to build a patio, plus codes and permits and what not are different everywhere, so I am just gonna give you some highlights and share what we learned along the way. First thing we learned was layout is hard… #mathishard! Trying to get a straight lines and parallel lines and square lines is a challenge if you have never had to do it or don’t know all the contracting tips and tricks. I found the 3-4-5 method on Youtube and it totally works and is what we used for laying out everything, it is a method to measure and get perfect right angles in building a structure.
Once everything was laid out, the hubby dug the footers and then we poured the footers in two phases. I don’t think this is normal for your average patio, but due to our span and the weight of the glulam this is the way our architect had us do it. The first pour was pretty easy, we reinforced the hole with rebar and then added some rebar in the concrete after pouring to connect the first pour to the second. On the second pour I created forms and we had to insert the post bases into the concrete. This was stressful and a little challenging because we needed to ensure they were in the right place. Luckily we had measured everything and pulled strings in every which way to make this easier. But just know concrete work is hard work… it took 45-90lbs bags to fill up the footers! Oh and TIP: buy yourself a concrete edger to get rid of the sharp corners. We didn’t even think of this and have never done concrete work before, so now I have to go bak and sand down the sharp points.


Next up was #DemoDay! It was sure nice to see the old patio go down and that meant things were getting real! I did salvage the wood and made a dining table for the new patio. If you haven’t seen that build, you can check it out here. It is a real conversation piece when I tell people what I made it from.


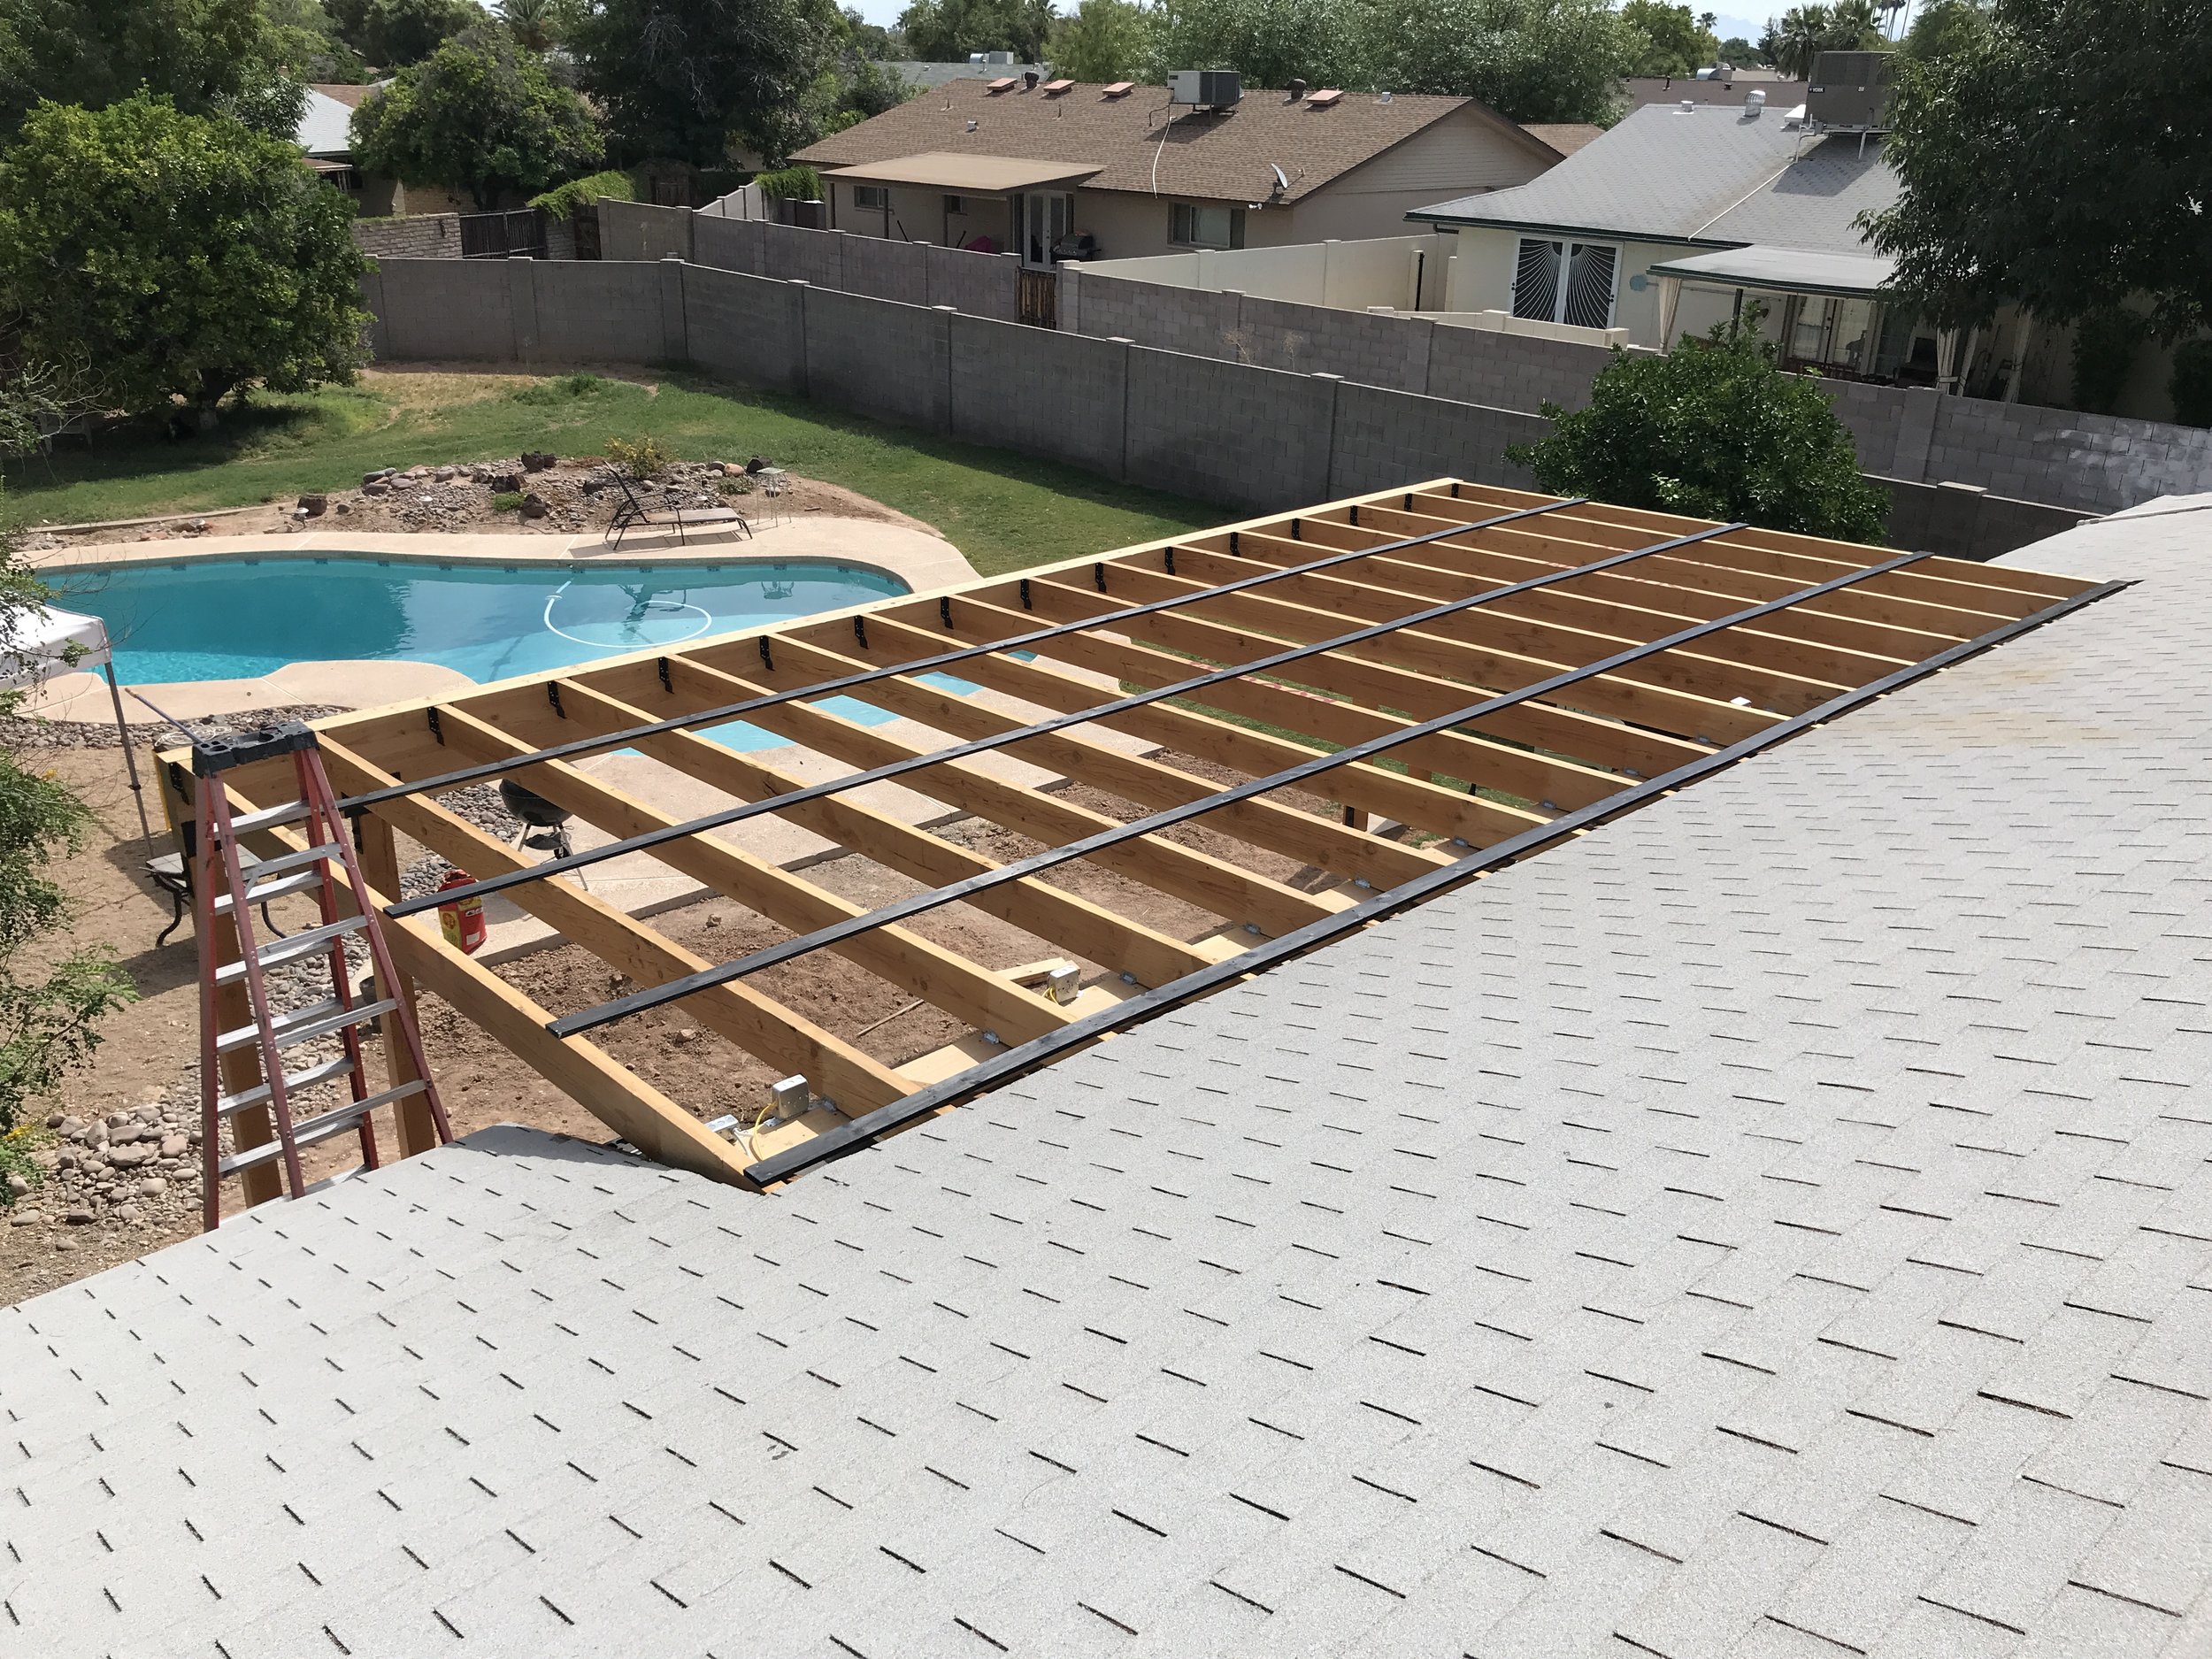
We wanted to get the most height under the patio that we could especially because the 18” glulam would restrict some views if we didn’t get it high enough. So we cut back the eve and sheathing on our roof and set the joists directly on top of the exterior wall of our house. To cut the shingles and the sheathing exactly where we needed with used a circular saw with the depth set to only cut thru them and not the trusses. Oh and the blade we used on the saw was called the Demo Demon by Diablo. It worked great cutting and we only needed 1 blade for all that we did. Then we cut the tails off the trusses using a reciprocating saw with a carbide pruning blade, also from Diablo. That blade gave a nice clean cut. We the attic exposed we prayed for no rain!


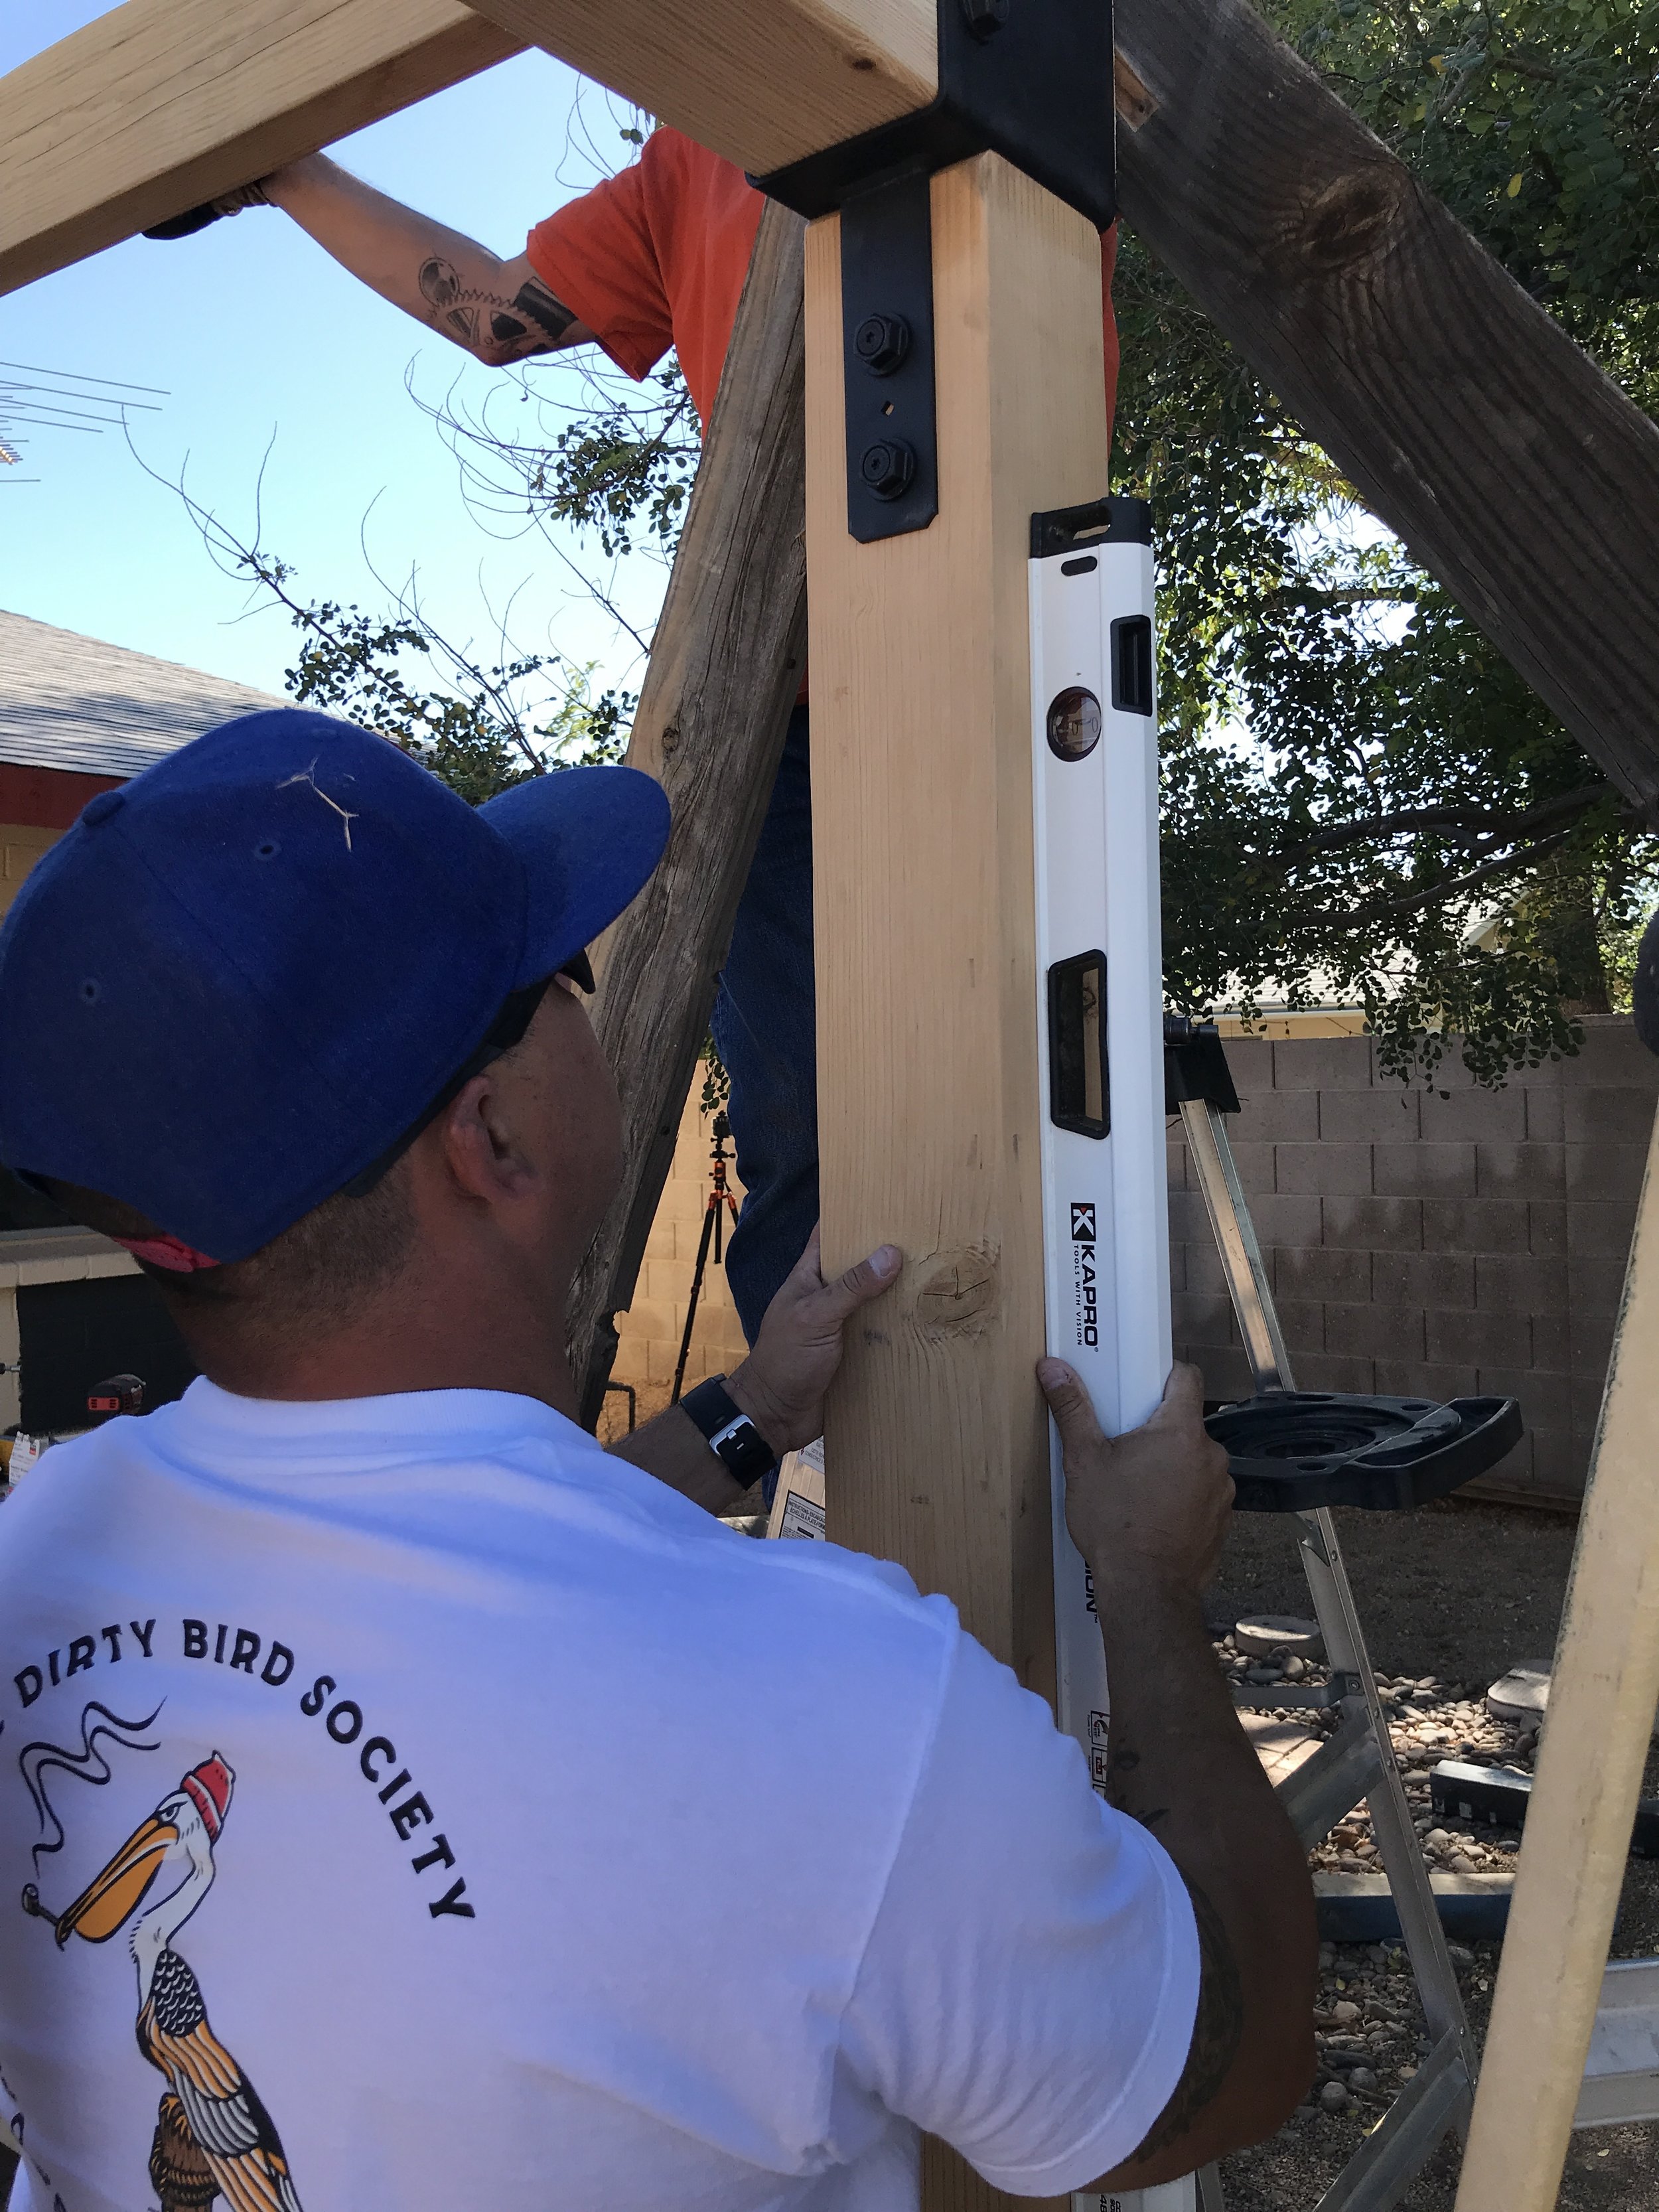
The next phase for us was setting the posts. We already had the post bases installed in the concrete, but wanted to have the post installed before we had to have a crane delivery the glulam. So I picked them up earlier in the week, got them cut to final height and sanded. Then my hubby helped get them installed. We used Simpson-Strong Tie Outdoor Accent Structural Wood Screws and Washer. They were so easy to install and give an AWESOME look of a bolt connection. Plus, there is a very slight play in them so we had room to square up and level everything later in the install.


That weekend we woke up early to beat the heat and were all ready to go… or at least that is what I thought. As the crane and wood delivery truck were getting set up in the alley someone measured the bracket (5 1/2”) and then measured the glulam (5 1/8”)… exactly what I ordered. But what I assumed was that one of those measurements were nominal and that they would fit. But they don’t! They actually make two size of glulams 5 1/8” thick and 5 1/2”. The 5 1/2” thick ones are called X-Beams. Total learning experience, but know I know if there is ever a next time. So needless to say our day was short lived and we sent the glulam back and waited for a new one. It was gonna be the main feature of the patio and we wanted to make sure it looked right.
But I did have the joists delivered and since we had to wait another week or so to get the new glulam, I decided I would sand the joists. I had planned on doing it after installation, but am so glad it worked out this way because it was so much sanding!!!

When the crane came again with the X-beam it all happened so fast… beam fit, we leveled it and it was set no problems. We then attached the joist directly to the glulam using some Simpson Strong-Tie joists hangers that we had them custom powder coat for us. We made a jig so that installing them would be a little easier and in hindsight we could have made an even better jig, up this one did the job. On the house side of the joists we used another Simpson Strong-Tie bracket on both sides of the joists to secure them to the top plate of our exterior wall. All in all from crane time to the last joist being installed was only 4 hours with 4 people. A real good day… so we decided to break in my new DIY Cooler Deck Box!


The following week I did more sanding and clear coated all the wood using General Finishes Exterior 450.

Then the following nights and weekends my husband and I installed the purlins (what we would be screwing the roofing panels to), flashing and corrugated metal roofing. My husband tool the lead here because he knew way more about bending metal and roofing in general. For the transition from old roof to new roof we tucked a piece of metal, that had a break in it for our roof pitches, under the old shingles on one side and on top of the new corrugated metal on the other. We also put some foam corrugated strips and sealant between the two so that water or critters wouldn’t be able to get up in the attic.


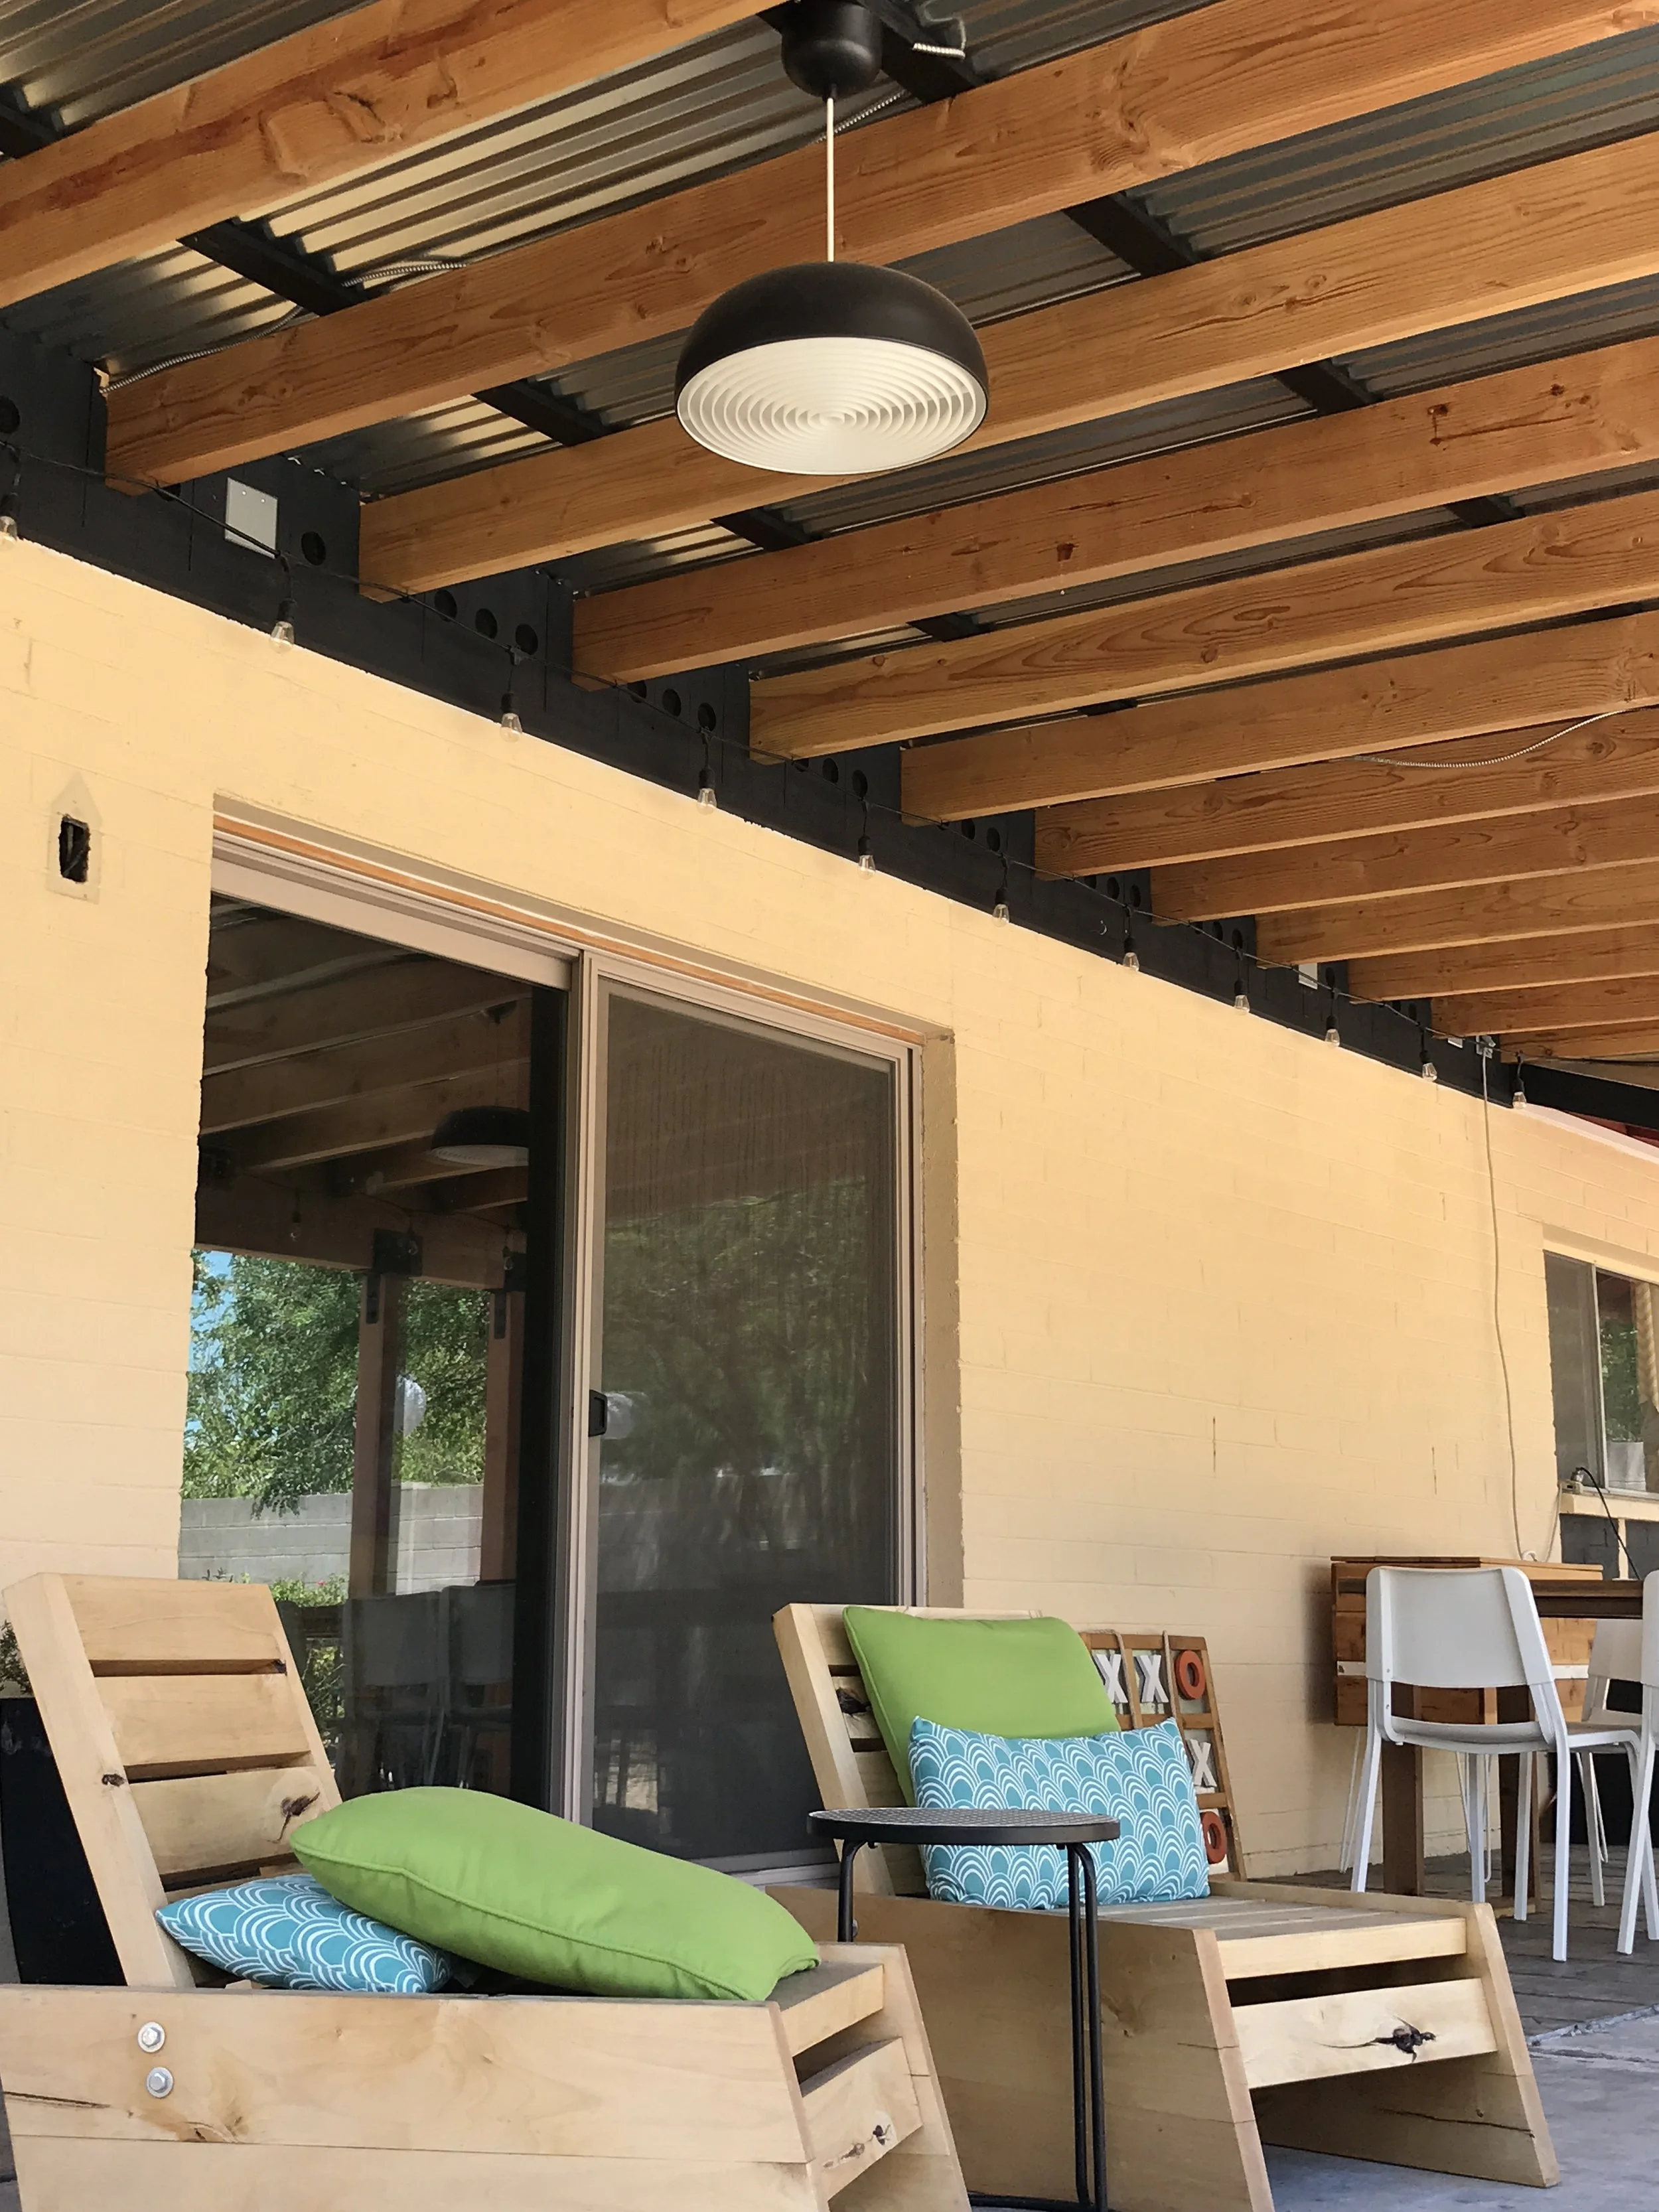
Once the roofing was done it was time to close of the attic space underneath. I did this by installing 3/4” pine shiplap vertically. I also cut holes in most of them and put a wire mesh or bird block behind it. This is for ventilation the attic which basically means the attic stays cooler which helps keep our house cooler.

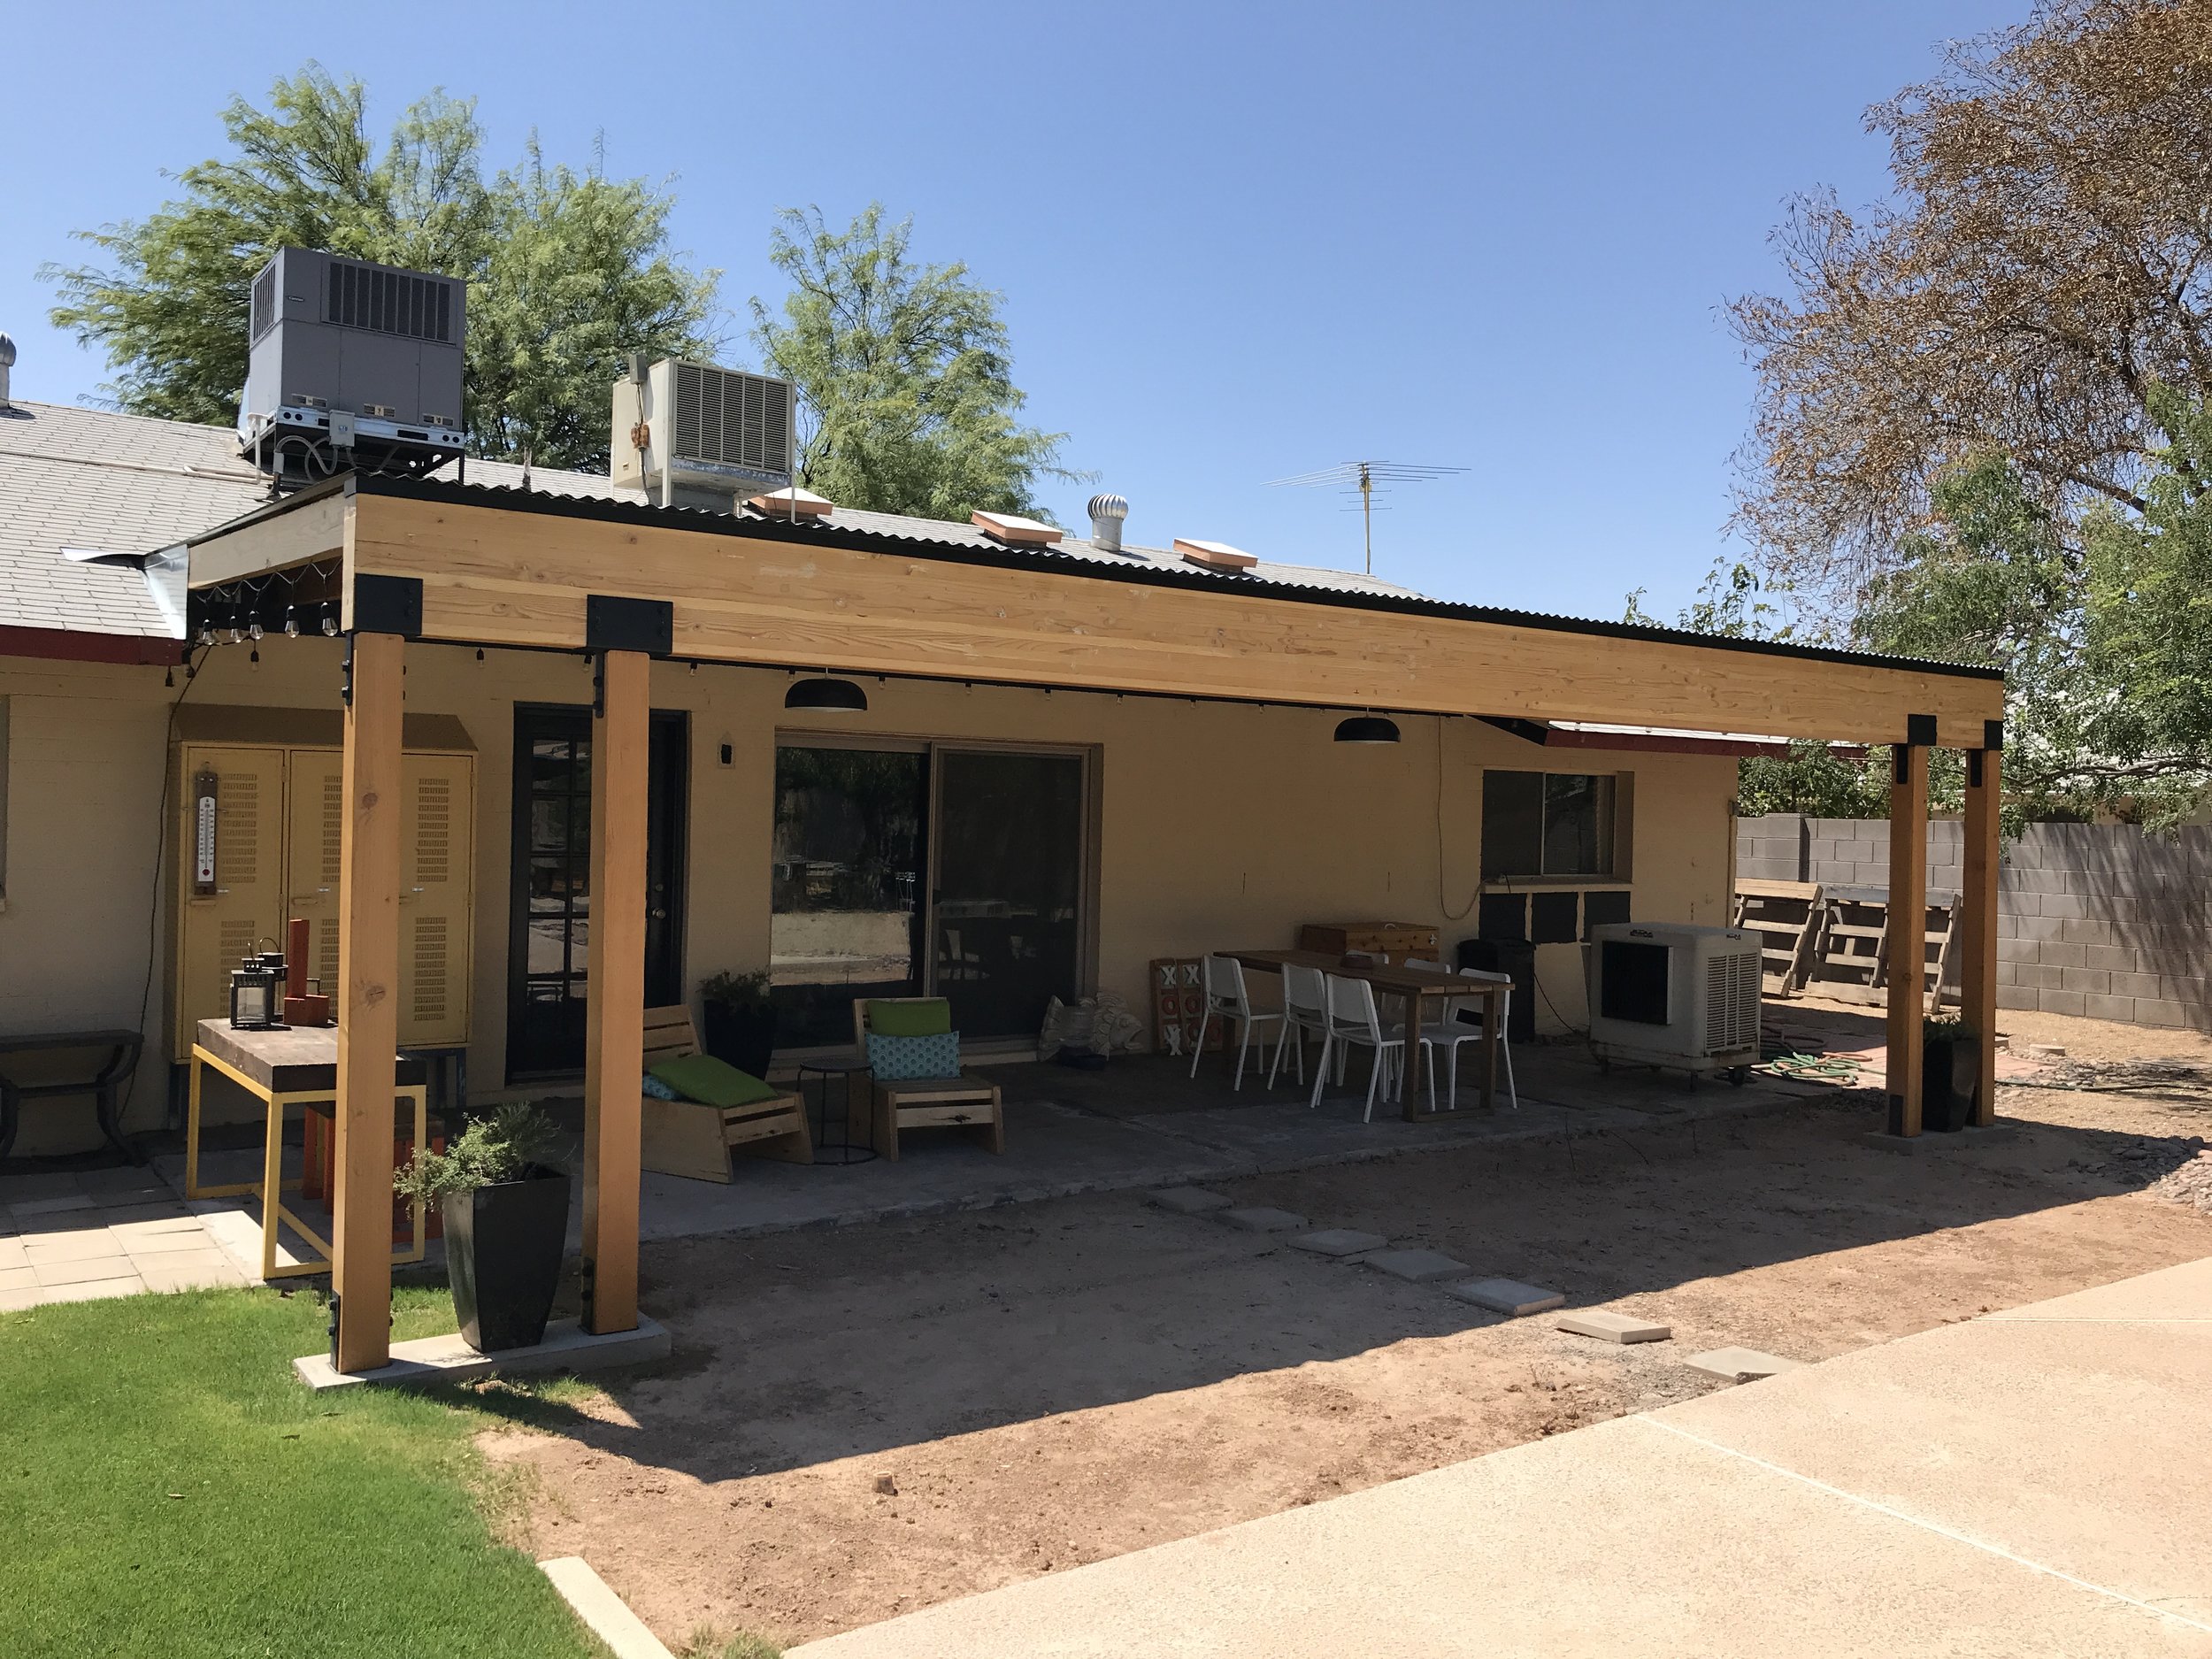
Then lastly some paint, lighting fixtures and the patio was ready to be enjoyed.

Remember where we started…

I still need to want to do several projects in this space like painting the house and new patio flooring… but one project at a time!
I want to thank Simpson Strong-Tie for sponsoring this project… the brackets are definitely the star of the show and what I get the most compliments on.


Need some patio inspiration…. Pin This!

And if you need some exterior furniture or project ideas,
check out these…
DIY Outdoor Cooler Deck Box
DIY Simple Outdoor Dining Table
DIY Outdoor Tic-Tac-Toe Game
DIY Modern Bench With Back
DIY Modern Deck Chairs
Thank you all for following my building journey. Your support is what makes it possible for me to do what I love. Keep #BuildingAwesome and have an AWESOME day!
-Sadie Mae


