How I Insulated My Garage Door
Okay, it is finally time to insulate my garage door. I say finally because I have lived in this house for almost 8 years, I have had a mini-split a/c unit in the garage for about 1 1/2 years and I have had the insulation kit for about 9 months! Nothing like procrastinating.

BEFORE INSULATION
This post is NOT sponsored. All opinions are my own. This post DOES contain affiliate links. For more information on my affiliate programs, see my DISCLOSURES page.
As you most probably know I use my garage as a woodshop, so the first step was to clean the garage door. It was filled with sawdust, overspray and debris. I used my shop vacuum with a Mullet dust separator attached to it. The dust separator helps to keep the air filter in my shop vac clean. (Use code AWESOME for 10% OFF Mullet)
Then I wiped down the garage with Simple Green to make sure there wasn’t any residue and that the stickers that came with the kit would actually stick.
Speaking of kit… this is the kit I got.

It comes with the panels pre-cut to fit most garage doors and stickers to attach them to the door.
I choose this kit because after a lot of research I figure it would be best for my space, because:
It is light weight and I wouldn’t put to much strain on garage door springs.
Super easy to install, no cutting or dealing with nasty pink insulation or foam.
The reflection of the silver panels blocks heat*** perfect for AZ summers.
***NOTE: I hope you didn’t come here for a science lessons. I don’t know exactly how it works, just that it works. Also, if you live in a colder climate you most likely want to go with a different insulation type or add a foam insulation along with this kit.

The kit comes with 8 panels and just enough stickers for each panel to have six (6) stickers. I needed two (2) kits for my 2 garage car door.
After opening the kit and reading the instructions is says for improved thermal performance to add a 3/4” gap between the door and the panels. You can either stick the panels to the outer rim of the door sections to achieve this or do what I did and add 1” foam in between.
I went with the foam because I didn’t feel that the panels would stick as well on the rims of the door and that the foam is light weight enough that it wouldn’t affect the door opening. This is the foam I got and cut it up into small 1” sections.

I wish this foam had tape on both sides, but I couldn’t find any that was.
Before just sticking the panels to the door I did a dry fit (no stickers) and bent the panels to fit my door. You could cut them if you want, but I didn’t feel it was necessary. Plus, by folding it kinda gave the panel some rigidness. Once they were a good fit I made a mark or used a clamp to hold that line and then started placing the foam stickers on the door.

Test fitting a panel before installing the stickers.
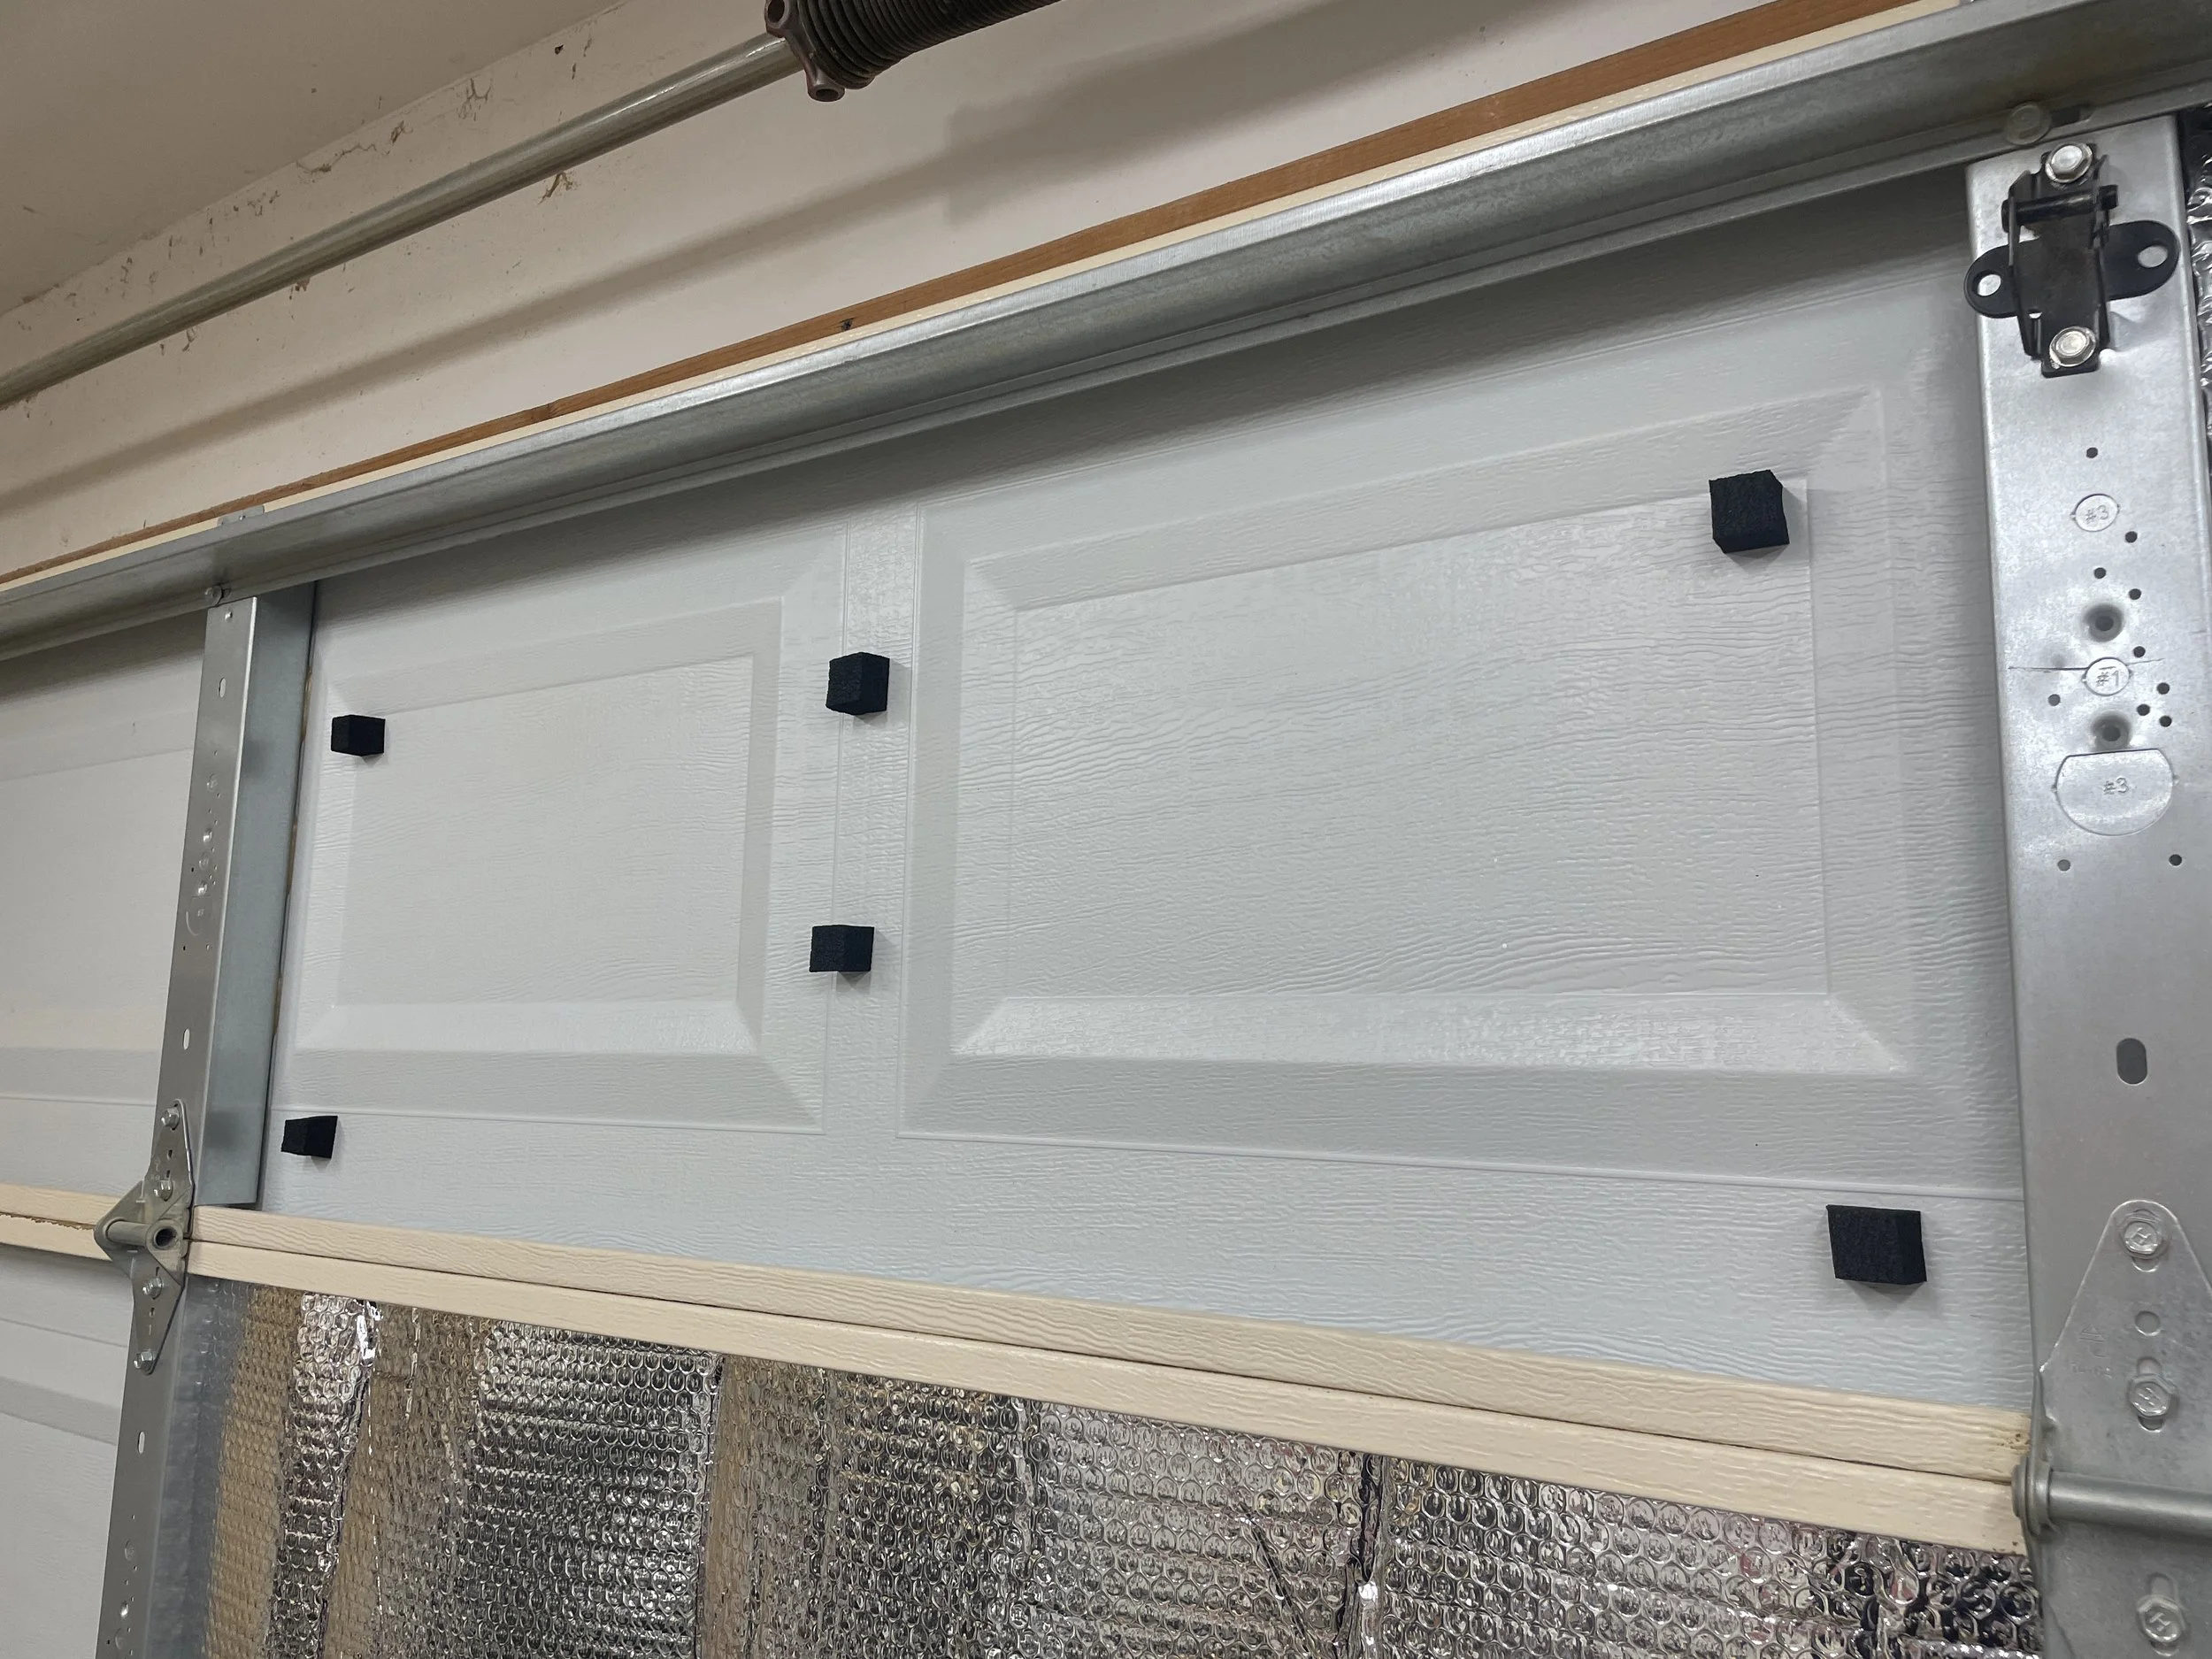
The 1” foam acts as a spacer to help improve the thermal barrier.
I placed a 1” square foam piece in each corner and two in the middle. The foam only had adhesive on one side so I ended up placing the stickers that came with the kit on top of the foam pieces, like this…

Added the stickers that came with the kit on top of the foam spacer pieces.
Then, one by one just added the panels and this is the final look. I really love how it cleans up the space!

The insulation cleans up the space and has me ready for summer.
I have only had the insulation in there for about two weeks now and I can already tell that the heater doesn’t run as much and that the outside noise is reduced. I can't tell when I get deliveries every time now. So I think this is a win and worthwhile upgrade. But the true test will be summer time in AZ. I will come back and update this blog post then.
Thanks for following my building journey. Remember Build LOUD, Build WILD and have an AWESOME day!
Sadie Mae
Watch me install the panels below!
Installing Garage Door Insulation