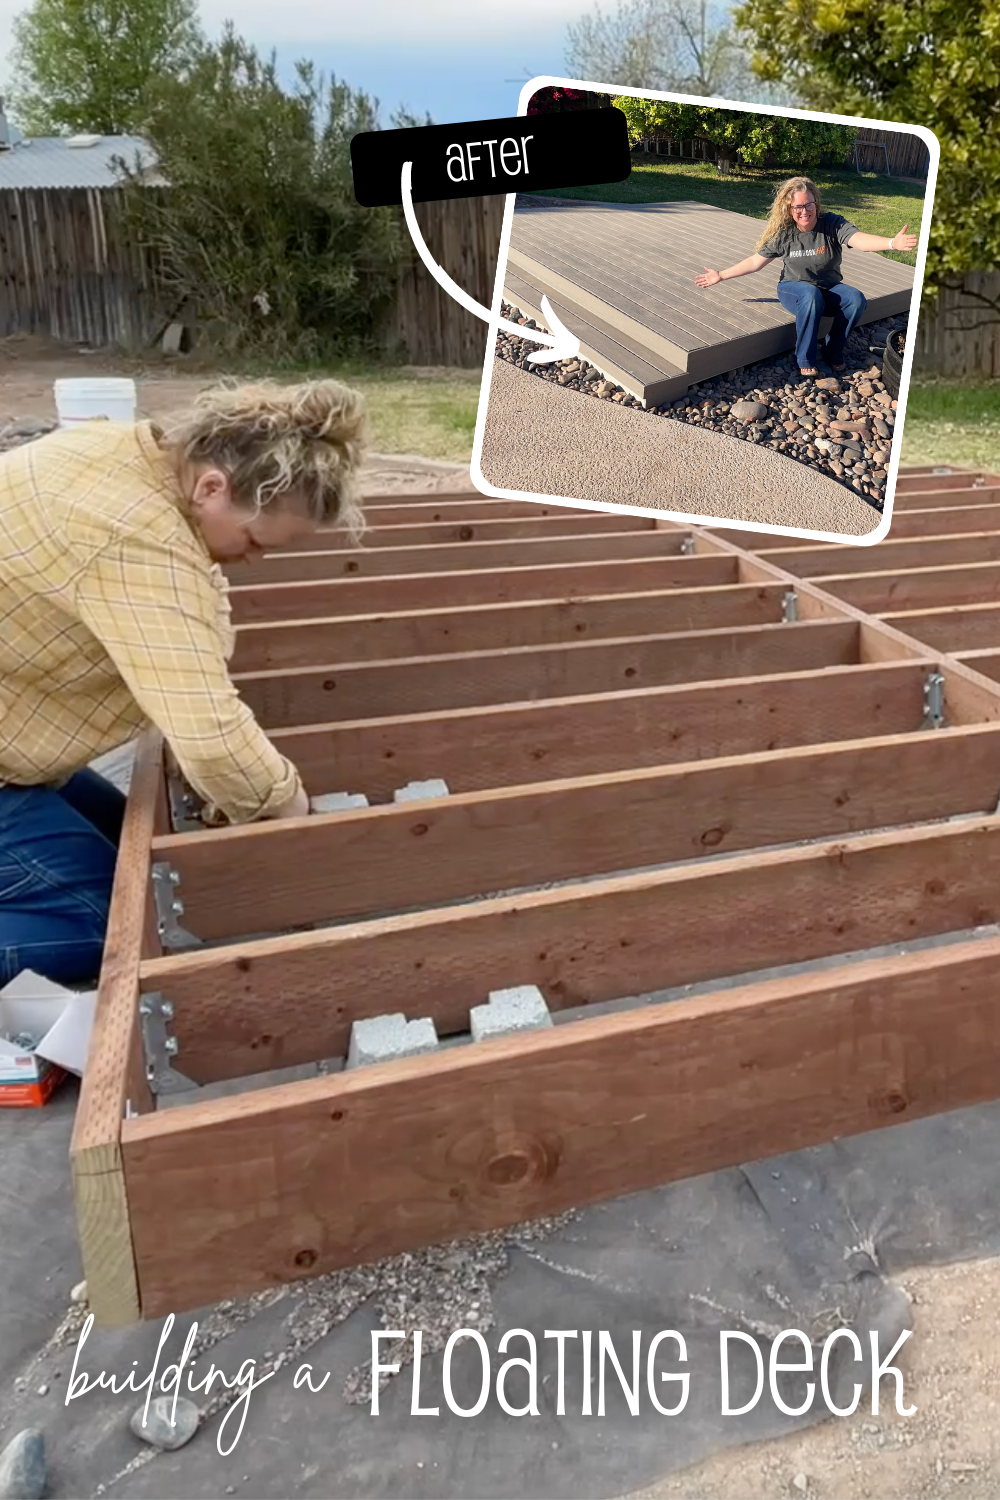
Building A Floating Deck with Composite Decking
We had this hill in our backyard and couldn’t get anything to grow on it. Plus, we were in need of some level ground around the pool that gets sun for summer sunbathing… so I thought why not take out the hill and build a floating deck!

BEFORE - the hill was way bigger than it looks in this picture. So much dirt!
This post IS sponsored by Simpson Strong-Tie. All opinions are my own. The post DOES contain affiliate links. For more information on my affiliate programs, see my DISCLOSURES page.
So of course I teamed up with my friends at Simpson Strong-Tie for this project. I have used their fasteners and connectors on a ton of my projects… but two similar to this deck were:
Building A Deck For The First Time
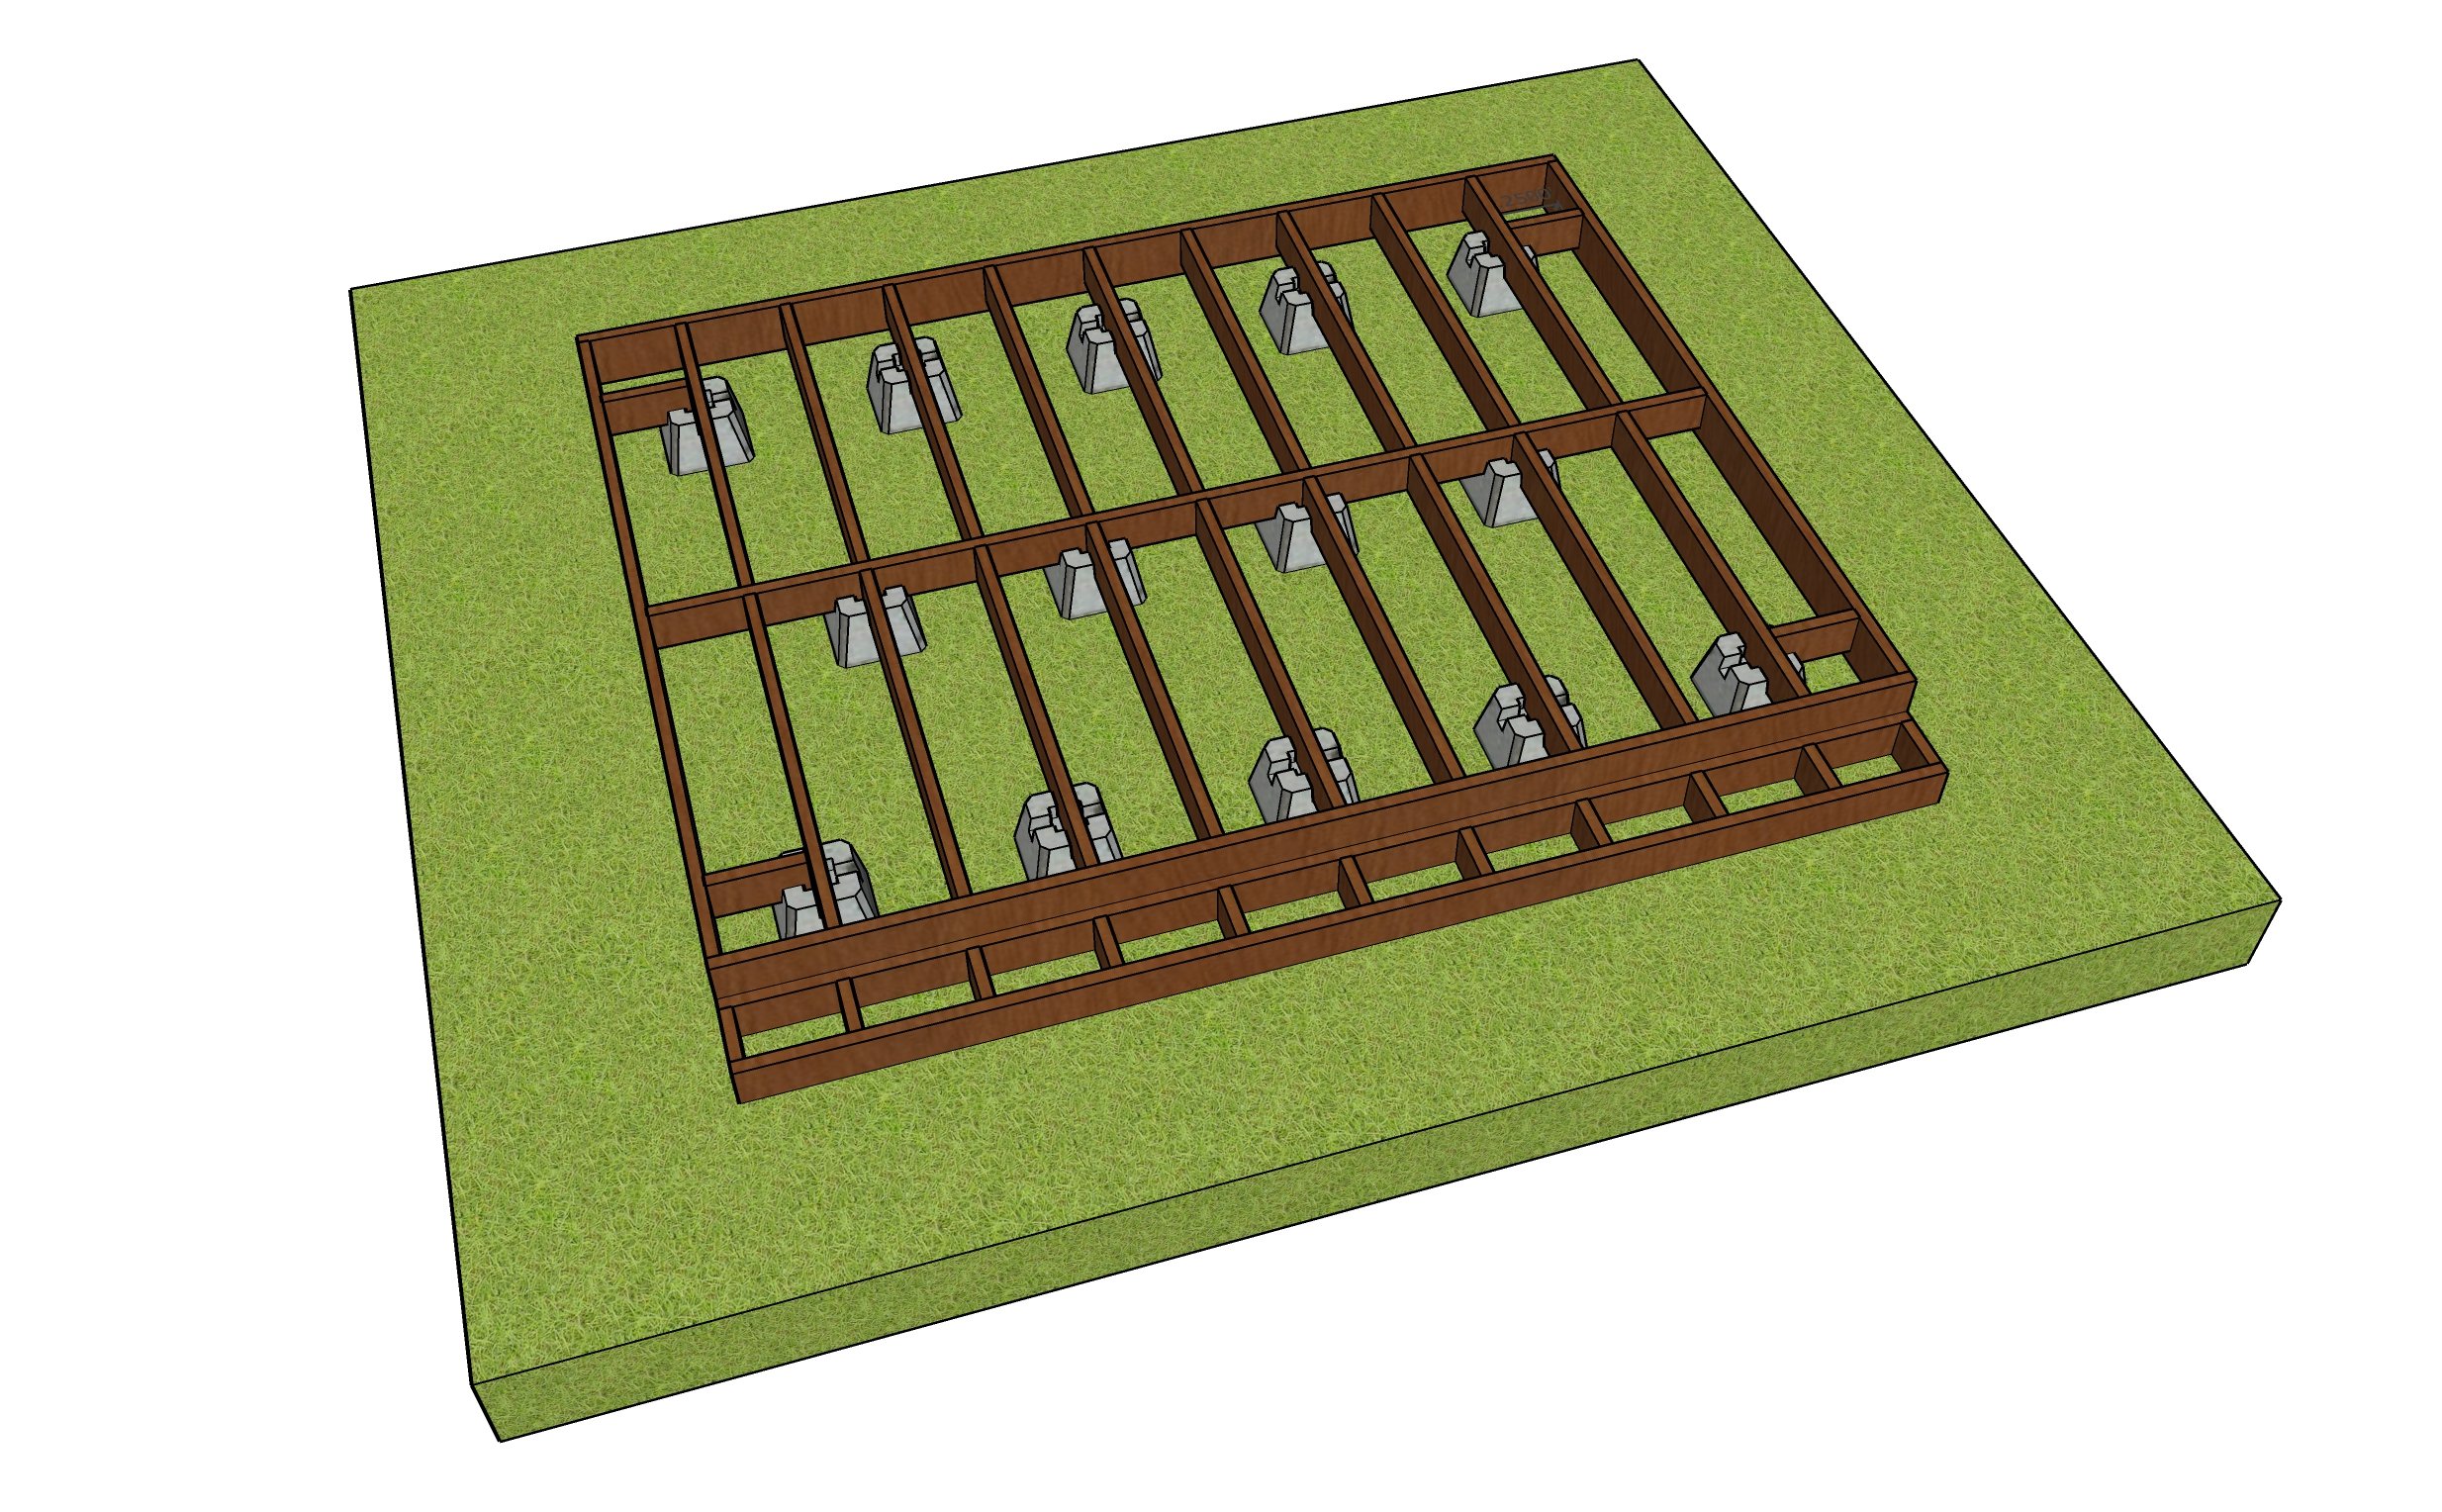
For any large project like this you always have to start with a plan. Simpson Strong-Tie has some AWESOME deck designer software on there website that I have used when I built my first deck. It helps with knowing how many footers you need, what hardware to use and can give you plans to submit for permit approval if it is needed. You can check it out here.
The software doesn’t have a floating deck option… meaning no footers, so I ended up designing mine with a combination of their software and SketchUp. It ended up being approximately 12’x10’.
I will have complete build plans available soon!
Step 1: Leveling the Ground and Setting Deck Blocks
So, with my materials order it was time to remove the hill! I did recruit the help of my husband for this step. I first removed the river rock and saved it for later. Then we got to digging being carful not to hit any of the buried irrigation lines. We even ended up renting a skid steer from a Big Box store to help us move all the dirt.

We ended up renting a skid steer from Home Depot Rentals and it saved the day and our backs!
And then we got is a level as possible using a big landscaping rake. It doesn’t have to be perfect at this stage. You’ll see why in a minute.

So first step in building the floating deck was layout! You need to know where each corner is going to be so we can reference those lines to know where to set the deck blocks. So, I used landscaping stakes and pulled string. Then used a tape measure and the 3-4-5 method to make sure it was square. When I had it where I wanted I placed a stake in each corner and re-pulled the string.

With my four corners set, I dug a shallow trench where the deck blocks were going to be set. I did this for two reasons. One (1) so that the deck would sit a little lower and so that I would only have to level the dirt in those three trenches with each other and not the whole surrounding area.
With the trenches dug, I added paver base to the bottom. Paver base compacts really well and will help the deck blocks from settling later on. Be sure to tamp the paver paver to set it and level each row with one another. Oh and I did add landscape fabric under the paver base to help keep weeds from growing under the deck.

This step was tedious, but not hard. Making sure things are right here will save you time down the road.
Then it was time to set the deck blocks. I inset the deck blocks so that they wouldn’t be seen once the deck was finished. This was a very tedious process, but it is one that will set the whole deck up for success. I used my string lines to measure off of to make sure they were in the right place and then used a 4’ level and a very straight 2x4 four to make sure each deck block was level with one another.
Step 2: Framing and Hardware
Once that was done, it was time for framing. I am using 2x8’s for the outside fascia boards and 2x6’s for all the internal joists. I started by trimming the factory ends off each board and then securing them together using Simpson Strong-Ties 3” Structural Deck Screws. Since these are 2x8 boards you want to use 4 screws at each connection.


I ordered my wood a little earlier and they dried out and got wonky, so it make getting everything straight just a little bit harder. Having clamps did help hold everything into place.
Then since this outside frame will not be sitting on the deck block I next attached the center joist that spanned the width of the deck. This was a 2x6 so it only needed three screws at each connection.

Three (3) screws into a 2x6 and four (4) screws go into a 2x8.
Then I place the frame on the deck blocks. Only that center 2x6 joist rests on the deck blocks at this point. At this point check the frame for square. To do this, use your tape measure diagonally from one corner to the other in both directions. If the measurements is the same your deck is square. If they are, you want to make adjustments before proceeding.

The frame is only sitting on the center row, but when we add the other joist that will distribute the weight. Corner brackets are Simpson Strong-Ties ML26Z.
If your deck is square, now is a good time to add Simpson Strong-Ties Corner Brackets. These will sure of the corners and help keep them from moving and throwing your deck out of square when installing the joists.
Next I cut all the other joists and installed them using 3 - 3” Deck Screws. if you are using composite decking like me these need to be about 16” apart. If you are using anything else, be sure to check on the deck designer software for appropriate spacing.
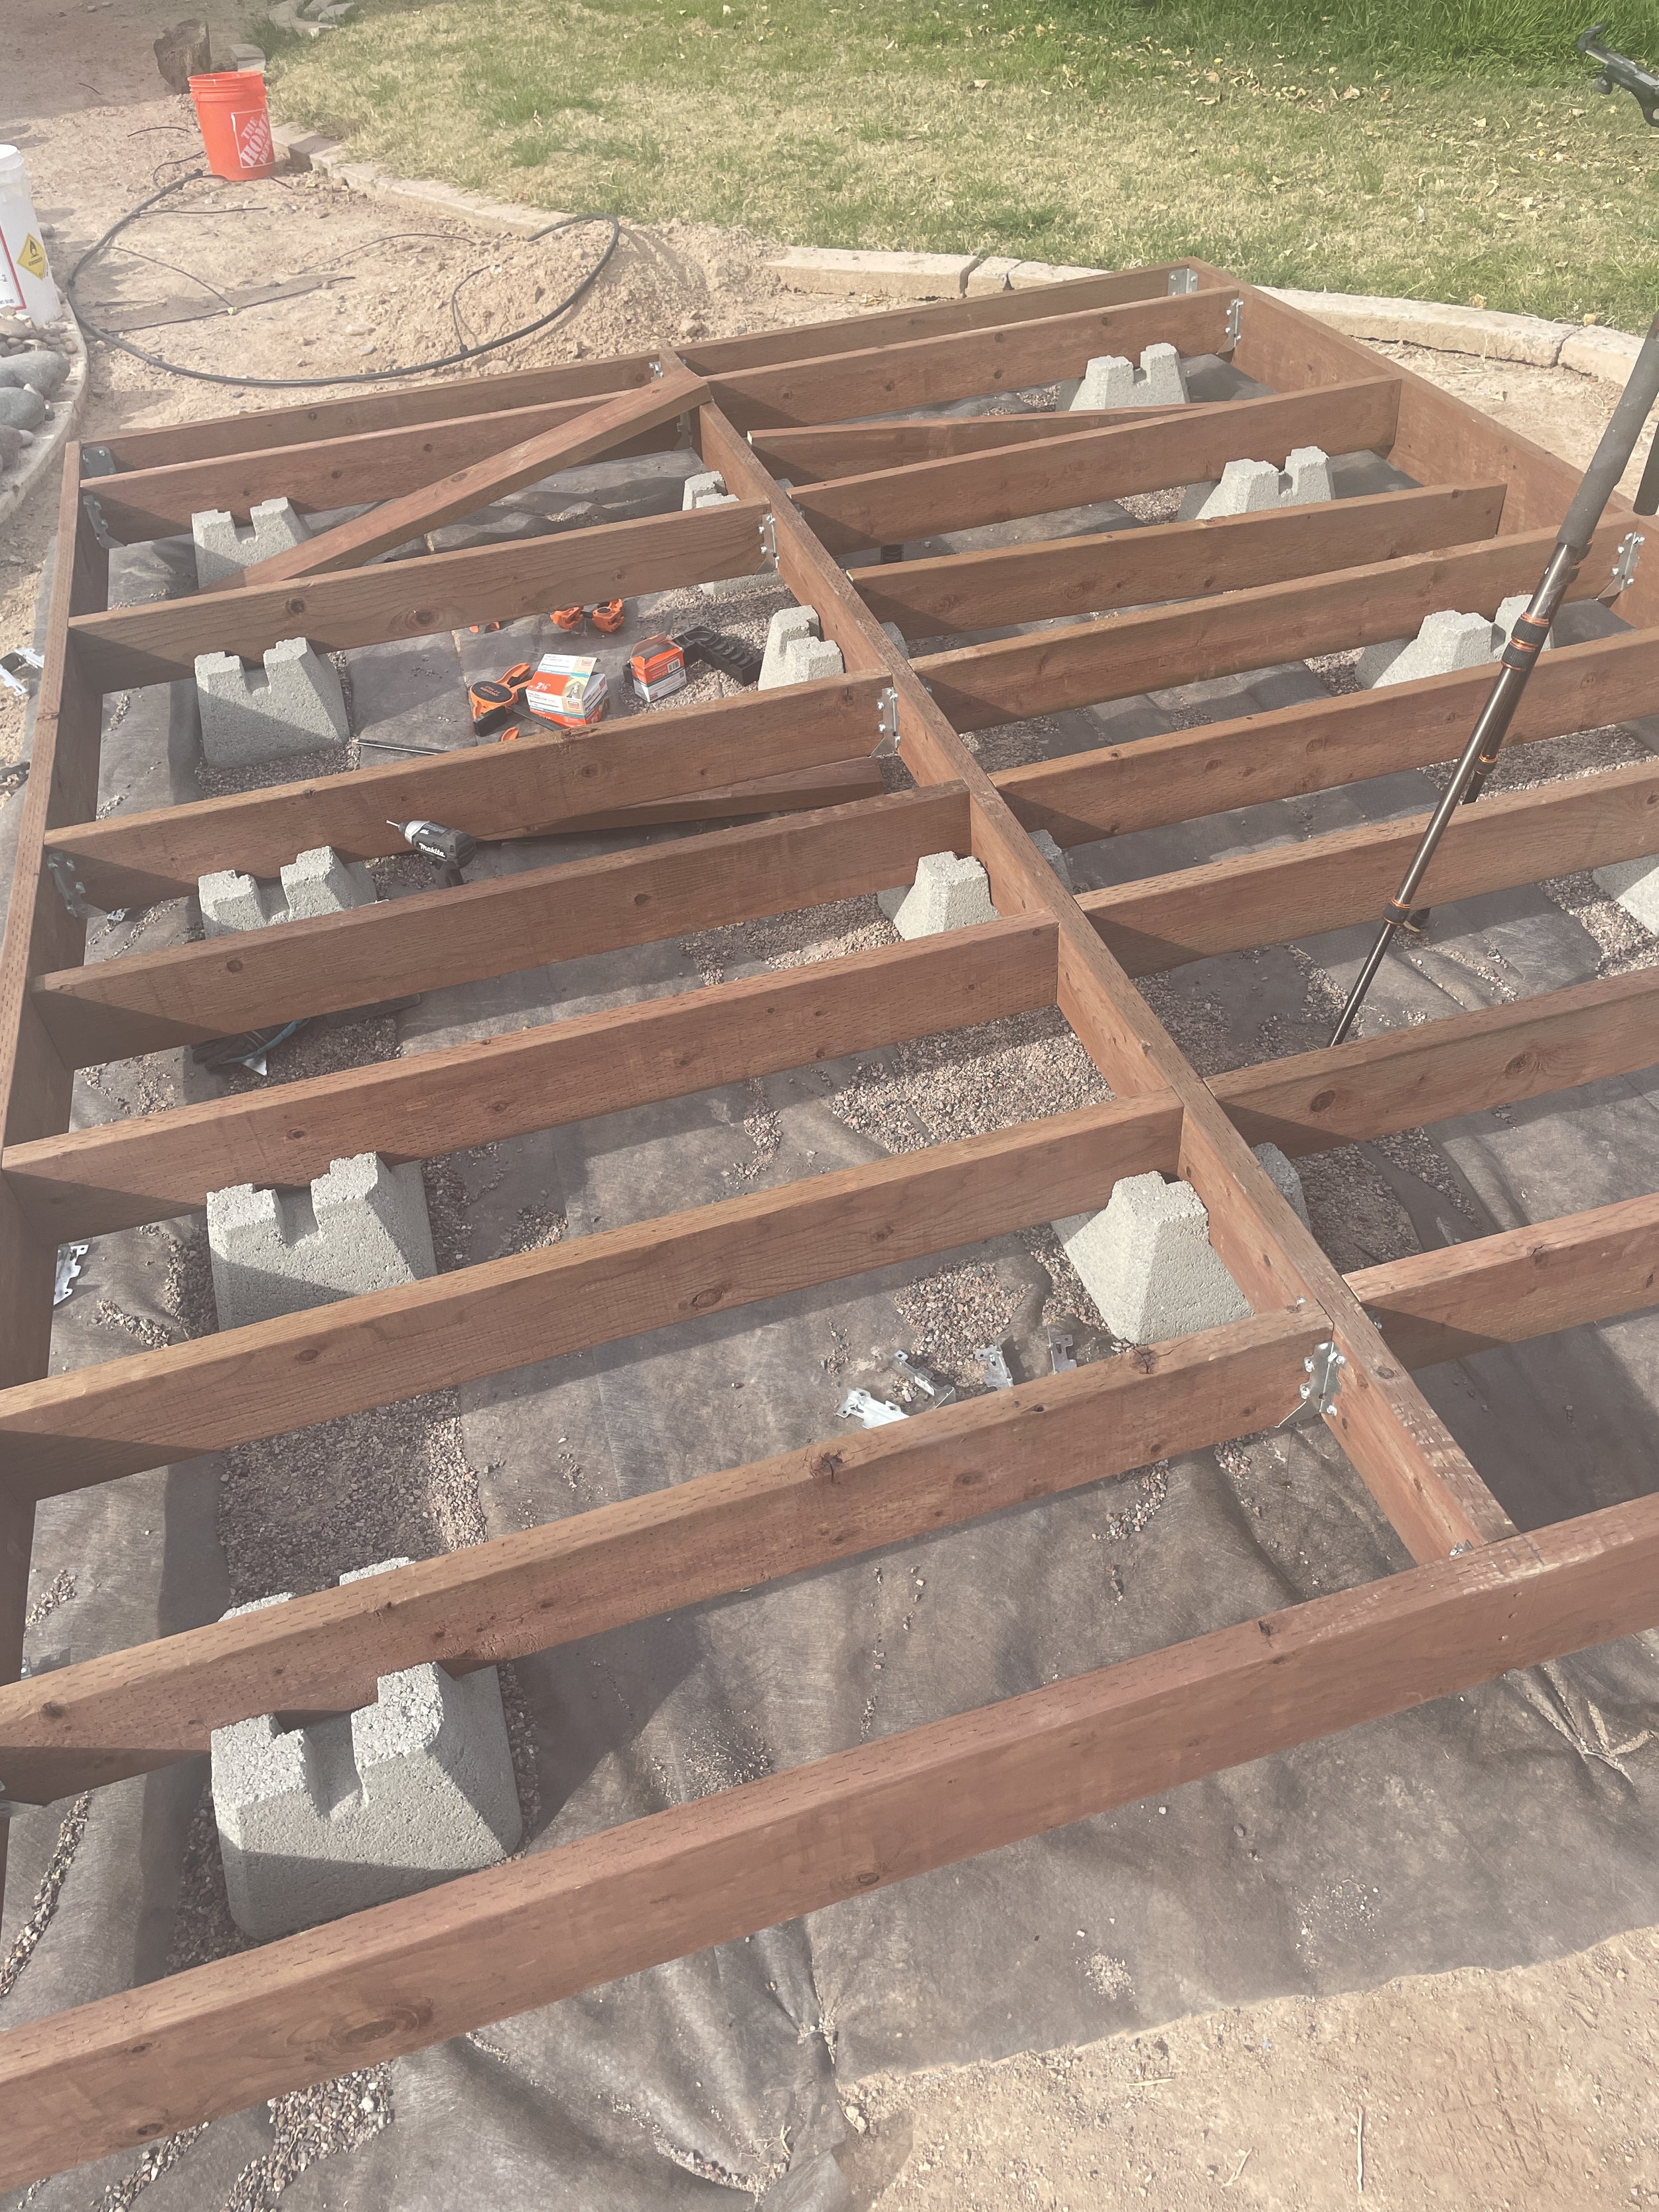
Where the joist rest on the deck blocks in the center there are no joist hangers, but I did toenail the boards in from the opposite side.

My boards were wonky so I ended up having to use the joists to help me get my frame square.
The framing might look complete, but it’s not. You want to add Simpson Strong-Tie Joist Hangers everywhere that the joist meet the outside frame or center joist. These are important to install because they are going to sure up the joist and help with any downward pressure of walking on the deck later on.

Simpson Strong-Ties Joist Hangers - LUS26Z. Each hole gets a fastener.
When installing them each hole that is in them is rated to have an appropriate fastener. For mine I used 1 1/2” SD screws (SD9112R) into the joist and then 2 1/2” SD (SD9212R) screws though the joist and into the connecting board.
To watch me build my deck and get more details, watching my YouTube video Building A Floating Deck!
Then I framed up a step that runs the entire length of the width of the deck using 2x6’s. I made mine a little narrow and ended up having to rip my decking later on, but I have since updated my build plans with the correct dimensions, so that if you build yourself a deck you won’t make the same mistake I did.

I did end up adding landscape fabric and paver base under the stairs.
I added paver base and landscape fabric under the steps and then secured the step to the frame using more of those Simpson Strong-Tie 3” Structural Deck Screws.
Step 3: Decking and Fascia
For decking I ended up going with Trex composite decking that has groves in the side so that you can use their hidden fasteners to install it and then you won’t have any visible fasteners once you are done.

The first row using Trex clips on one side on the hidden fasteners on the other.

I used a scrap piece of decking to make sure everything was aligned properly when installing.

Oscar sure is cute, but wasn’t much help when installing the decking.
The one by one you install each decking board. I didn’t have any help and this step and a friend might have helped save my back. Oh, I forgot… before I installed the decking I did apply joist tape or a butyl tape to the joists. It is an extra step and expense, but after all my hard work I wanted to make sure that this deck last a long time.

Joist Tape or butyl tape will help shed water away from joists and seal holes from the decking screws or simply put it will help to lengthen the life of your deck.
For the last row of decking material you won’t be able to using the hidden clips, so you have two choices. You can either use a hidden fastener and plug or what I did was you toenail a screw through the groove and into the joist.

I did pre-drill just to make sure nothing split will bring the screws into the decking boards.
Then I trimmed the decking board flush on both sides. The boards don’t come square on the ends from the factory so I highly recommend trimming both sides and not trying to get one side to line up. I used a chalk line and a circular saw to trim mine.

I surprised myself on how straight I was able to cut with a circular saw!!!
I installed the decking on the stairs the same way, except I did have to rip the inside board to work.
Then it was time for fascia. Trex does have fascia board that is the same material and color as the decking. But you might have to shop around. I got the decking from Home Depot and the fascia from Lowe’s. And some of it was readily available in store, so be sure to order everything before starting your deck.
To install them I ended up going with a special countersink tool made for composite decking and plugs. Again, I wanted all the fasteners to be hidden. I do recommend that you get some help holding the fascia in place while installing it or use some clamps like I did.

Fascia sits flush with top of decking to hide ends of deck boards.

Countersink tool and plus system. Drill bit got dull really fast, so you might want to try this one instead.

Now you see the screws!

Now you don’t!
The fascia is going to sit flush with the top of the deck and cover the ends of the deck boards. There are different ways to install composite decking, but this way I thought looked better and I wasn’t able to find matching composite boards that didn’t have the grooves in them to picture frame the top of the deck.
Then the last couple of steps I ended up paint the bottom of the framing that you could see, put the river rocks back and added a new planter with drip irrigation.

I opted to be cheap and not purchase another piece of fascia board for the bottom step. So I installed the small strip I did have, painted the bottom and then the landscaping will cover the rest!
I absolutely love how my DIY Floating Deck came out. I still have a lot more landscaping to go, but Awesome Oscar and I have already been enjoying lots of happy hours out there.

I love it and my new planter!

BEFORE

AFTER
Next up, I’ll be building some lounger for the space! So, stay tuned.
Thank you for following my building journey. Remember Build LOUD, Build WILD and have an AWESOME day!
Sadie