Budget Bathroom Makeover - Before & After
We have lived in this house for 5 1/2 years and I haven’t touch anything in this bathroom. I have really big plans to make it over, but I never seem to have the time and/or the money to do it. And I was tried of waiting, so I decided to give myself 1 week and a really small budget and turn this bathroom from awful to AWESOME! Let me show you how I did it.
This post IS NOT sponsored. This post DOES contain affiliate links. For more information on my affiliate programs, see my DISCLOSURES page.

BEFORE


Awful, right? The gray and navy tiles and the peach walls have to go. This makeover is really going to show you the power of paint!!
First up was demo! I took everything out and then removed the baseboards and door trim. The baseboards were this old oak and it wasn’t installed really well so it had gaps everywhere. Plus, I am in the process of replacing the trim in the rest of the house so I wanted this to match.

In the rest of my house I have been using some 1 x6 pdf boards for baseboards, but because this is a bathroom I ended up splurging and going with some primed solid pine boards… still 1x6. They look pretty much the same, except the mdf has the edges rounded over.
And for the door trim I used the same 1x3 pdf that I have been using in the rest of the house.
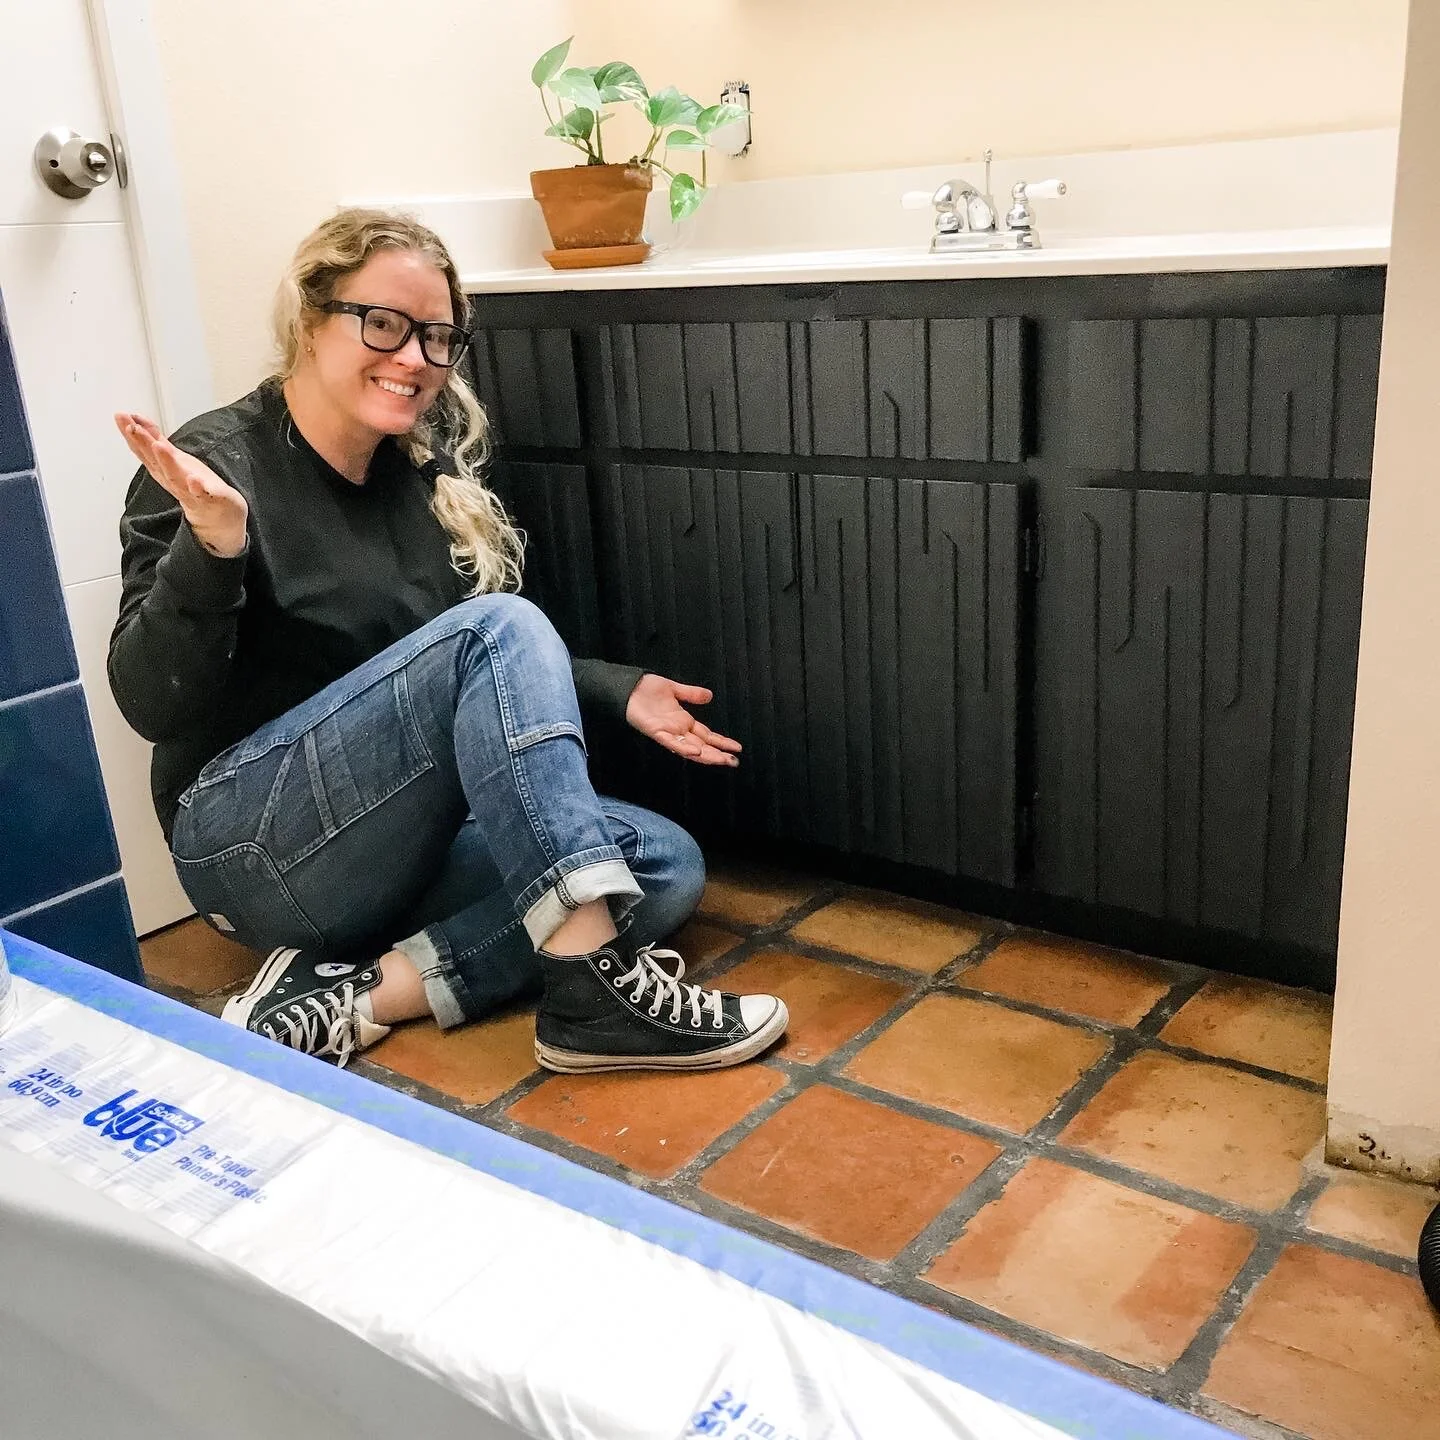
To jazz up the vanity… I used some leftover scraps and black paint I had on hand. For full details on that process, check out this post…. Budget Bathroom Vanity Makeover!

Before

After
Next, I painted the tub surround using a Tub & Tile Refinishing kit. I have a full tutorial of everything I learned from that process here… Painting A Tile Tub Surround.

Before

After
What was left you might ask? Well, the light fixture always bugged me because it looked like it was upside down. Did you know you can easily flip this type of fixture? Just a couple of screws! Well, I took it one step further and decided to spray paint it black to give a little more contrast to the room.

Upside down, right?

Clean & then lightly sand.
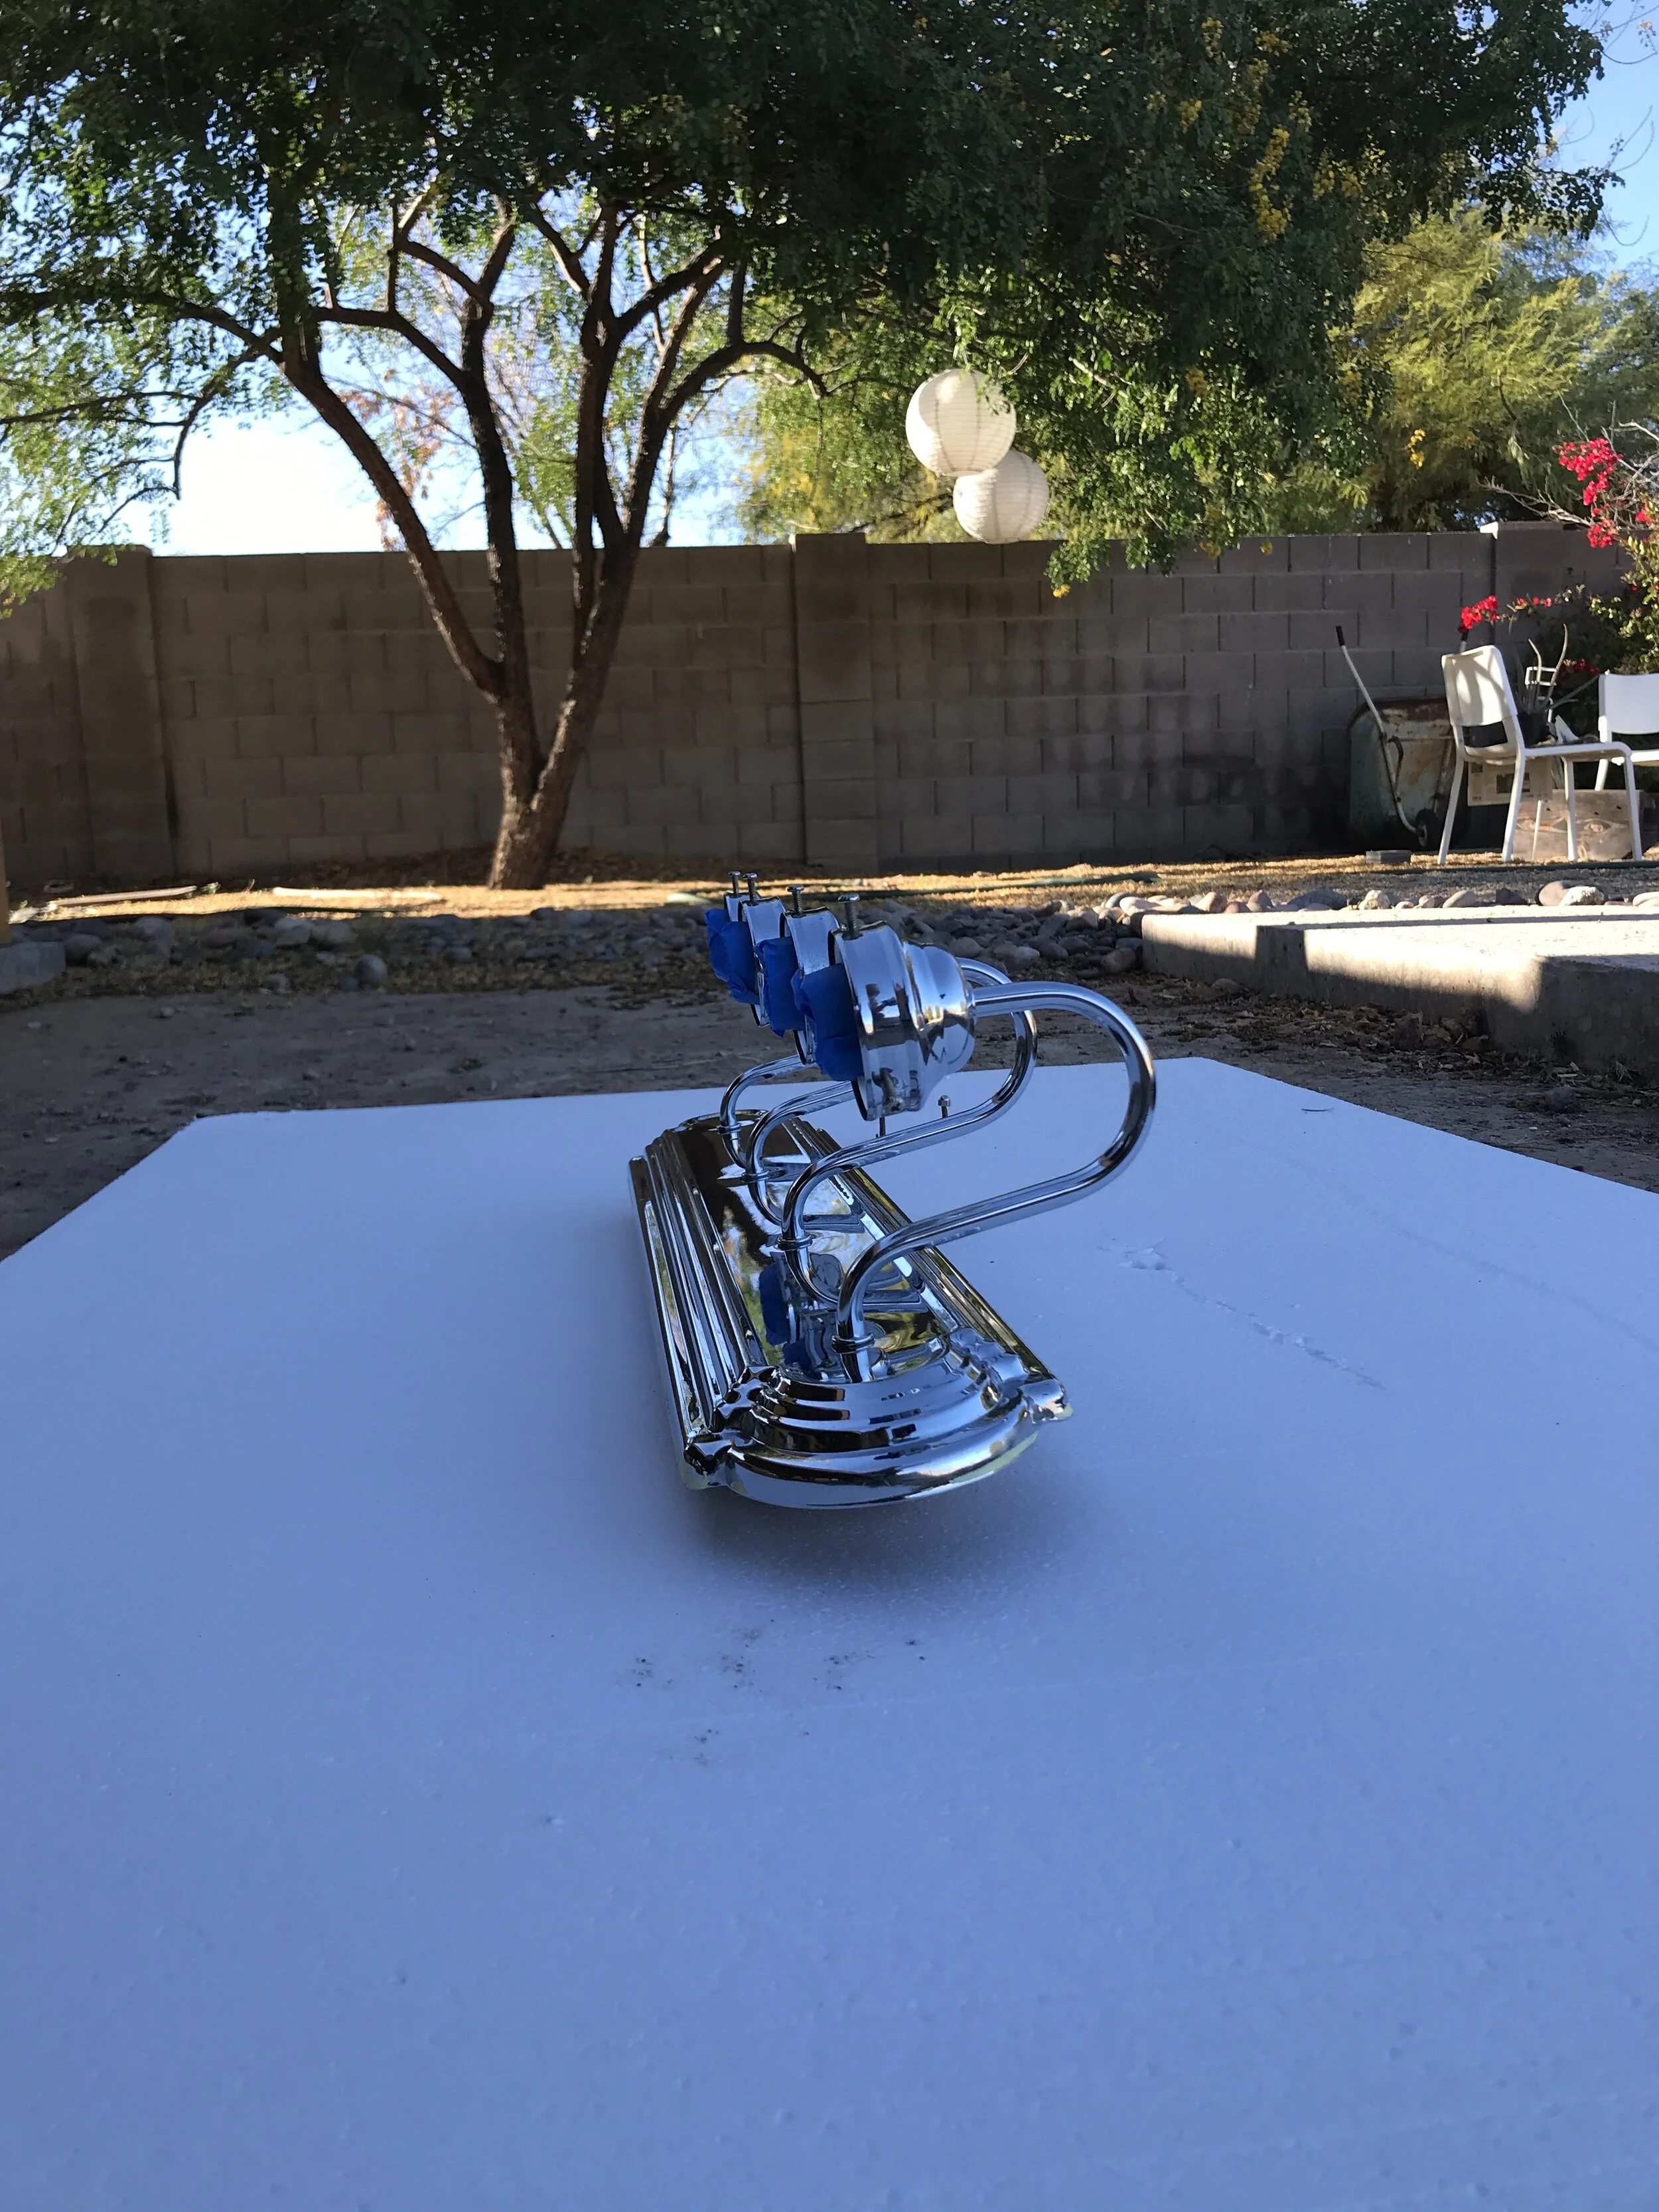
Tape off electrical stuff.

After = so much better!
Then it was time to paint the room. Most of the rest of my house is painted white and I had half of a 5 gallon bucket, so the bathroom went white! And boy did that brighten it up. Oh and just so you know… this might be one of the smallest rooms in my house, but it was the hardest one to paint! So many nooks, crannies, trim pieces, etc.

Before

After

I highly recommend getting an extender pole when painting walls or ceilings. Makes it go by so much faster!
I also ended up replacing the toilet paper holder. The one that was there seemed to be original and couldn’t fit my Costco size rolls of paper, so the rolls were hardly ever on it. This was also built-in to the wall so I had to patch a piece of drywall. I’m not the best at it, but it will do for now. The drywall in this house it all sorts of hodge podge, so eventually I wall to put a wall treatment in this room to cover it up. But again for now, this is so much better!


Now we have room for wipes and a full size roll of TP!
And what has to be one of my favorite changes would have to be to the light fixture! Check out that original!
Before

After
And then lastly I added a new shower curtain. I only had one of those plastic ones in here before. And with all the bright white paint on the tub surround and throat the bathroom it made the old countertop look dirty. So the shower curtain being a natural color really helped to balance that out.
So how much do you think I spent?
Shower Curtain - $25
Towel Hooks - $28
Toilet Paper Holder - $26
Black Spray Paint - $6
Baseboards & Trim - $40
New GFCI Outlet - $19
This rest I already had on hand, so I spent $225 and 1 week labor on the makeover!
TOTALLY WORTH IT IN MY OPINION!!! What do you think?

From awful to AWESOME!
Yes, it’s not perfect. Yes, I do have so many other projects planned for this space. But, til I can get to them I am no longer embarrassed about my bathroom.
Thank you so much for following my journey! I appreciate all your support in reading my blogs, liking, sharing and commenting. Means more than you know.
Remember Build Loud, Build Wild and have an AWESOME day!
Sadie Mae
Want to reference this post in the future? PIN It and Save It For Later!