DIY Bubbly Bar Cabinet | Power Carving
Power carving is something that I have always wanted to try ever since I got into woodworking. It seemed so fun and the textures you could create endless. That is why when my friends at Saburrtooth ask me to team up on a project, I jumped at the opportunity. I knew exactly what I would carve… you see I had been wanting/needing to make myself a bar cabinet. My pantry is small, so I figured by making one I could free up some space in there. And since it was gonna hold all the bubbly, I decided to carve bubbles on the front like champagne or beer bubbles.
This post is Sponsored by Saburrtooth, Superior Power Carving Tools. All opinions are my own. This post does contain affiliate links.
So I started like I do with every project that is for me… digging thru my scrap pile. And I found just enough 8/4 Knotty Alder for the doors. Some of the pieces had been milled before and therefore were all different thicknesses, so I started by planing them all down to 1” thick. This did take a while and created a ton of sawdust, but it was worth it to me to use of the scraps and not having to by more wood. Once that was done I glued up a panel that would end up being the two doors. I did it all together so that I would have continuous grain on the front. And speaking of grain I had mine run horizontally because I thought it would help show off the bubbles that would be running vertically.


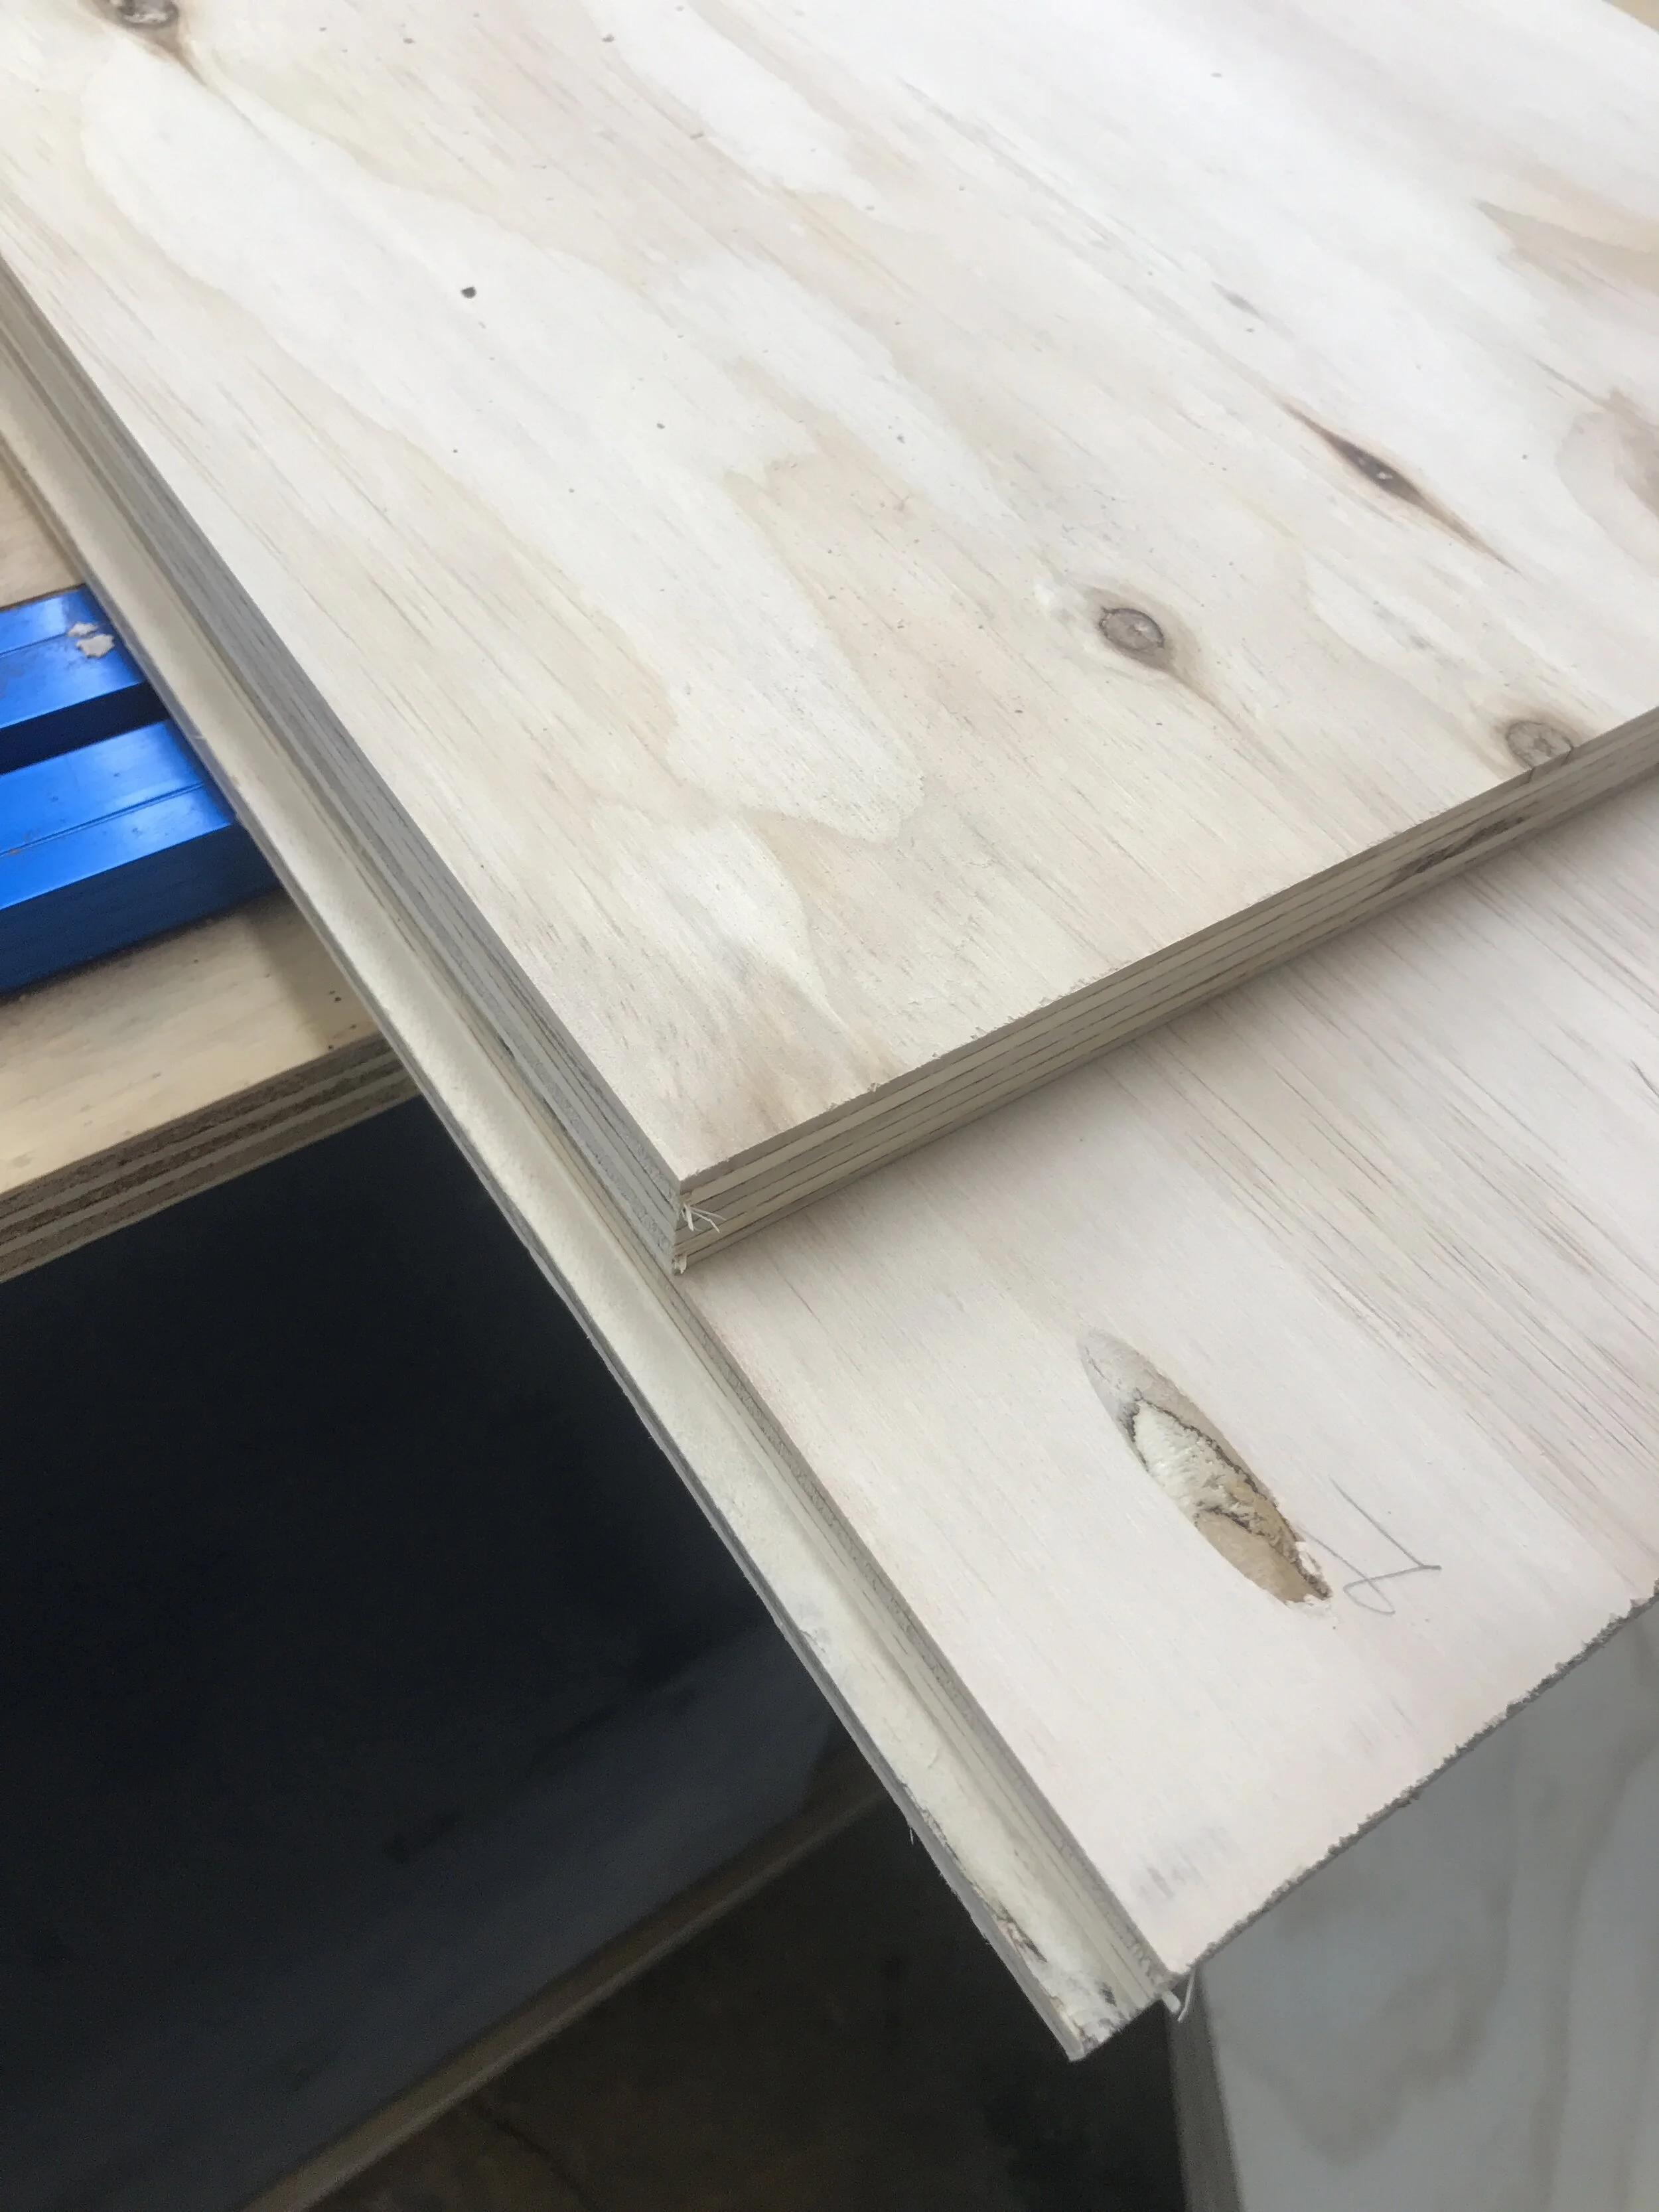
If you aren’t set-up to mill and glue up the doors fronts or if that is a little beyond your comfort level you could also make your doors out of 3/4” pine plywood and edge band the edges. The plywood will give a cool layered or textured effect when carving. I probably would have gone that route if I did have so much knotty alder scraps.
Next step was to cut the carcass (plywood) pieces to size. I edge banded all the appropriate sides before assembly so that the edge banding wouldn’t throw off my dimensions and would be easier to apply.

Not the best pic, but you can see how the edge banded side makes the piece of wood look solid.
I then routed a rabbet in the back of the top and bottom carcass pieces. I did this so that when you put the back on the cabinet you can’t see it from the sides. Be sure to note which side is up and which side is down so that you are getting the rabbets and pocket holes on the correct size of the boards. I learned this the hard way, but since I was painting my cabinet it didn’t really make that much of a difference in the long run.
Shelf pieces with be the same depth as where the rabbet starts on top and bottom pieces 12 3/4”.
Then I assembled the carcass with pocket holes. The full build plans go into detail of where I recommend placing the pocket holes and order of assembly to help minimize the appearance of them later.
It also includes:
Shopping Lists
Tools Lists
Cut List
and Step-by-Step Instructions with 2-D pics!
You can get a copy here, DIY Bubbly Bar Cabinet Plans.

When building drawers always use your hardware to measure actual opening before building drawer.

I used popsicle sticks to give me just enough spacing when installing drawer shelf. I also painted inside the carcass at this time, because I knew it would be almost impossible later.
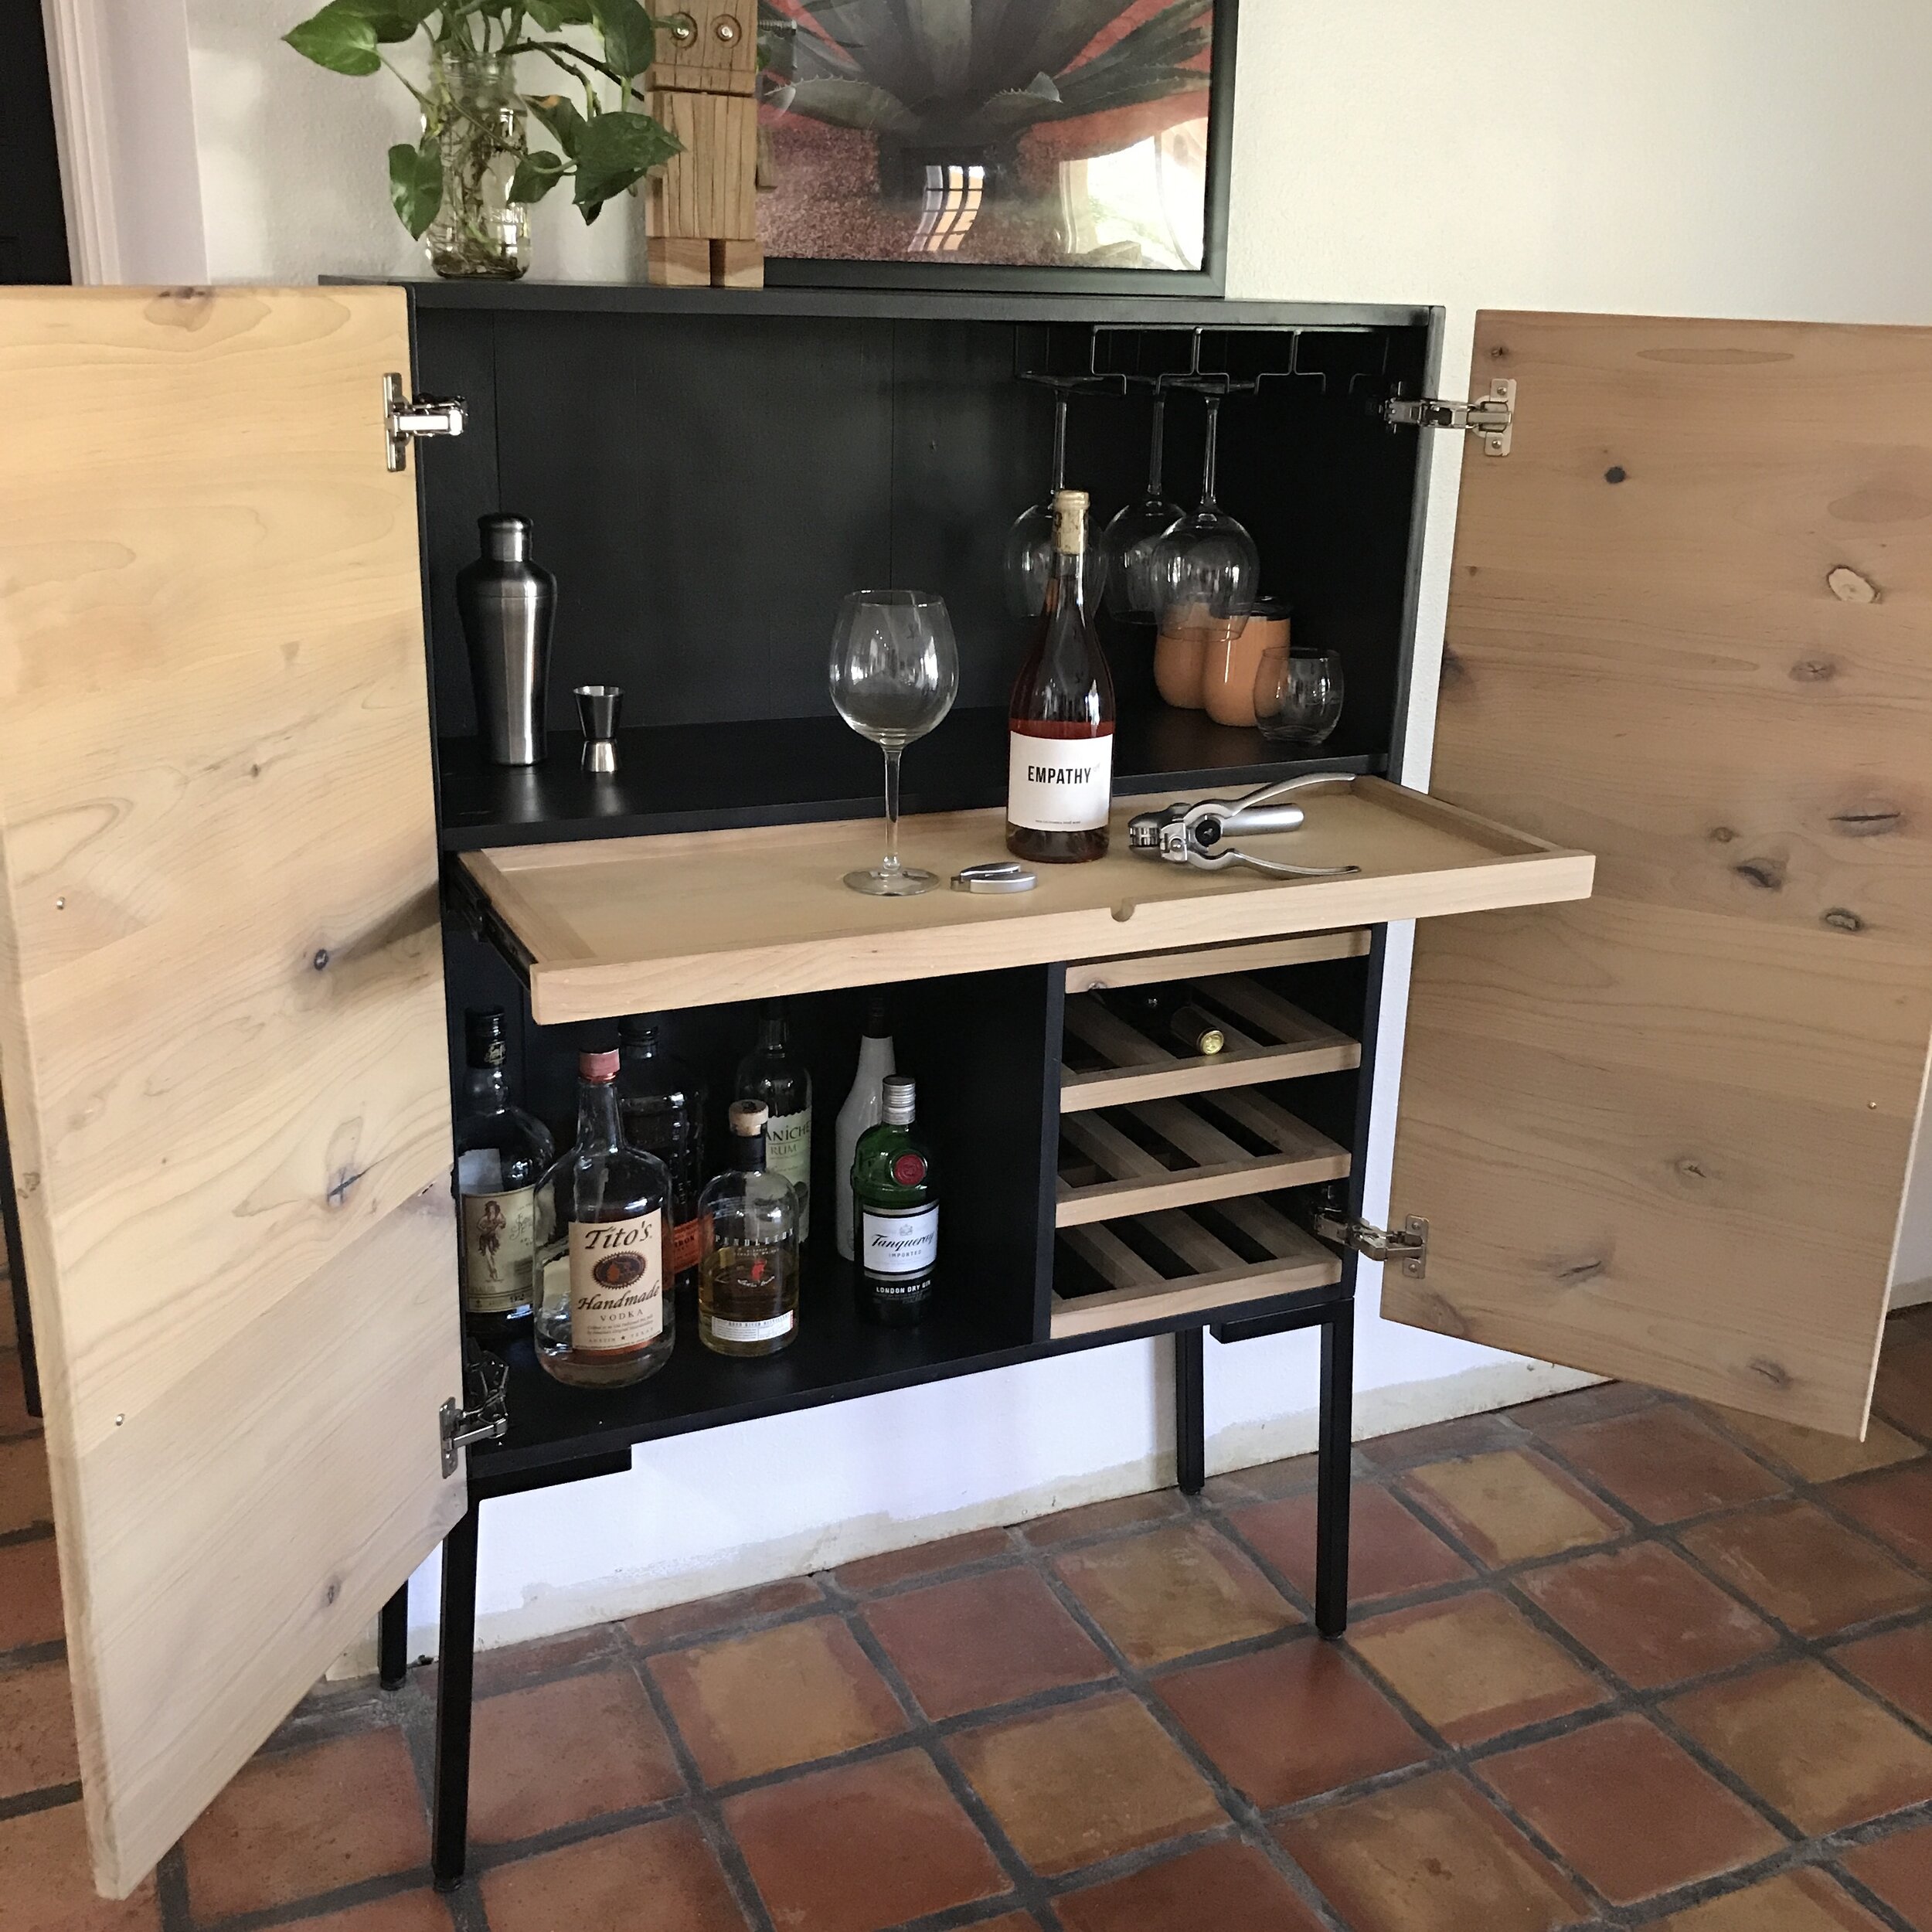
I designed the bar cabinet to fit in a specific spot in my house which meant it couldn’t be that deep. But I also knew that since it was gonna have all the drinks in it, I wanted to be able to serve drinks from there. So, I put in a pull-out shelf at counterheight (36”). This gives you a spot to pour drinks, cut up limes, or open your favorite beverage. And again, since I wanted to maximize its depth I decided to forgo hardware and drill a finger pull on the front of the shelf to open it.

To attach the bottom upright I used 1 1/4” wood screws from the bottom of carcass and top of shelf.

I always get excited when I install a drawer successfully!
If you wanna see more details on how I built the DIY Bubbly Bar Cabinet including how I drilled the finger pull for the pull-out shelf, check out my YouTube video.
Now that the carcass was built, it was time to trim the cabinet doors. I made the carcass as square as possible, but there can always be some inconsistencies, so I decided to use it as a template to cut out the cabinet doors. I set the entire panel I glued up on top of the carcass and traced it. Then I used my circular saw and a straight edge to cut on the lines. Once I had the outline cut, I marked the center and cut straight down the middle. The kerf of the blade (1/8”) should create enough space between the doors so they don’t rub once installed.

Now comes the fun part…… POWER CARVING!!! But before I did that I installed the pulls I was gonna use on the cabinet, which I love… you can get some here! I did this because I wanted to make sure that when I carved the bubbles they didn’t interfere with the hardware.

Okay now really the fun part. To help me visualize where I wanted the bubbles I printed a few graphics offline as a guide. This really helped me stay on track when carving and not get carried away with too many bubbles. I also practiced on a scrap piece of wood to see what I liked and didn’t like. I didn’t like when the bubbles got too close or overlapped too much, because it made them look “mushy” instead of like bubbles.

I carved the bubbles at varying depths to help add dimension and used three different sizes sphere burls from Saburrtooth for this project.
These burrs cut awesomely and quick. Like I said before practicing helps make sure you know how much pressure to apply and how to hold your grinder to get your desired look. Speaking up grinders I used two, my Makita Die Grinder and my Dremel for all of the carving.

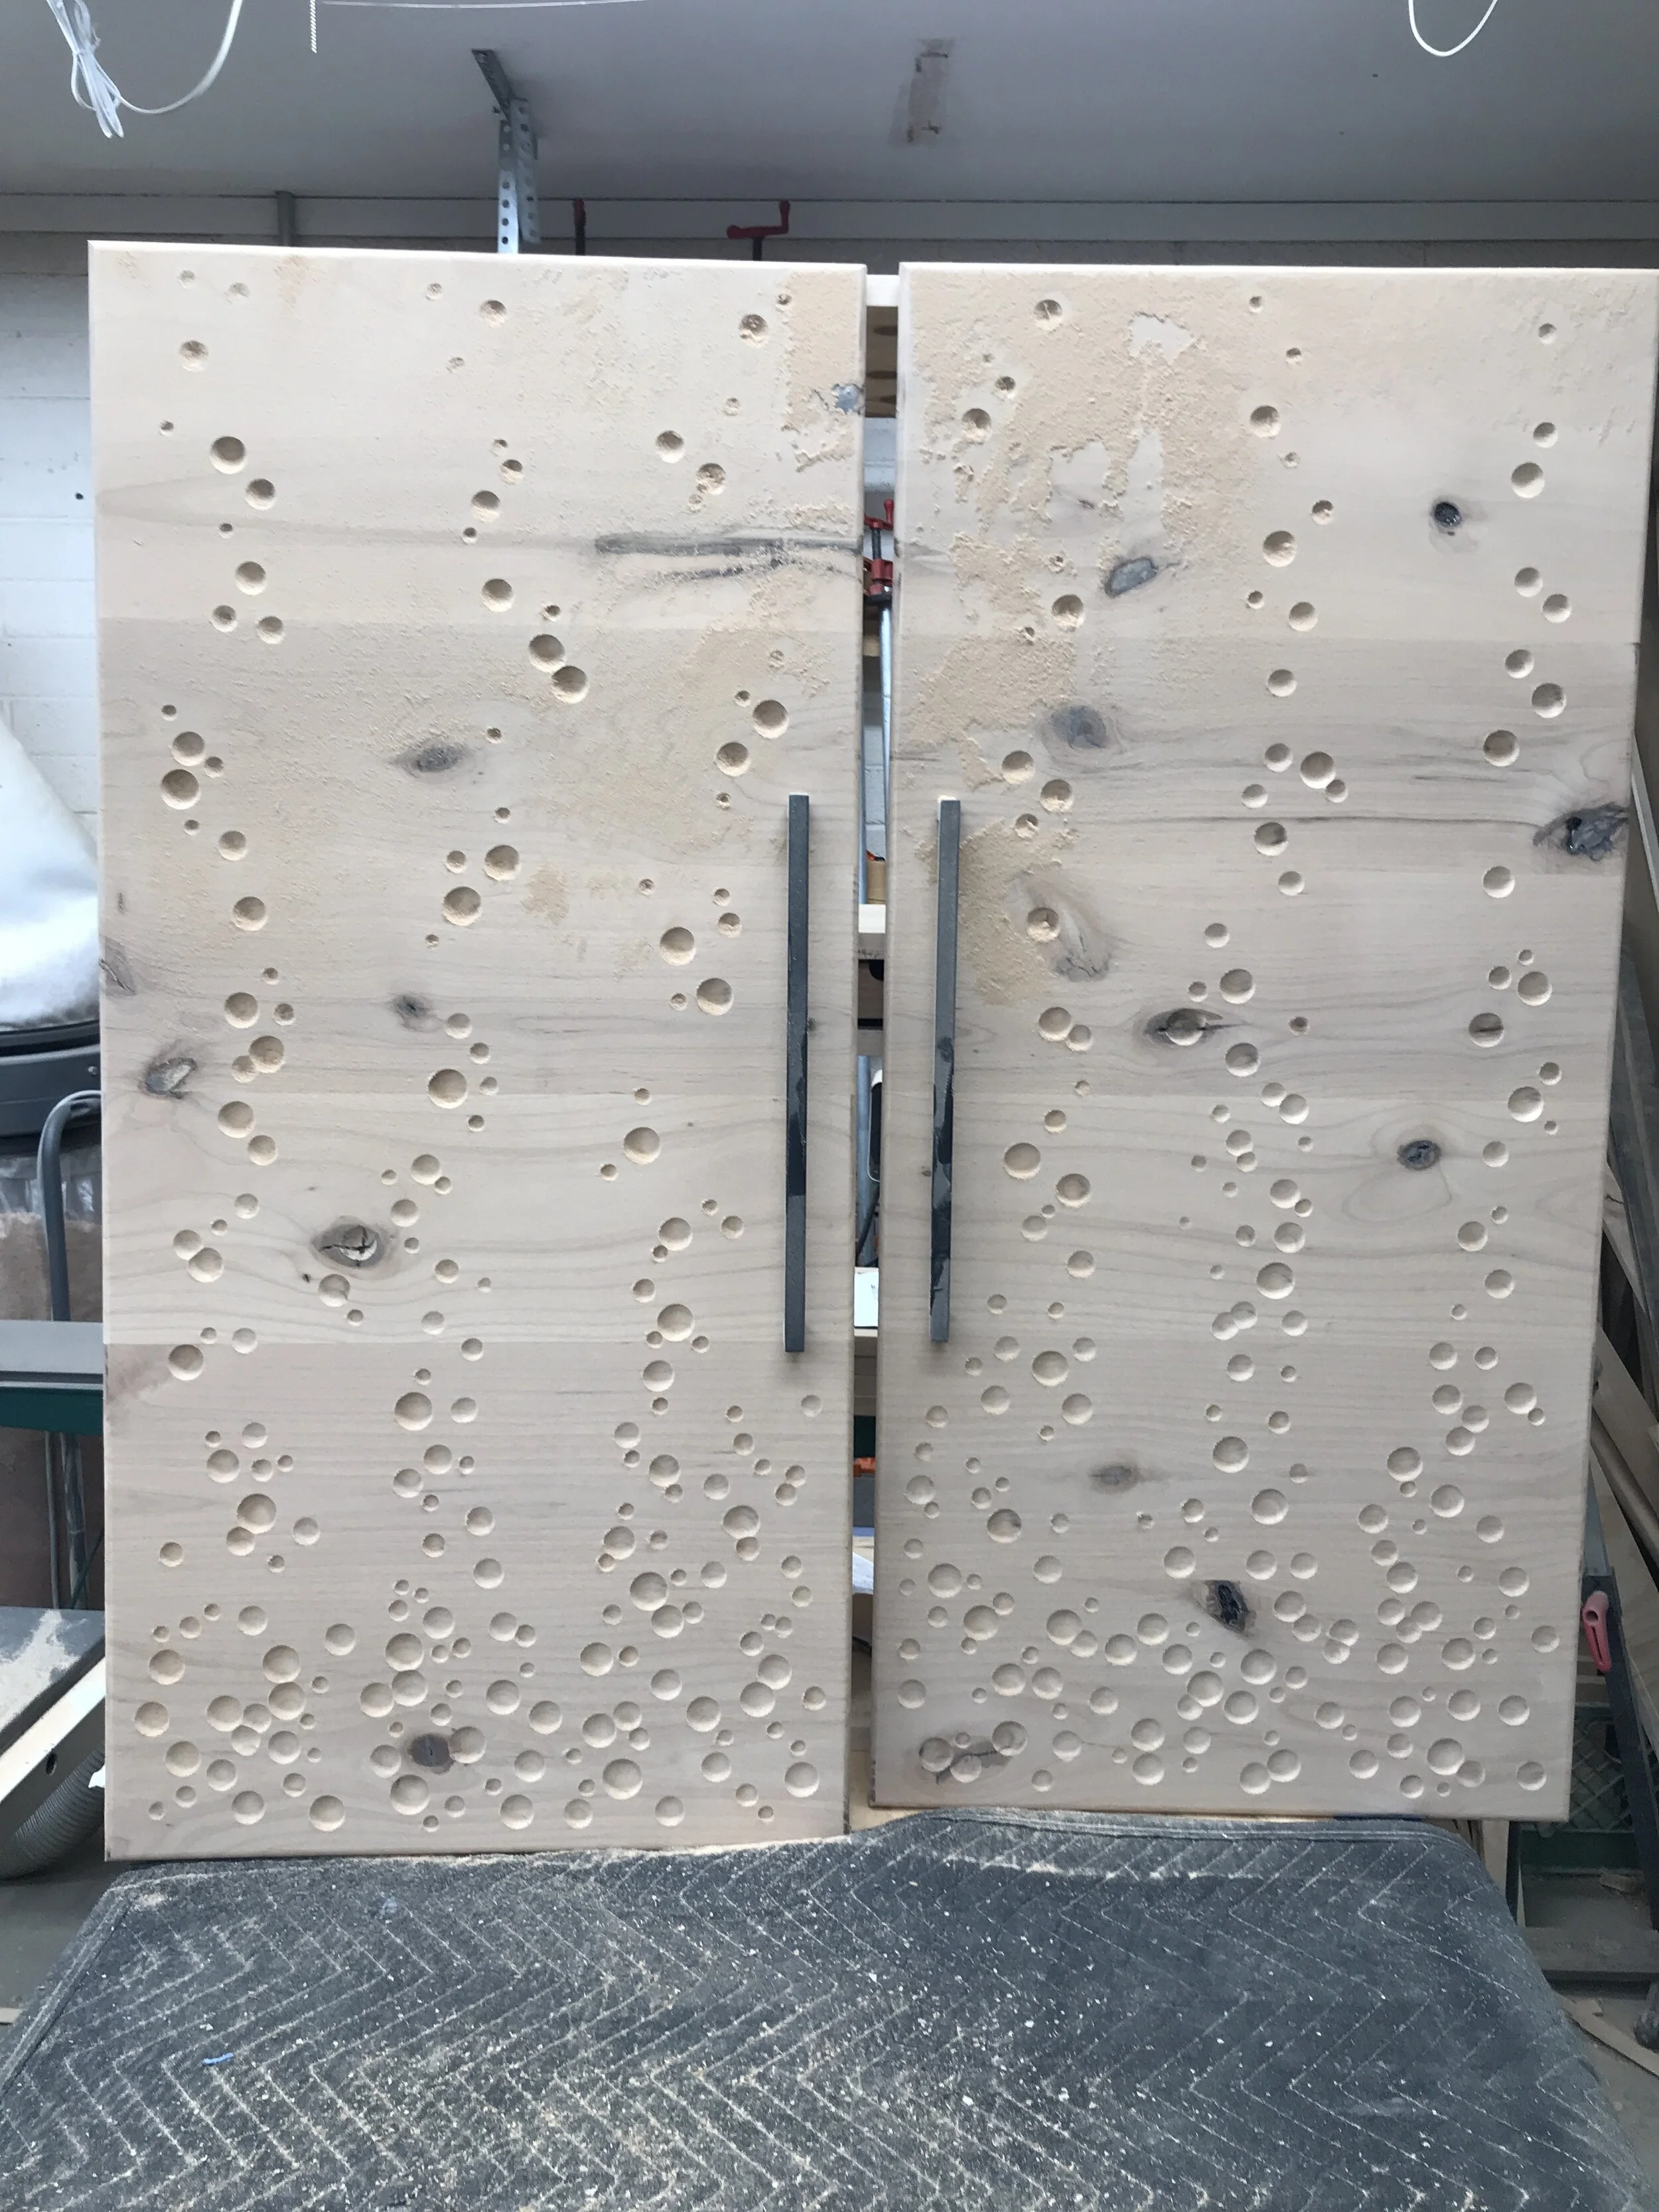
During the carving process I would stand up the doors to get a better look at them and then add more bubbles as needed. Less is more and this helped not over do it.
Once you have your desired design sand and finish. I used Rubio Monocoat in natural for my doors and it gave it an almost champagne color…. light and natural looking. And since I wasn’t able to completely sand in each of the bubbles it gave them a darker look then the tops of the doors… just some more AWESOME dimension.
Now that you have your carcass assembled and doors carved it was time to put everything together. Adding the handles back on was easy because I already had them laid out from before. But I did learn a lesson when it came to the hinges.

I love this jig by Kreg for drill cups for the hinges.
I drilled everything like normal using hinges for a full-overlay door on a frameless cabinet and they worked, BUT….. when I opened the doors and tried the pull-out shelf it wouldn’t open, just ran into the doors. So, I learned that there are hinges for these very reason, they are called Zero Protrusion hinges. They allow the door to open up further and therefore not block the pull-out shelf. Problem solved! Glad this was an easy obstacle to overcome and that I didn’t have to completely rethink the pull-out shelf. I learn something new everyday in this woodworking business.

We all make mistakes…. wrong hinges, pull-out shelf hit the doors.
With the correct 0 protrusion hinges.
Then lastly I screwed on the metal legs. I got them here. But you could used hairpin legs or any other 16” metal legs. I also added a metal wine glass holder, I got it here. And viola I had a DIY Bubbly Bar Cabinet!

I spray painted the legs matte black.
I loved how this thing turned out so much that I had to paint the wall behind where is was going. It was on the project list already, but this was just the added motivation that I needed.

If you wanna build yourself a DIY Bubbly Bar Cabinet I have full plans in my shop! And if you do build it I would love to see a pic, so tag me or use the hashtag #BuidlingAwesome.

Celebration time… the Bubbly Bar Cabinet is complete!


Baseboards coming soon!
And if video is your thing, you can see how this all came together in my YouTube video of the build.
I hope you enjoyed this project as much as I did. Til next time, keep #BuildingAwesome and have an AWESOME day!
-Sadie Mae
Can’t Build It Now? PIN It and Save It For Later!