Modern Shiplap Hall Tree Bench
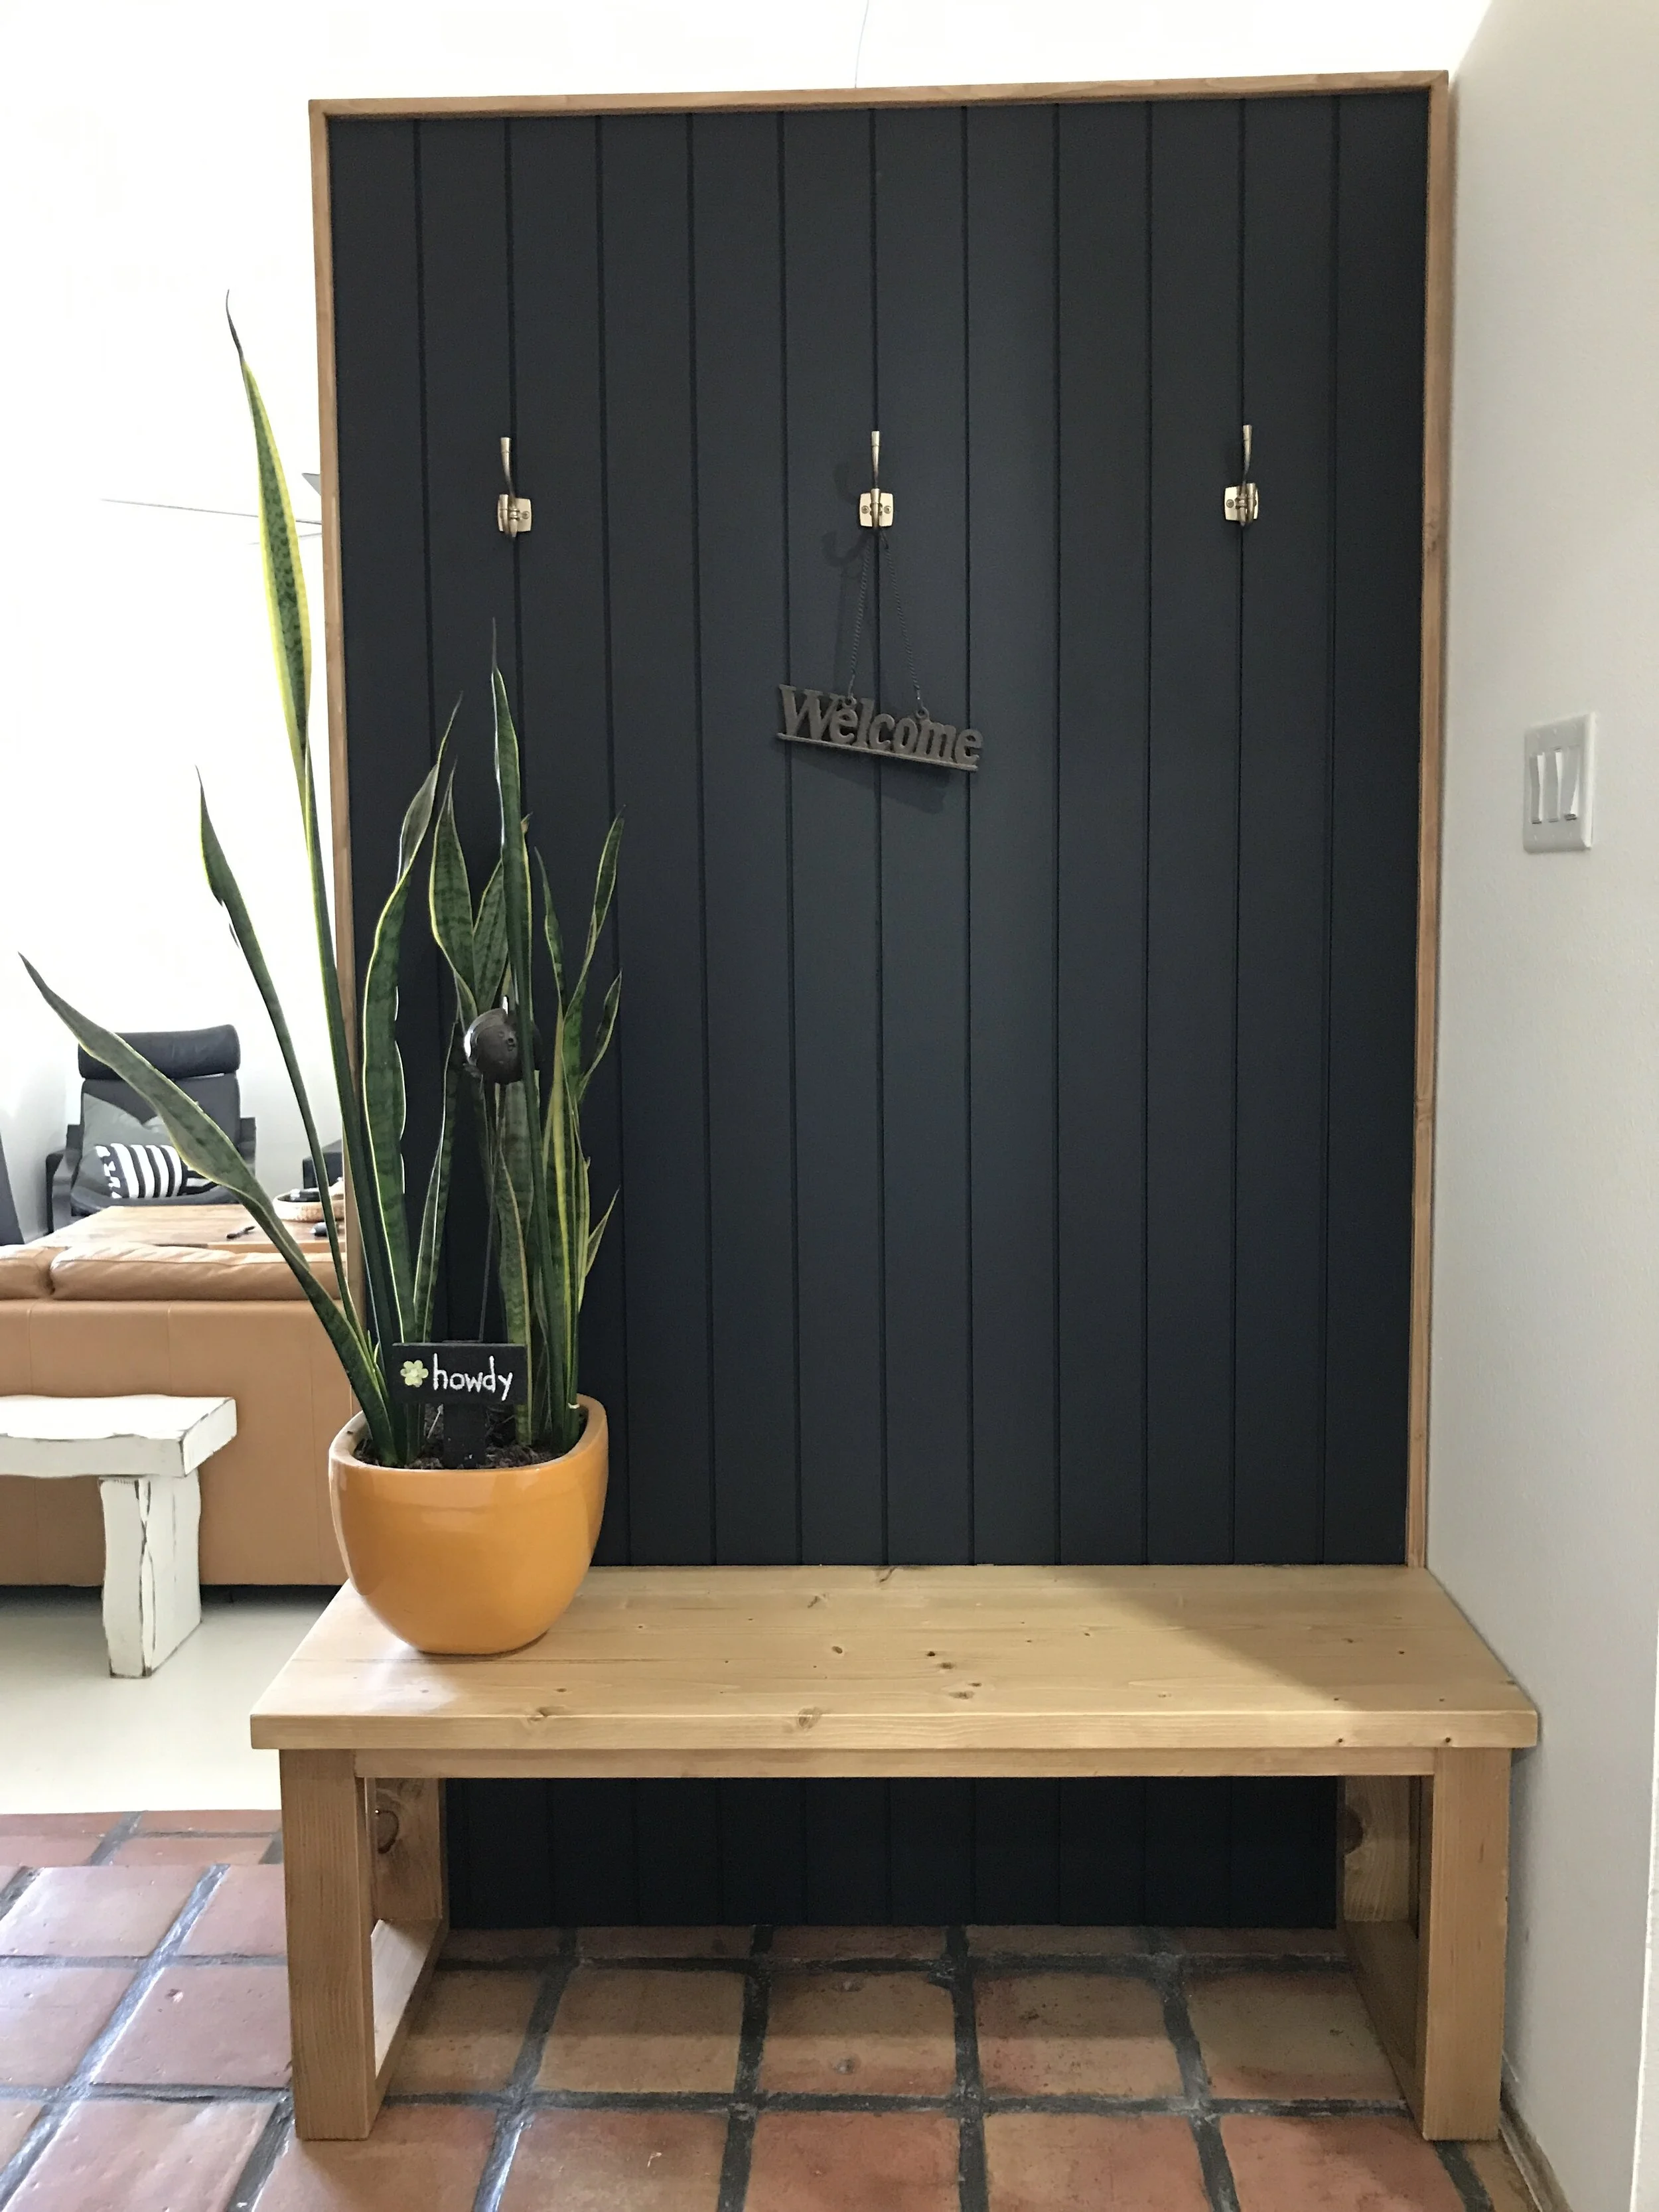
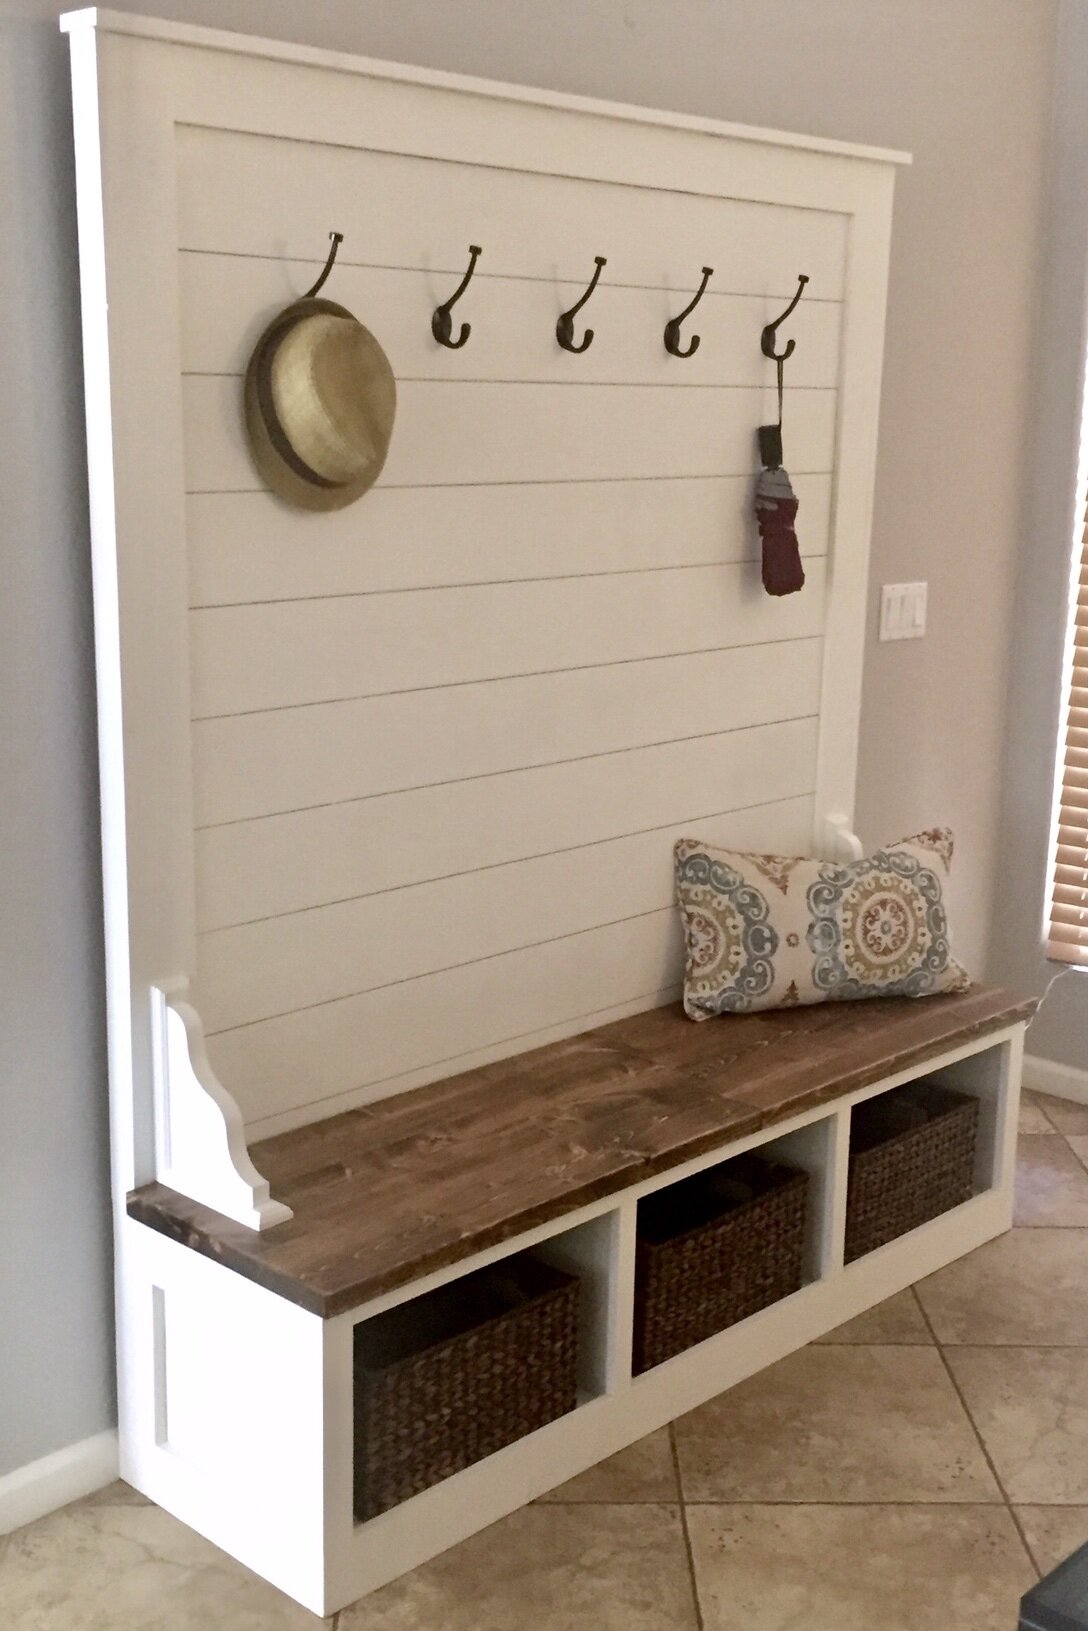
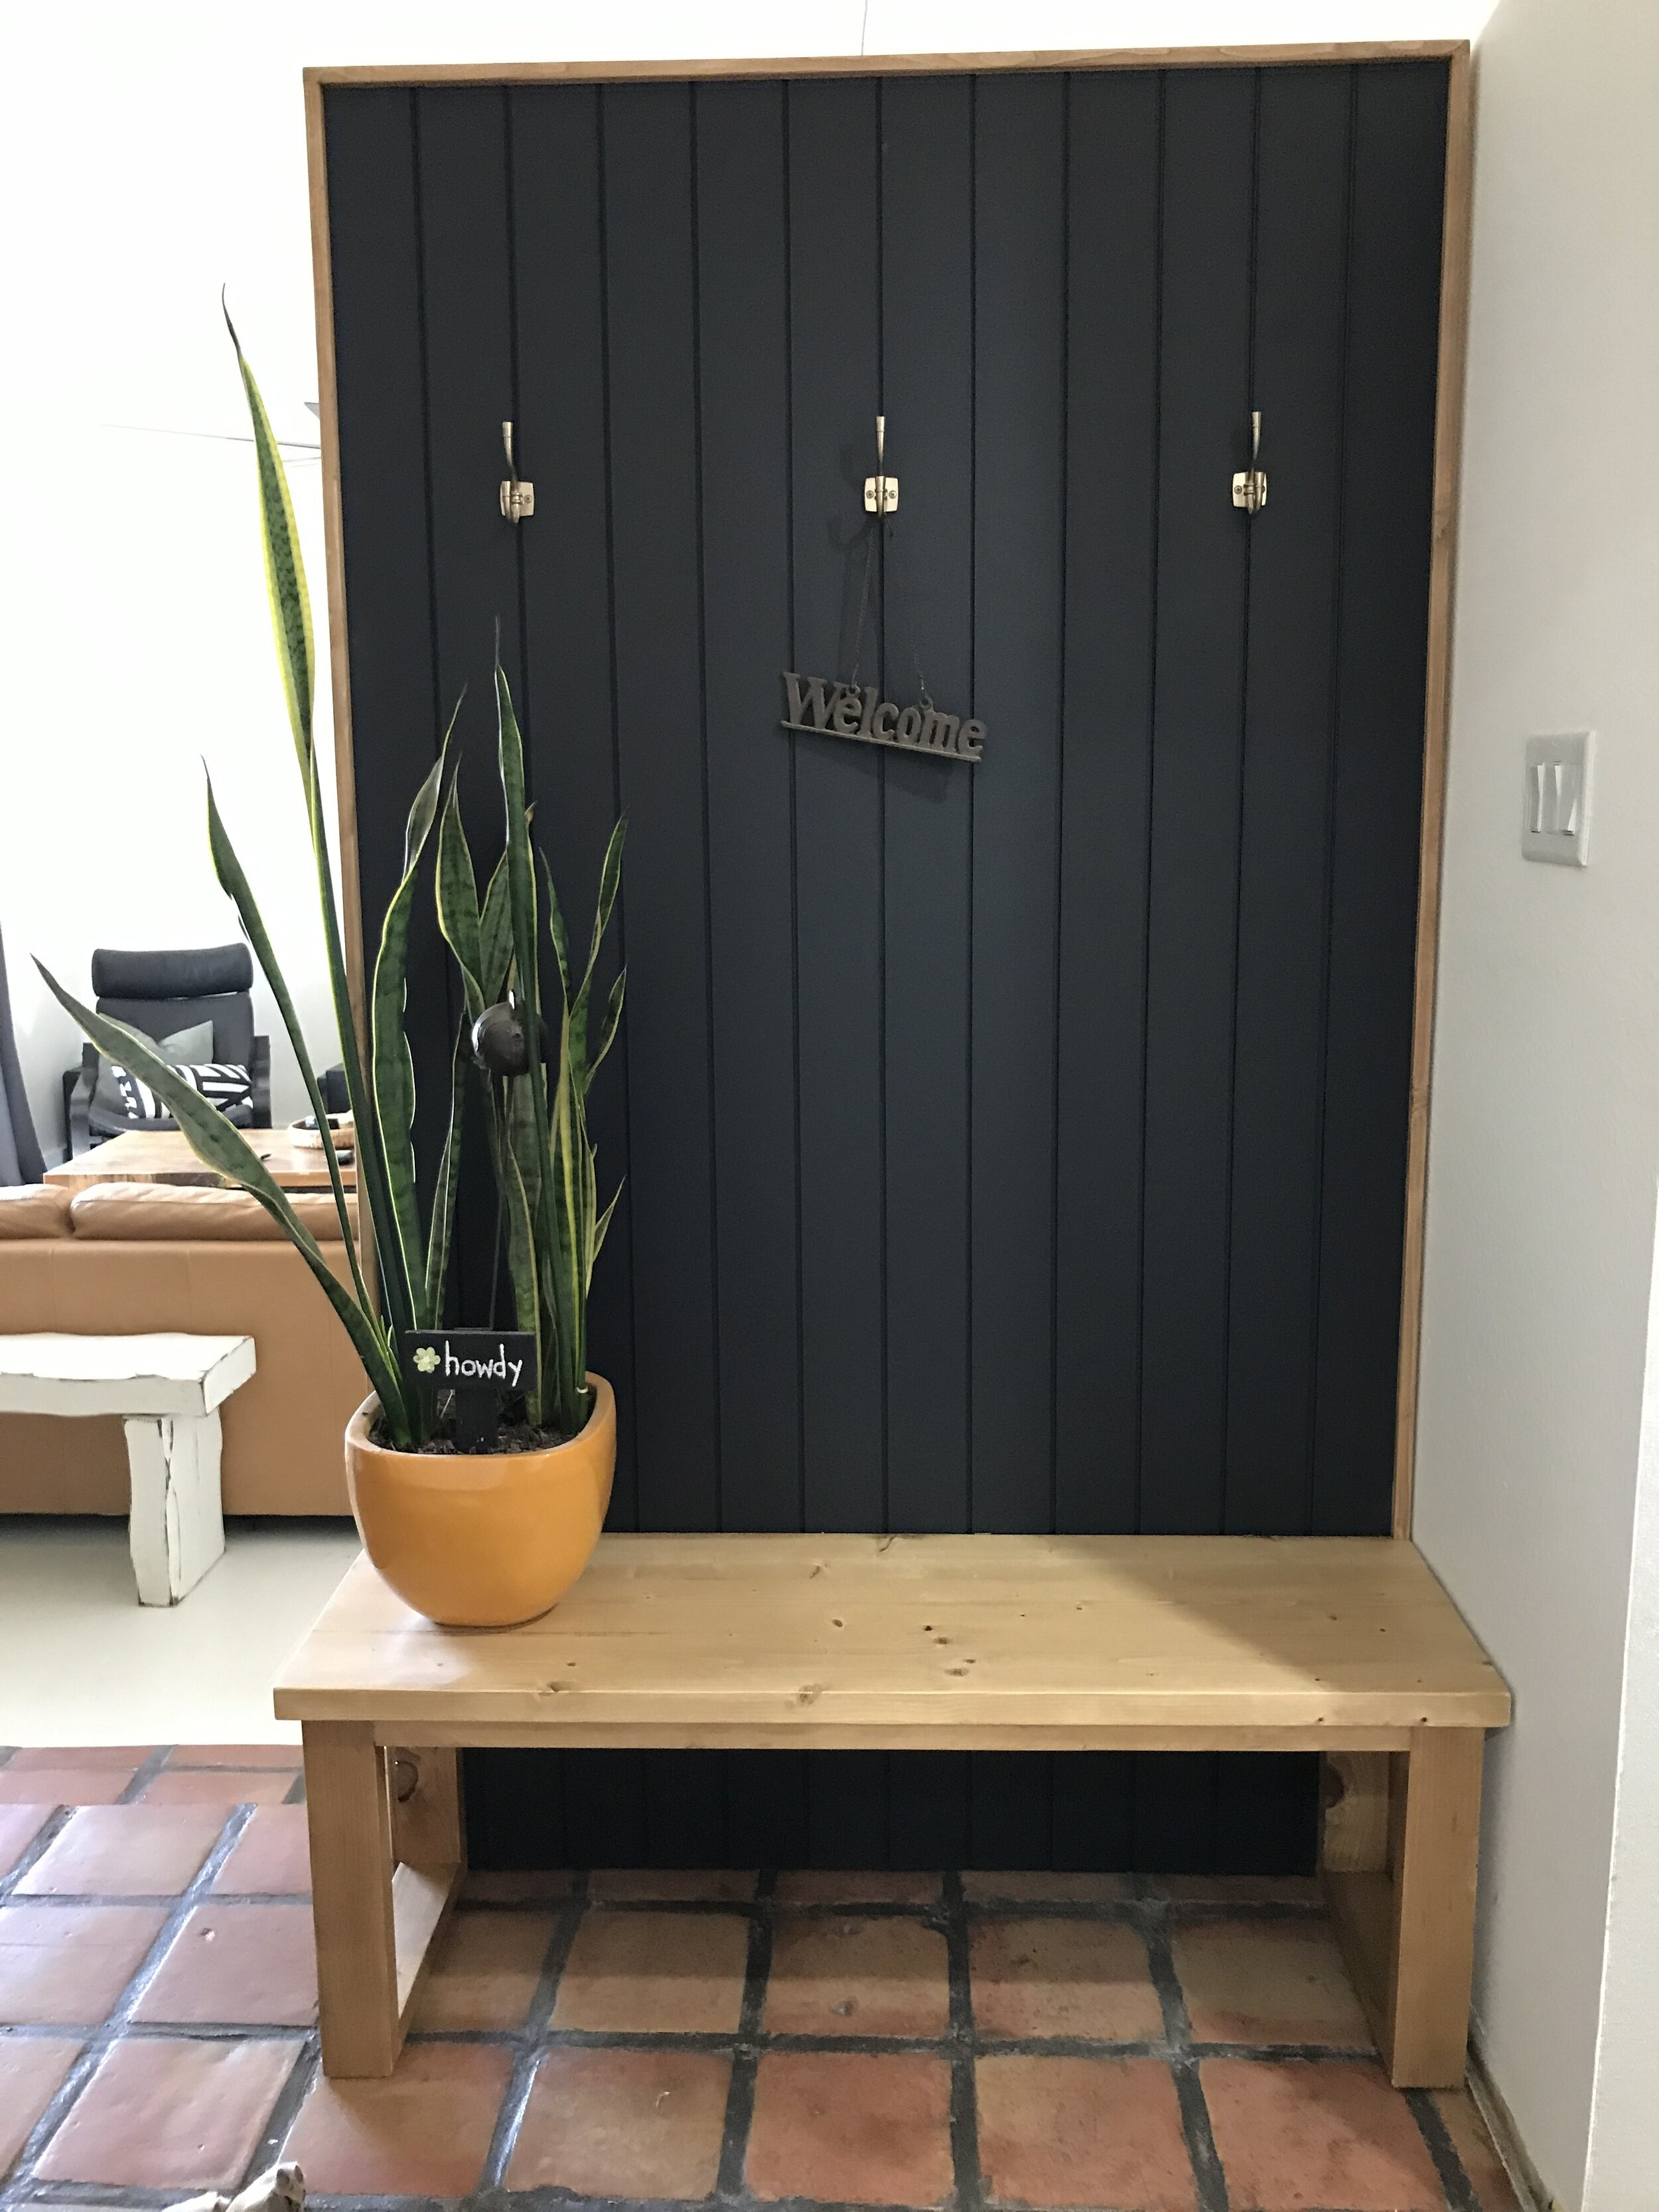
This build is inspired by my most popular build to date… the “OG” Shiplap Hall Tree Bench. In my humble opinion it is an awesome design, but it is more on the farmhouse side. And since like me and a lot of others style is leaning more on the modern side these days I thought it would be fun to design a modern version. Hence the “Modern” Shiplap Hall Tree Bench… think black paint, vertical shiplap, light wood and AWESOME!
This is NOT a sponsored post. This post DOES contain affiliate links. For more information on my affiliate programs, please see my Disclosures page.
Even though this is a big build it is a super easy build that only requires five (5) tools! Yes you heard that right, five (5) tools… a miter saw, drill, orbital sander, pocket hole jig and a pin nailer! I did end up using a table saw on this build as well to cut the round edges off of the 2x4’s, but that is a completely optional step. And if you do end up wanting to build one of these for yourself, the plans will have the dimensions for both versions!
Okay so let’s get started with some tips of what I learned while building this piece….
Awesome Oscar was totally drooling over the final result! Or it was my husbands green chili!?!
Watch me build this piece on my YouTube Channel!
Tip #1:
When you are buying your materials, particularly the 4x8 sheet of plywood have the big box store trim it down to 83 1/4” to give you an overall height of 84” when we are all done. This is taller than “OG” bench by 6”. Feel free to adjust that dimensions to fit your space. Also, be sure to get a flat piece of plywood. Mine ended up being warped and I had to add some extra bracing which I show you more about later.
Tip #2:
When picking out your 2x4’s and 2x6’s, I like to purchase the Prime Whitewood Studs. They are more likely pine or spruce and stain better that the fir studs. They are a little bit more in price, but for the quantity you need for this build it really isn’t that big of a deal.
Tip #3
If you have a table saw and are going to be ripping the rounded corners off the 2x’s, I suggest doing that after you get the pieces cut down according to the cut list. It just makes it easier to feed them thru. And since the 2x4’s are 3 1/2” to start, rip the first and straightest side at 3 1/4” and then rip the second side at 3”. And the seat 2x6’s are 5 1/2” to start, so rip the first and straightest side at 5 1/4” and then rip the second side at 5”.
LEFT: Curved Edges ripped off down to 3” wide. RIGHT: Standard 2x4, 3 1/2” wide.
Tip #4
Sand all pieces of the base before assembly. It makes sanding so much easier! I sanded to 120 grit.
Bases pieces ripped and ready for sanding.
Tips #5
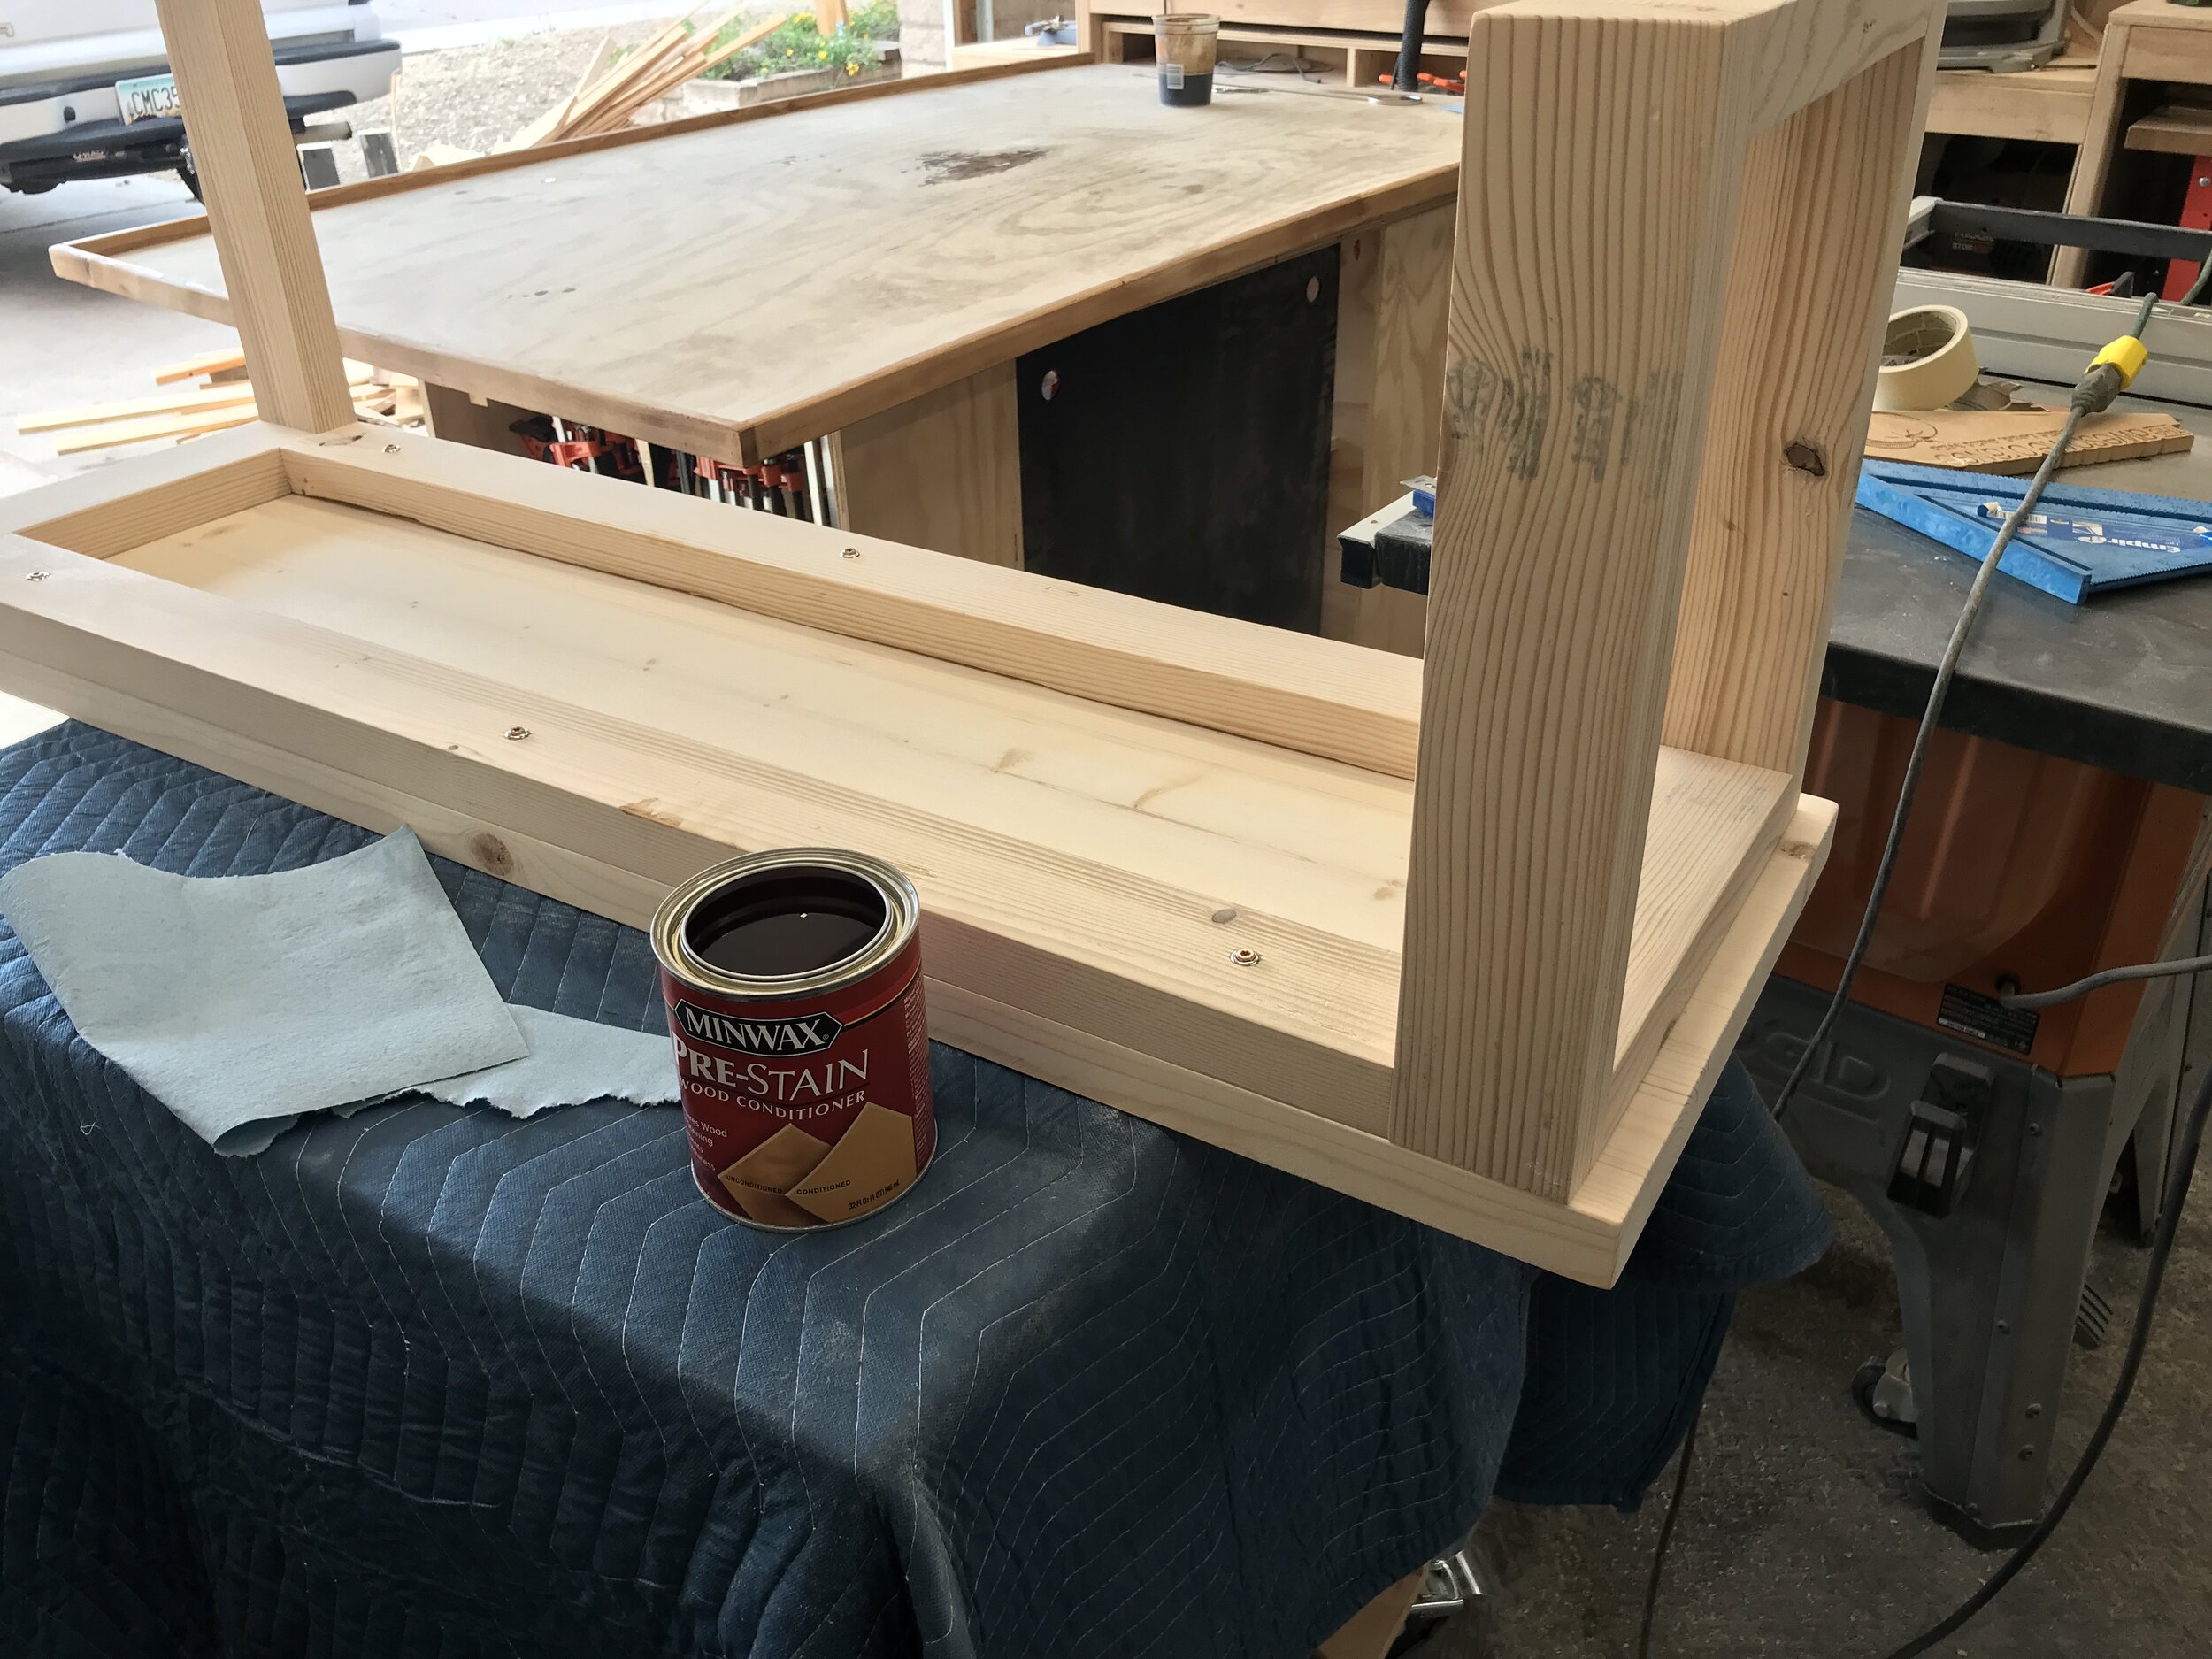
Assemble the base, add trim to plywood hall tree portion and then stain. Doing it this way I found there is less taping off and easier to move around. I stained my using a 50/50 mix of Minwax Natural and Provincial. When staining soft wood like pine I always recommend using a pre-stain conditioner, this helps prevent getting blotchy marks and allows the stain to go on evenly. Once that was dry I also sealed each of these pieces using Varathane’s water-based polyurethane in matte.
Pocket holes drilled = Assembly time!
No visible pocket holes once I attach the top!
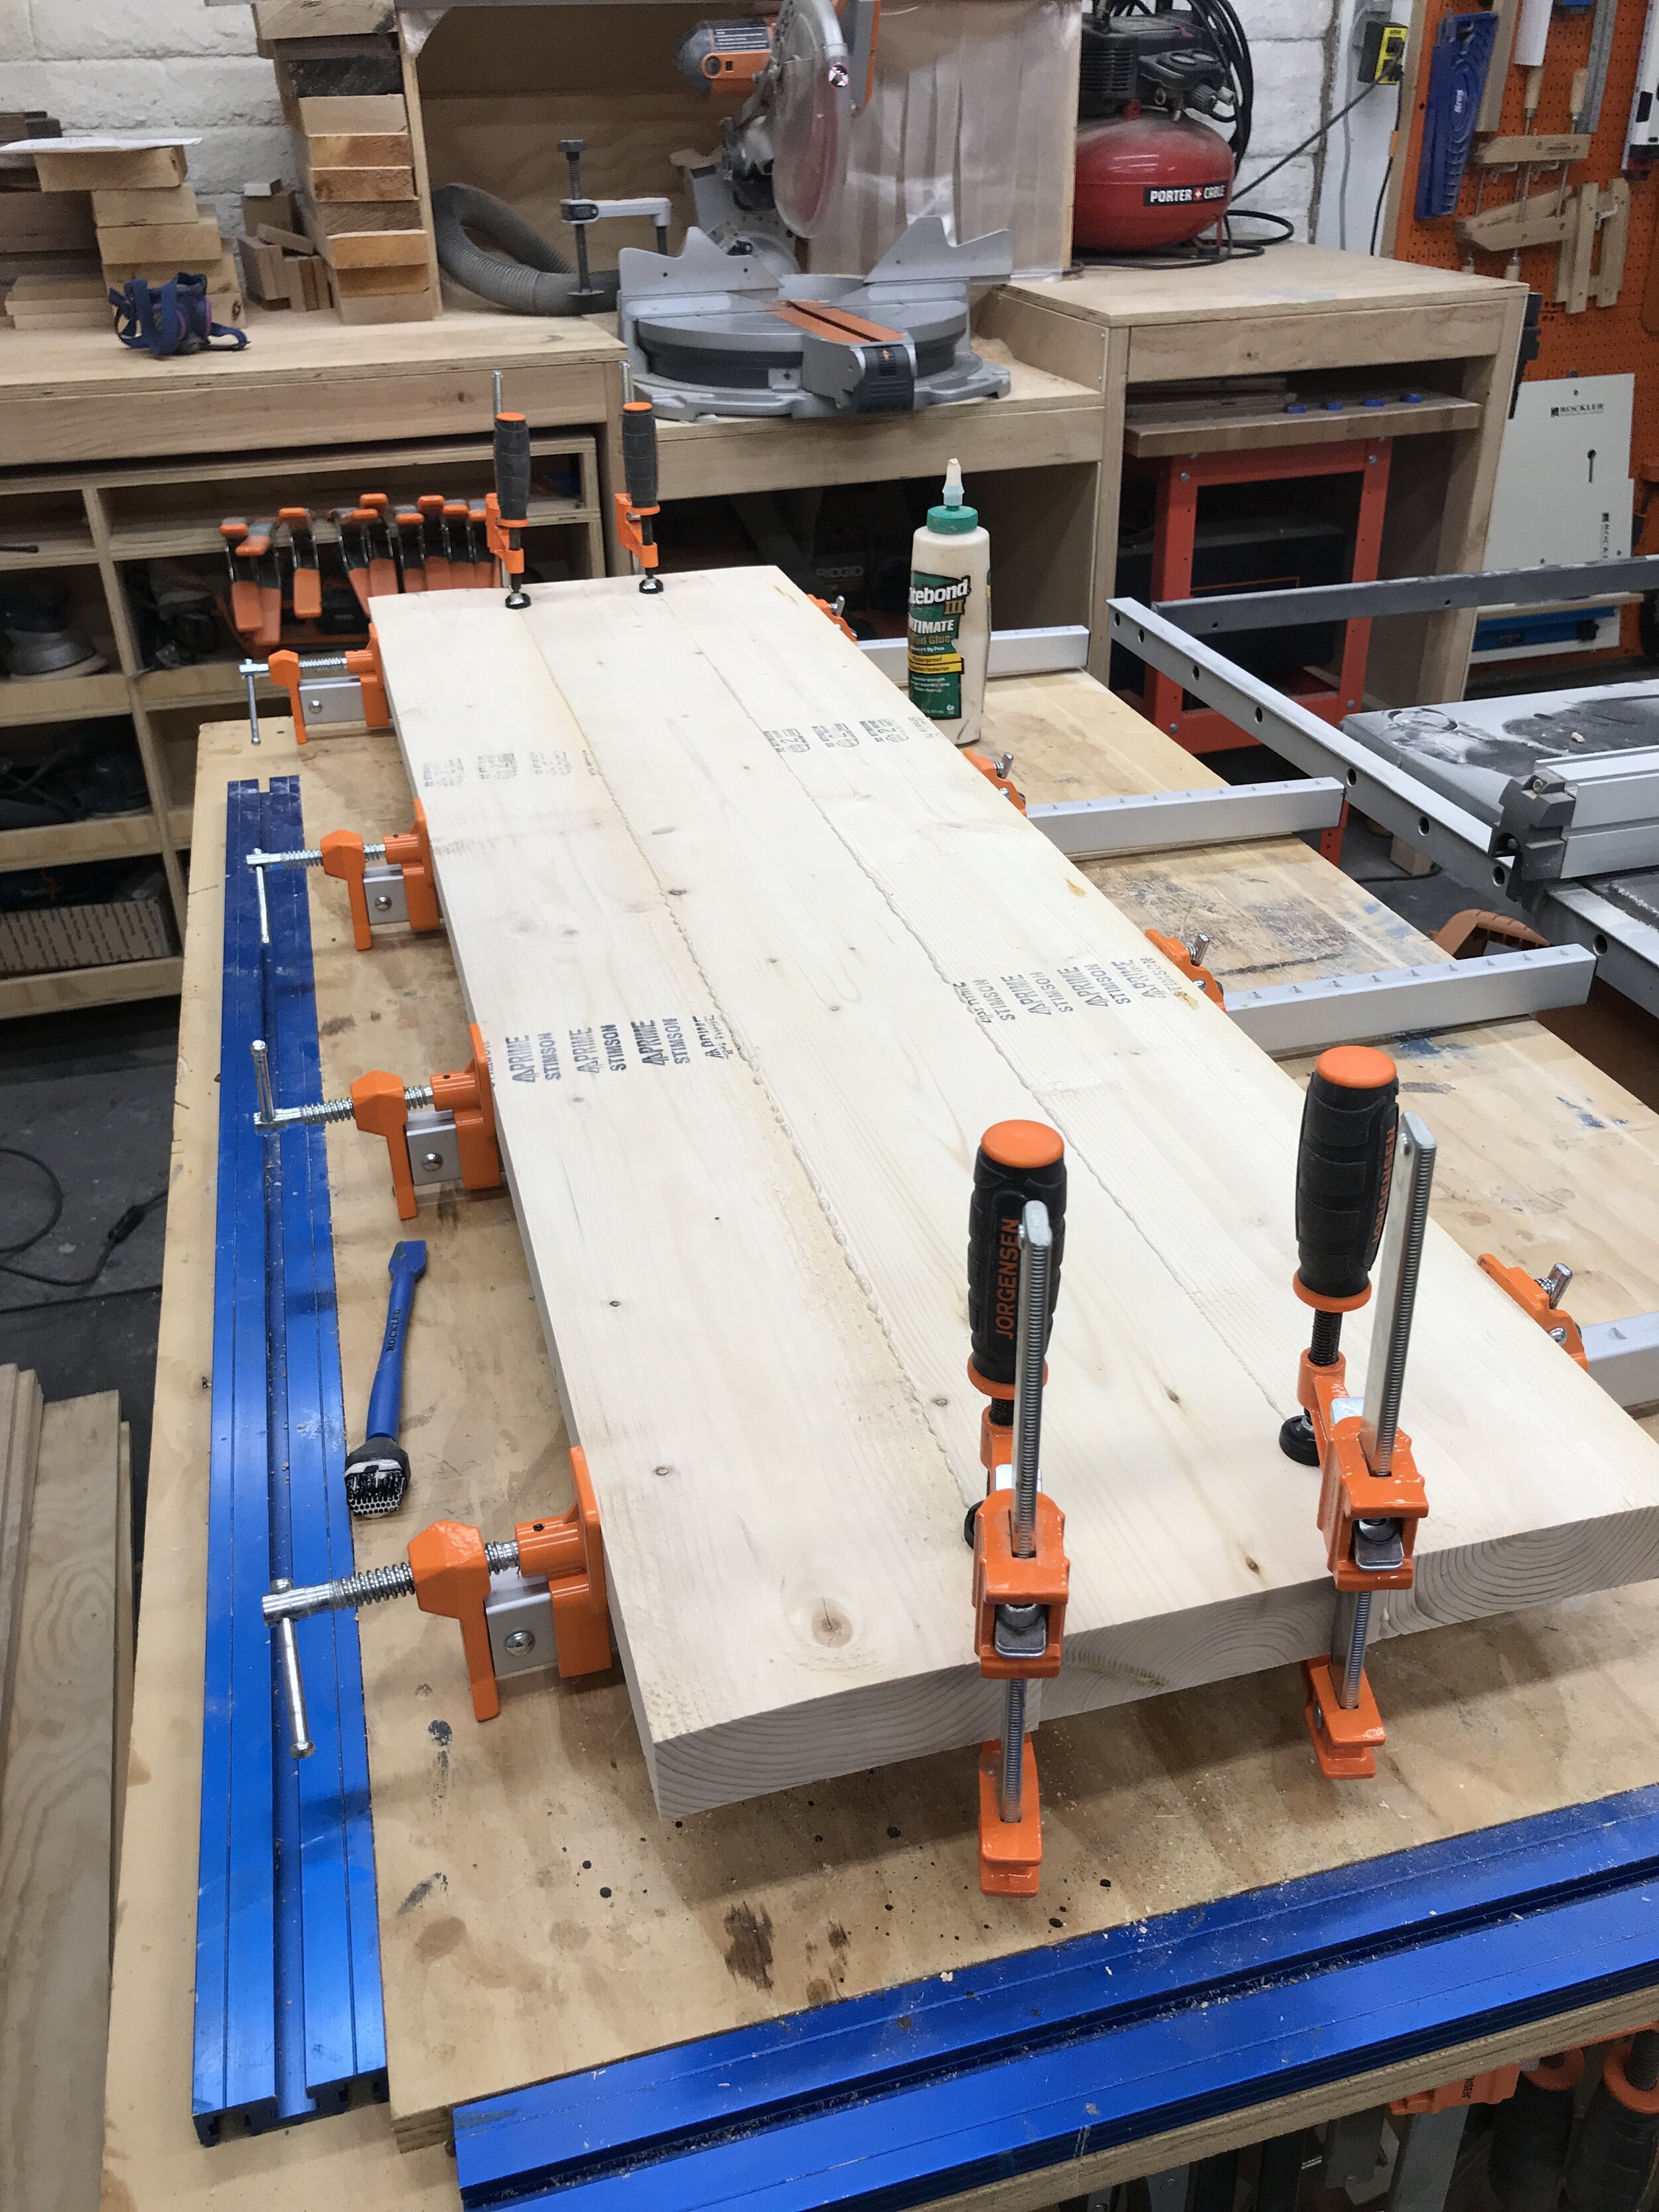
When gluing up the top be sure alternate the grain smily up smily down etc. If you don’t have clamps you and just install the seat top as individual boards by screwing them in one by one from the underside of base.
To attach top I made oversized holes in the apron and then used 2 1/2” screws with finish washers. The extra space allows for wood movement.
Always use a pre-stain conditioner on soft woods like pine!
Tip #6
Now is time for the vertical shiplap! I used mdf bender board for this. It comes in 1/4” x 3 3/4” x 96” and is smooth so it takes paint really well. Since the back hall tree portion is 48” wide or pretty dang close you will need exactly 12 of these if you leave a 1/4” gap in between. If your plywood is slightly over 48”, which sometimes it is be sure to compensate when attaching each piece to ensure even spacing. Once I cut my shiplap pieces down to the same lengths as the hall tree I then attached then using Titebond’s Thick and Quick glue and some 23ga pin nails. I like this glue because it doesn’t run and dries quickly. The pin nails are hardly even visible so I didn’t even fill them, the primer and paint did that for me. I used the pin nails just to hold the pieces in place as the glue dries.
Used some scraps of the bender board to create even spacing between boards.
Be sure to clean up any glue squeeze out before it dries because it will be almost impossible when dry.
Tip #7
Before painting the vertical shiplap I recommend using a primer. This will help decrease the number of coats of paint you need. And if you are painting your vertical shiplap a dark color or black like me, I suggest using a tinted primer. I ended up painting on 1 coat of primer and 2 coats of paint. I used some left over Behr exterior paint I had on hand in the color of Tricorn Black…. my favorite black! Also, I have found the best way to paint shiplap and the small grooves is to use a brush and a small foam roller. First brush in the cracks and the use the roller to get rid of the brush marks and paint the rest of the piece.
This is the primer I used and it worked great. It was left over from some shutters I made a while back.
Brush the cracks and then roll aways the brush marks using a foam roller.
Tip #8
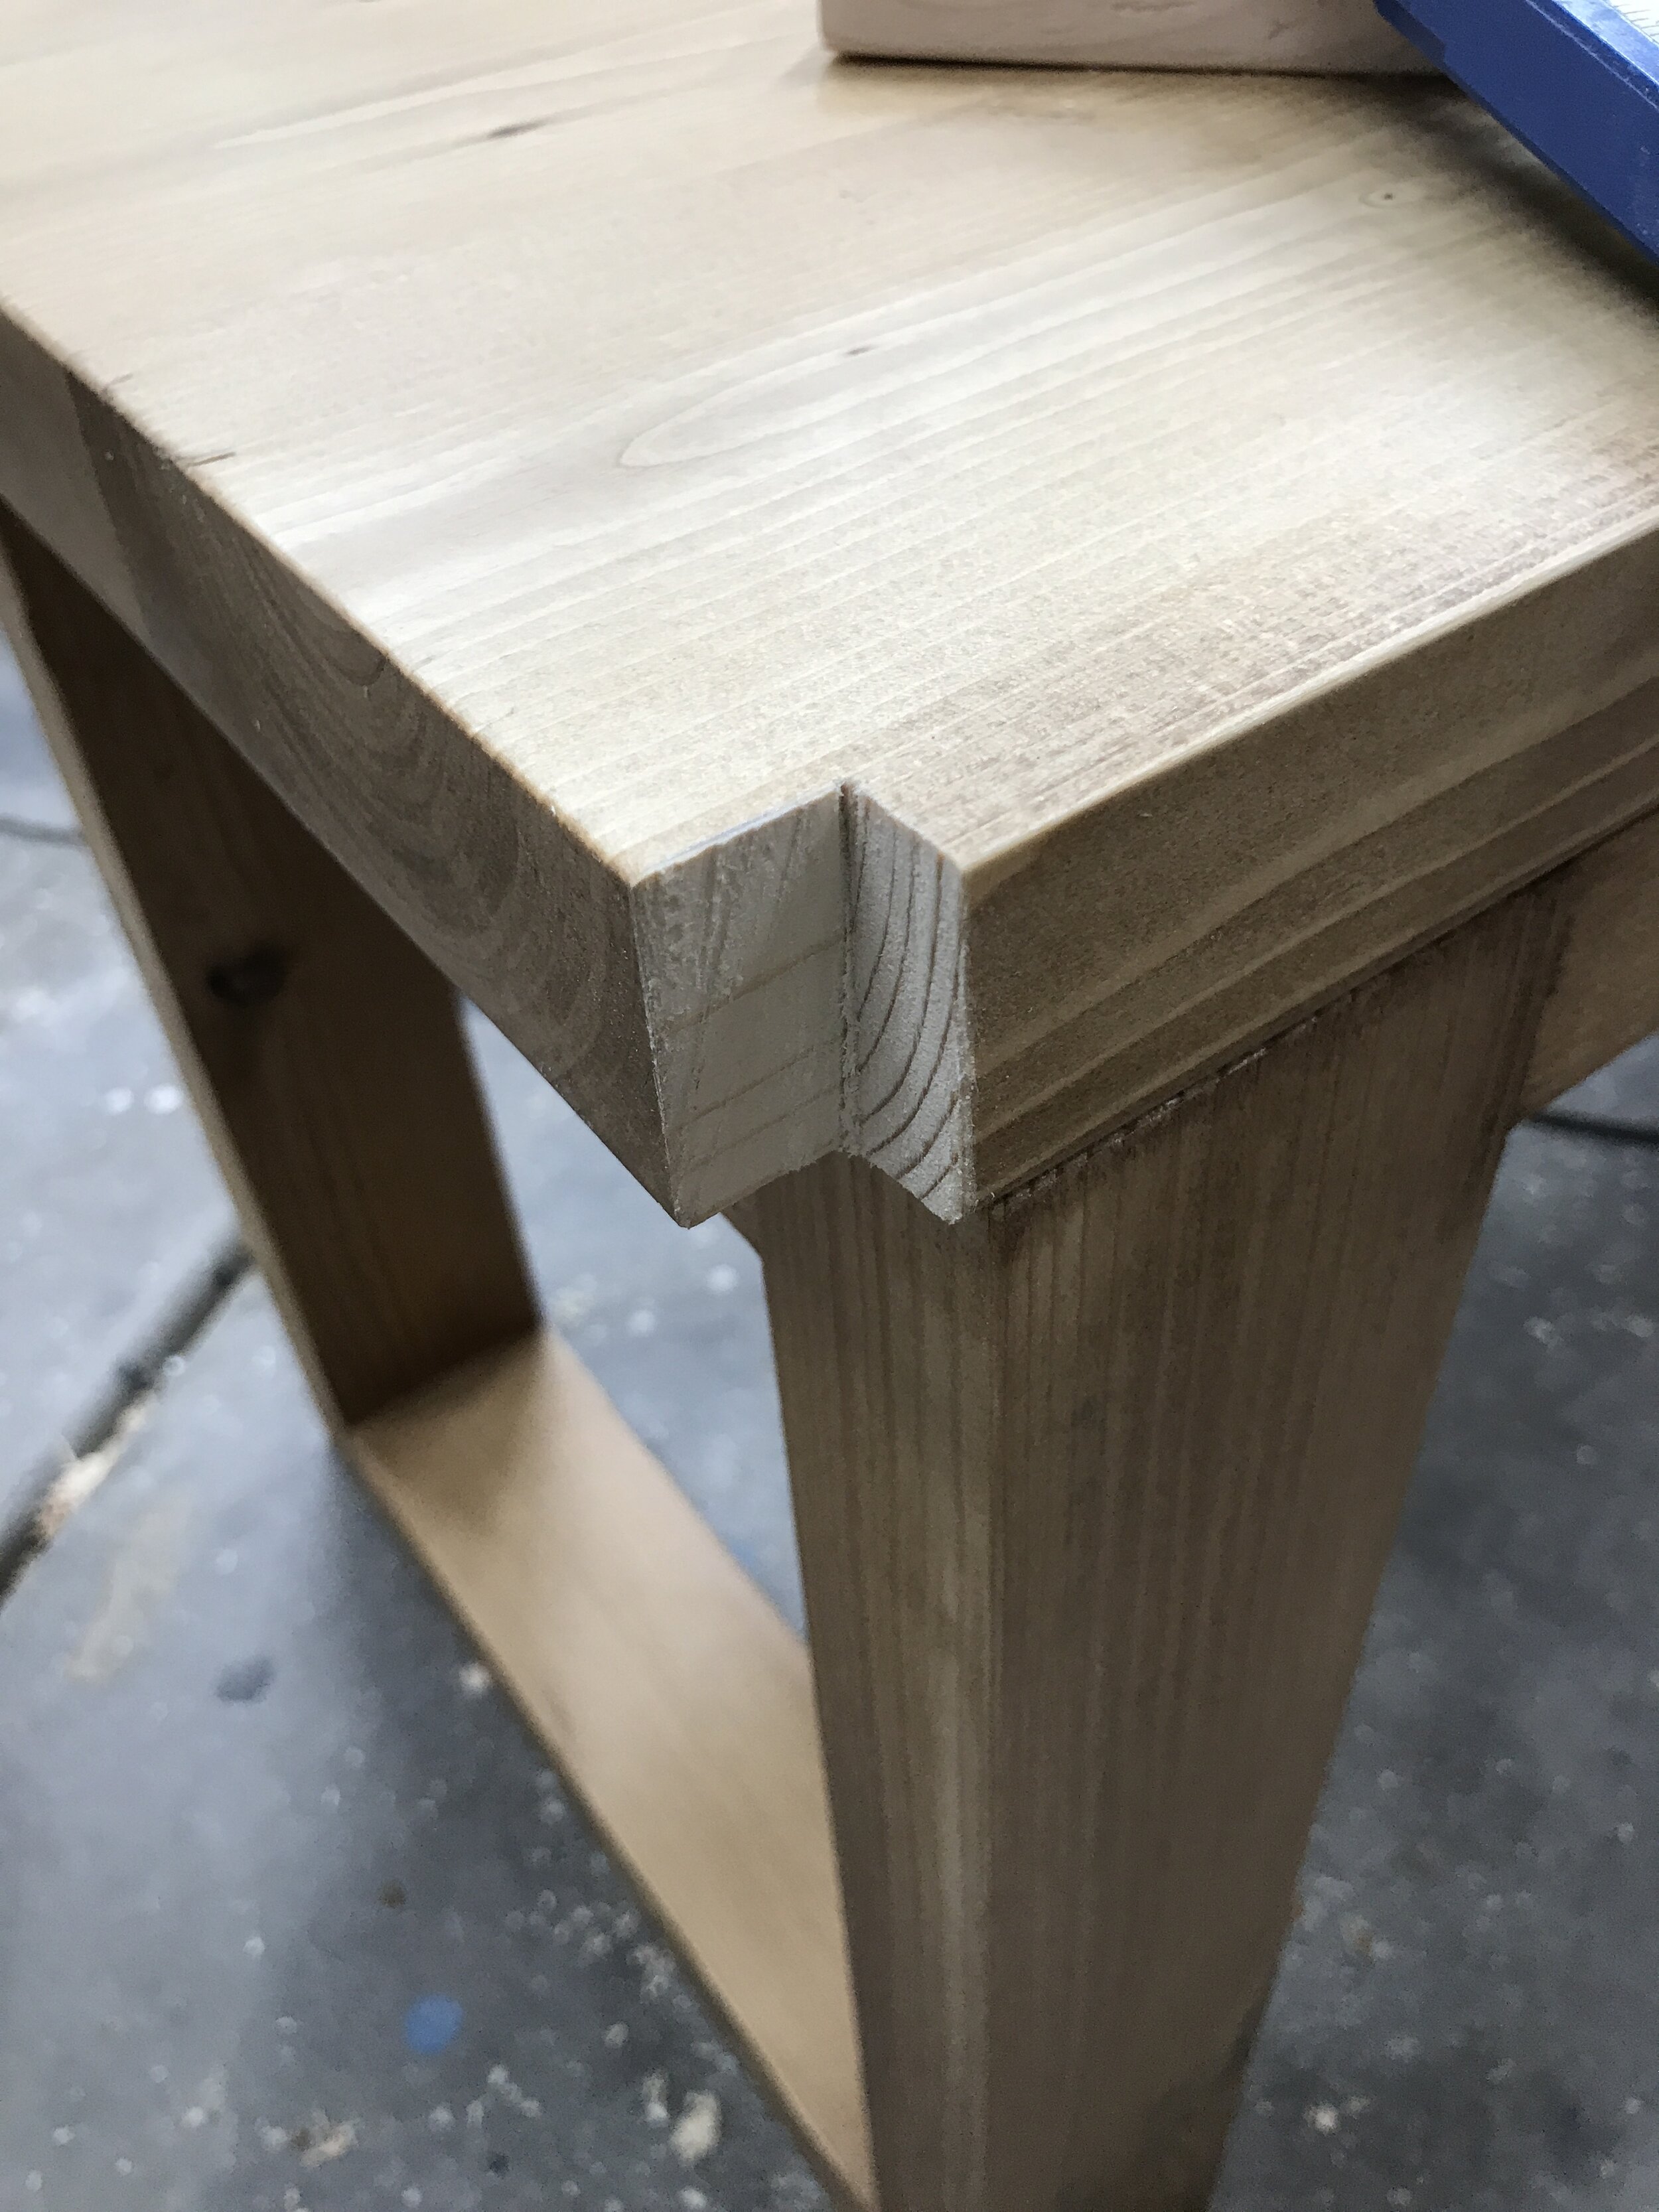
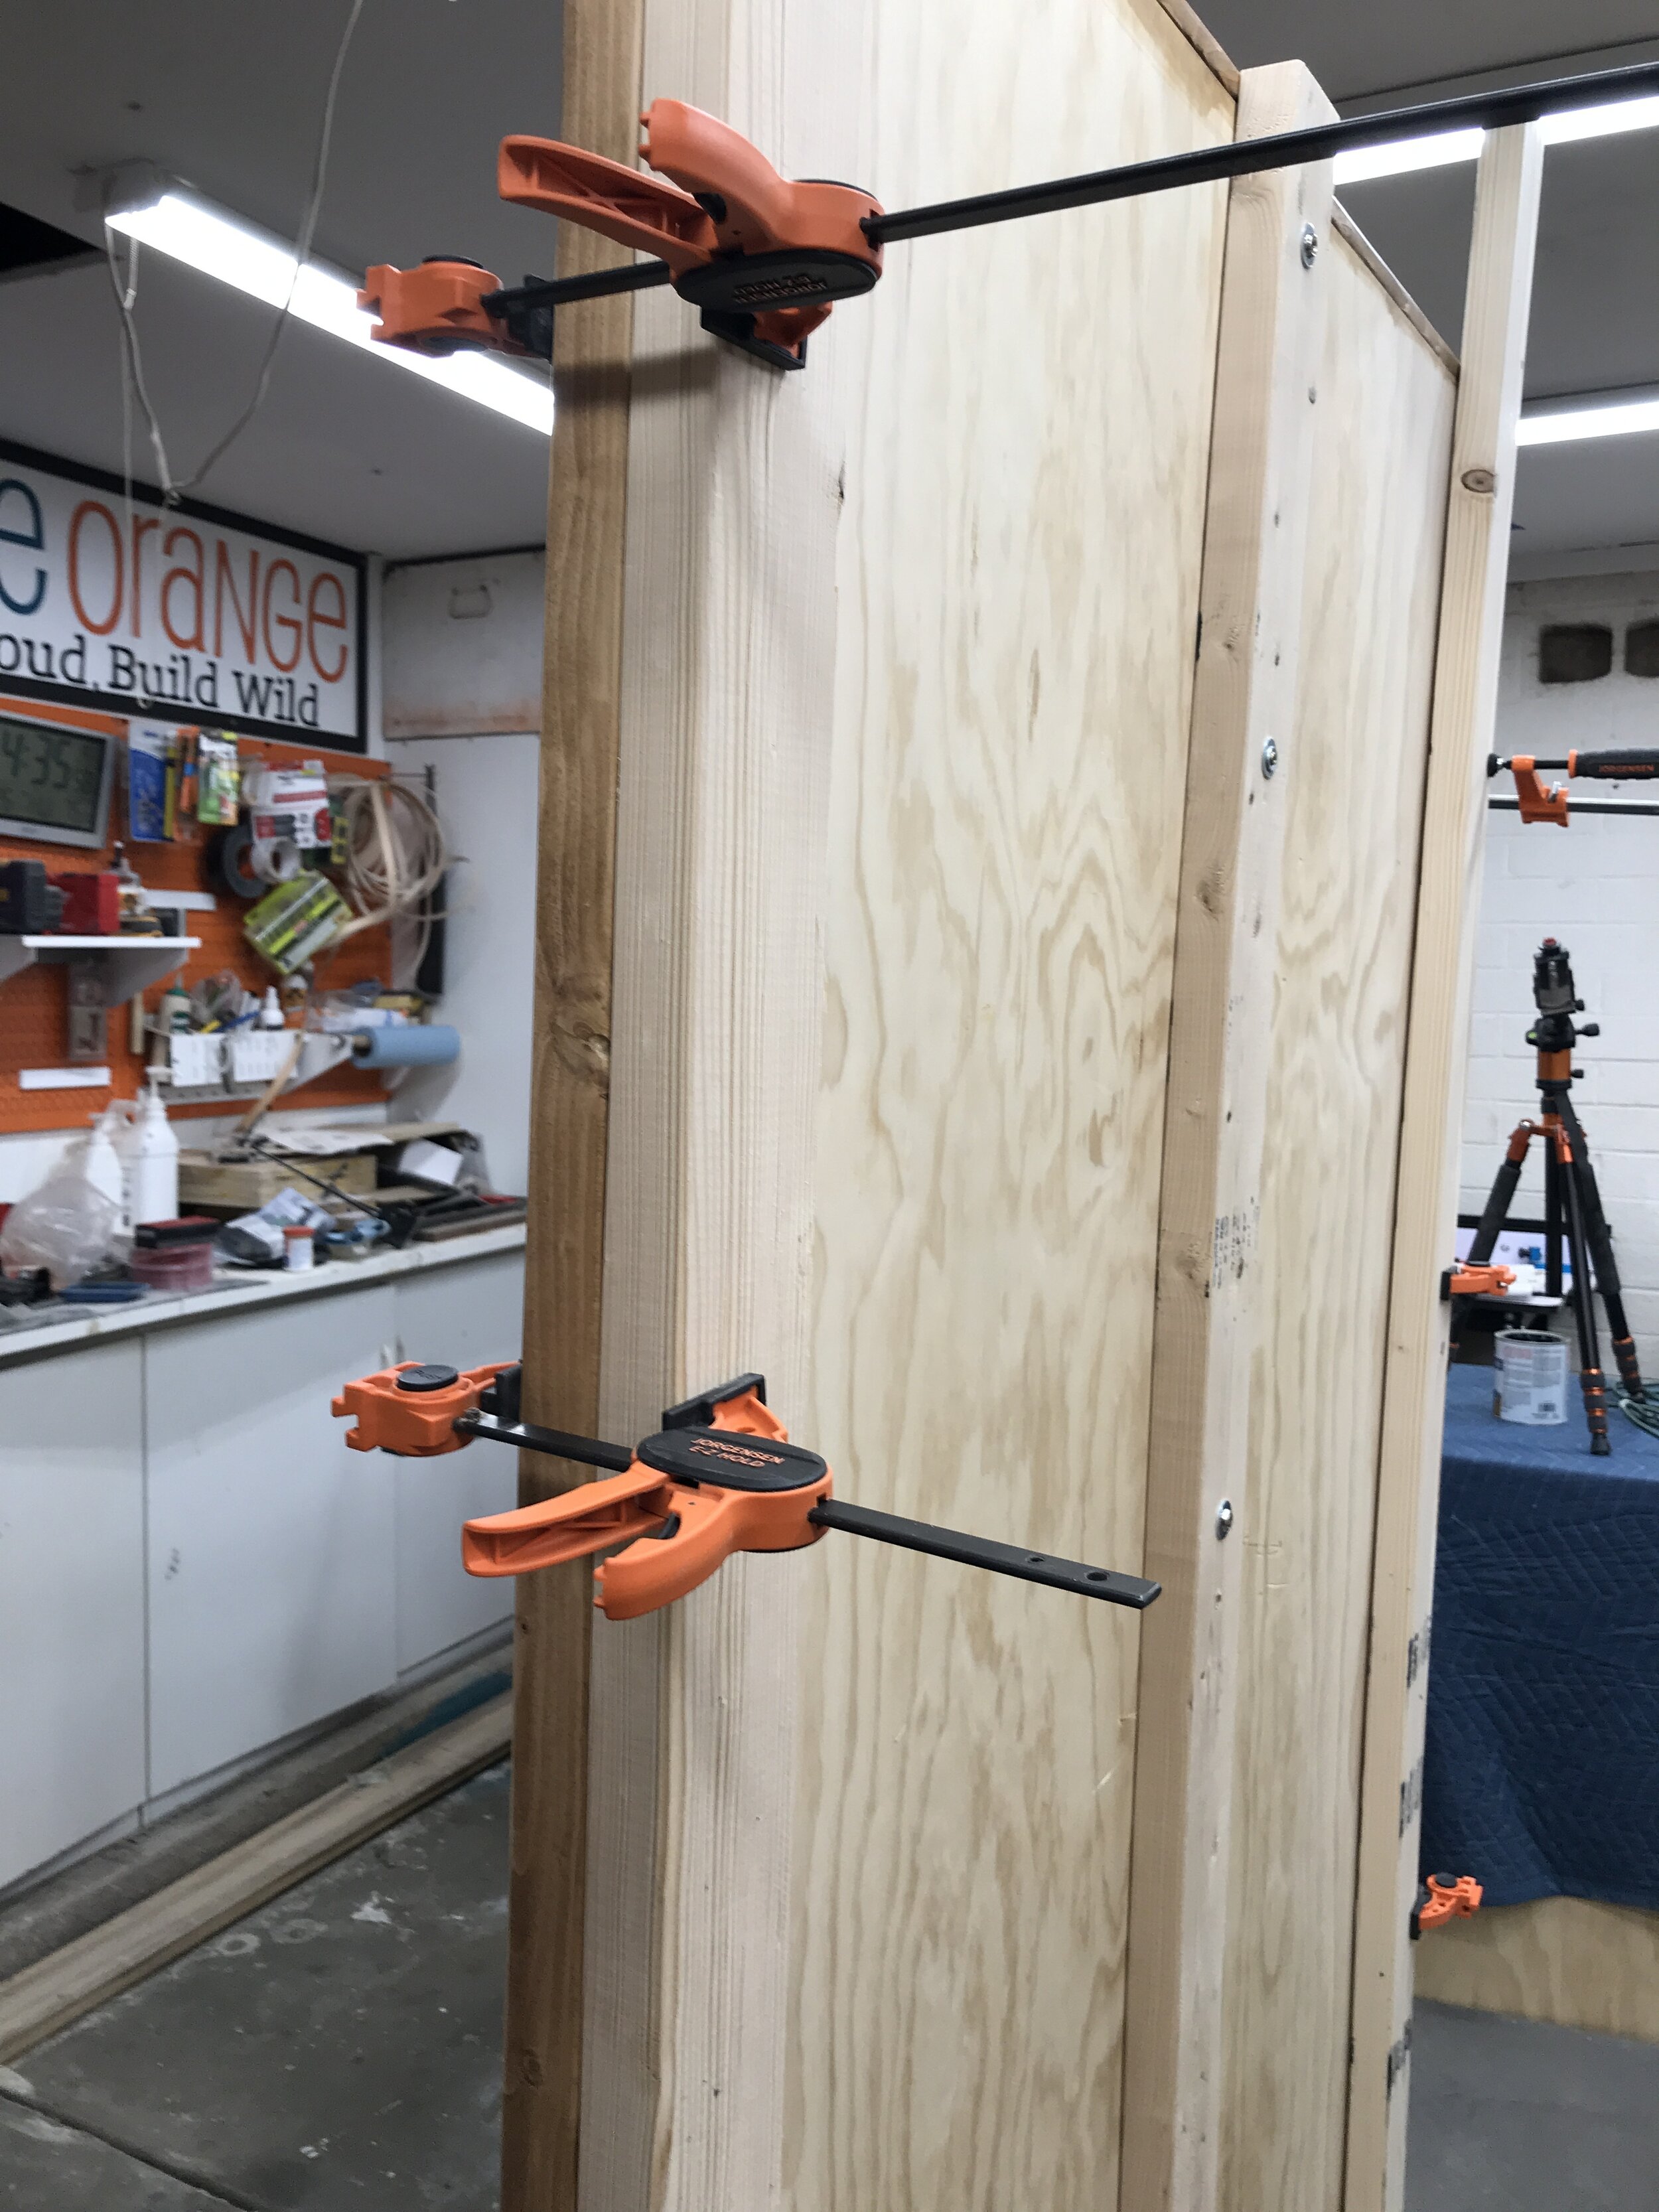
You will need a hand saw to notch out the back corners of the bench seat before attaching it to the hall tree. And then to attach the bench to the hall tree portion I recommend having the hall tree portion hanging off your workbench, placing the bench on top of it and using a few clamps to keep everything lined up. This allowed me to attach the two pieces by myself without needing someone helping. But once they were together I did need help getting it down. Oh and to attach the two pieces I just used some 2” screws from the back of the plywood (hall tree) and into the bench.
Before notching.
I used a scrap of the trim board to help layout where to notch. The Kreg multi-mark works great too.
Looks good, but does it fit?
My Pony | Jorgensen EZ-Hold Clamps holding everything together while I attached from the backside.
And the other side!
Tip #9
Last tip… attaching the hooks. These are the ones I used. I added three and it made the spacing super easy because the direct center of the hall tree is a crack of the shiplap. So I just measured down 18” from the top, made a mark, centered the hook on that line and pre-drilled for the screws. And then for the two outside hooks I did the same, but with the second groove in from each side. This was a win/win… less math and perfectly spaced hooks!
Tip #10
Okay, seriously last tip… If you end up with a piece of plywood that is warped like I did, screw three 2x4’s to the back of the plywood. Be sure to use 2” screws so they don’t go thru the front. I placed my 2x4’s one on each end and one in the middle and it kinda gives the look of board and batten. Be sure to stain the exposed edges of the 2x4’s so the blend in with the rest of the piece. Or if you don’t want to do that you could remove the baseboards where you will be having your Modern Shiplap Hall Tree Bench and screw the hall tree portion directly into the studs.
Gave my Pony | Jorgensen clamps a workout getting this plywood straight.
I only had 2 1/2” nails in stock and couldn’t run out and buy shorter ones, because quarantine, so I used some washer to make up for it.
Okay I know that was a lot of tips, but I do want to assure you this was an easy build and it only requires those five (5) tools! So do you want to start building yourself a Modern Shiplap Hall Tree Bench? If so, I have full plans available in my shop that include all dimensions, cut lists, materials list, tool list and diagrams. You can find them here…
Modern Shiplap Hall Tree Bench Plans
Perfect Entryway Drop Zone Bench! Maybe baskets underneath?
Awesome Oscar approved!
An AWESOME welcome statement piece for any home!
I love being able to bring these design ideas to life and love even more when you build yourself a piece using one of my plans. So if you do build one, I’d love to see it. Please tag me in it or use the hashtag #BuildingAwesome!
And if you want more build ideas using 5 Tools or less, check out these other AWESOME builds from some of my friends:
My Repurposed Life - Spool Bed Bench
Anika’s DIY Life - DIY A Frame Desk
Jaime Costiglio - DIY Simple Side Table
At Charolette’s House - How To Build A Rustic Wooden Bench
Thanks for following my journey, happy building, stay safe and have an AWESOME day!
Sadie Mae
Can’t make it now? Pin it and save for later!
This is a .pdf download product featuring step-by-step building plans for my Modern Shiplap Hall Tree Bench.
Plans include shopping, tools, and cut lists as well as dimensions and 2D diagram models. Plus, some building tips. The plans also include a version with or without a table saw!
License - Single use license, not for professional use.
File Type - 11 Page PDF Plan
To see some step-by-step photos and tips of how I made this build please refer to my blog post at Modern Shiplap Hall Tree Bench.

