Build A Farmhouse Table - The AWESOME Way!
I love making dining tables because it is the piece of furniture that a family is going to use everyday together. They are going to make memories there. So I make my tables sturdy and durable to last a lifetime with the family. I like rustic finishes that only get better with time. One of my favorite builds and best sellers is a farmhouse table. There are so many different ways to build a farmhouse table. You can have straight legs, X legs, or turned legs. My favorite are turned legs for a farmhouse table. They add that perfect amount of curvy goodness to the table. I also like that the legs don't get in the way of the chairs, meaning leg room for everyone!!!
Wanna know how I make a farmhouse table? Well here goes....
#1 - I pick out the legs. This is the fun part! You can find turned legs at some of the big box stores, but Osborne Wood Products have the best selection for turned legs. They are my go to spot for turned legs. You can't go wrong with any of the legs, but I choose the Portsmouth legs for this build. I like how thick they are. They add a beefy quality the the table. They are 4" at the top. The longer the table the thicker I like the legs to be.
Just unboxed the legs!!!
#2 - I make a cut sheet for my table and buy wood. In this case I am building a table that is 72" L x 40" W. I don't cut everything out at this time, this is just my guide on how much wood I need to buy and what sizes. I use construction grade 2x dimensional lumber from the big box stores at this time. It is generally douglas fir. Even though I will be milling my wood, I look for pieces that are straight and aren't twisted. This greatly helps cut down on the milling necessary. Picking out the best wood is very important, especially if you won't be milling your wood. I have made many tables before I had all the tools to mill the wood that came out great. Just take the extra time to look thru the wood for those perfect pieces! Trust me you will be very glad you did further into the build. Also, pick out the driest pieces of wood you can find. Wood will contract and expand with the seasons and moisture content in the air. Picking out the driest pieces will ensure less movement in your table down the road. I use a moisture meter when picking out wood for my tables. I like the moisture content to be less than 10%. I live in Arizona, so this isn't really a problem for me. It's a dry heat!!! haha But if you live in places with more moisture this could be an issue and you might need/want to let the wood dry out before building your table. Before I had a moisture meter I would do the weight test...... that is pick out the lightest pieces of wood. More moisture = heavy wood.
Here is a link to a good article from The Wood Whisper regarding wood movement . Or just google it and you will get probably more information than you ever wanted!!!
The Before! All the wood and legs I am gonna need to build my table and bench! 2x4's, 2x6's and Portsmouth legs.
#3 - I mill the wood. What is milling the wood???? Well, not sure this is the correct definition but..... milling the wood is preparing each side of the wood to be flat and smooth, so that when I glue them together I will have flat 90 degree edges to join. Having that will ensure that my table top is flat. So first I cut my pieces to length, plus about 6". I do this because I can get snipe (indents) in my wood on the ends when planing. Plus, when glueing the top it is very hard to get all the pieces exact even/square with each other and this will give me extra to trim and make the top square. So milling the wood.... face plane on the jointer, edge joint, plane for thickness on the planer and then rip to width. Ripping to width is done on the table saw. It is a good idea to use a feather board and have good infeed and outfeed support to make sure that the cut is straight. I am not going to go into more detail on how to use each of these machines because I am still new to using them.
Face plane on the jointer.
Edge plane on the jointer.
If you don't have these tools/machines I would recommend that you at least rip the table top boards 1/8"-1/4" off each sides to take the rounded corner corners off the boards, so that your top with be flat and not have grooves in it. Again, this is when picking the best straightest boards is important.
Once your wood is milled it is time to start assembly!!! I generally glue up my top first, so here goes.....
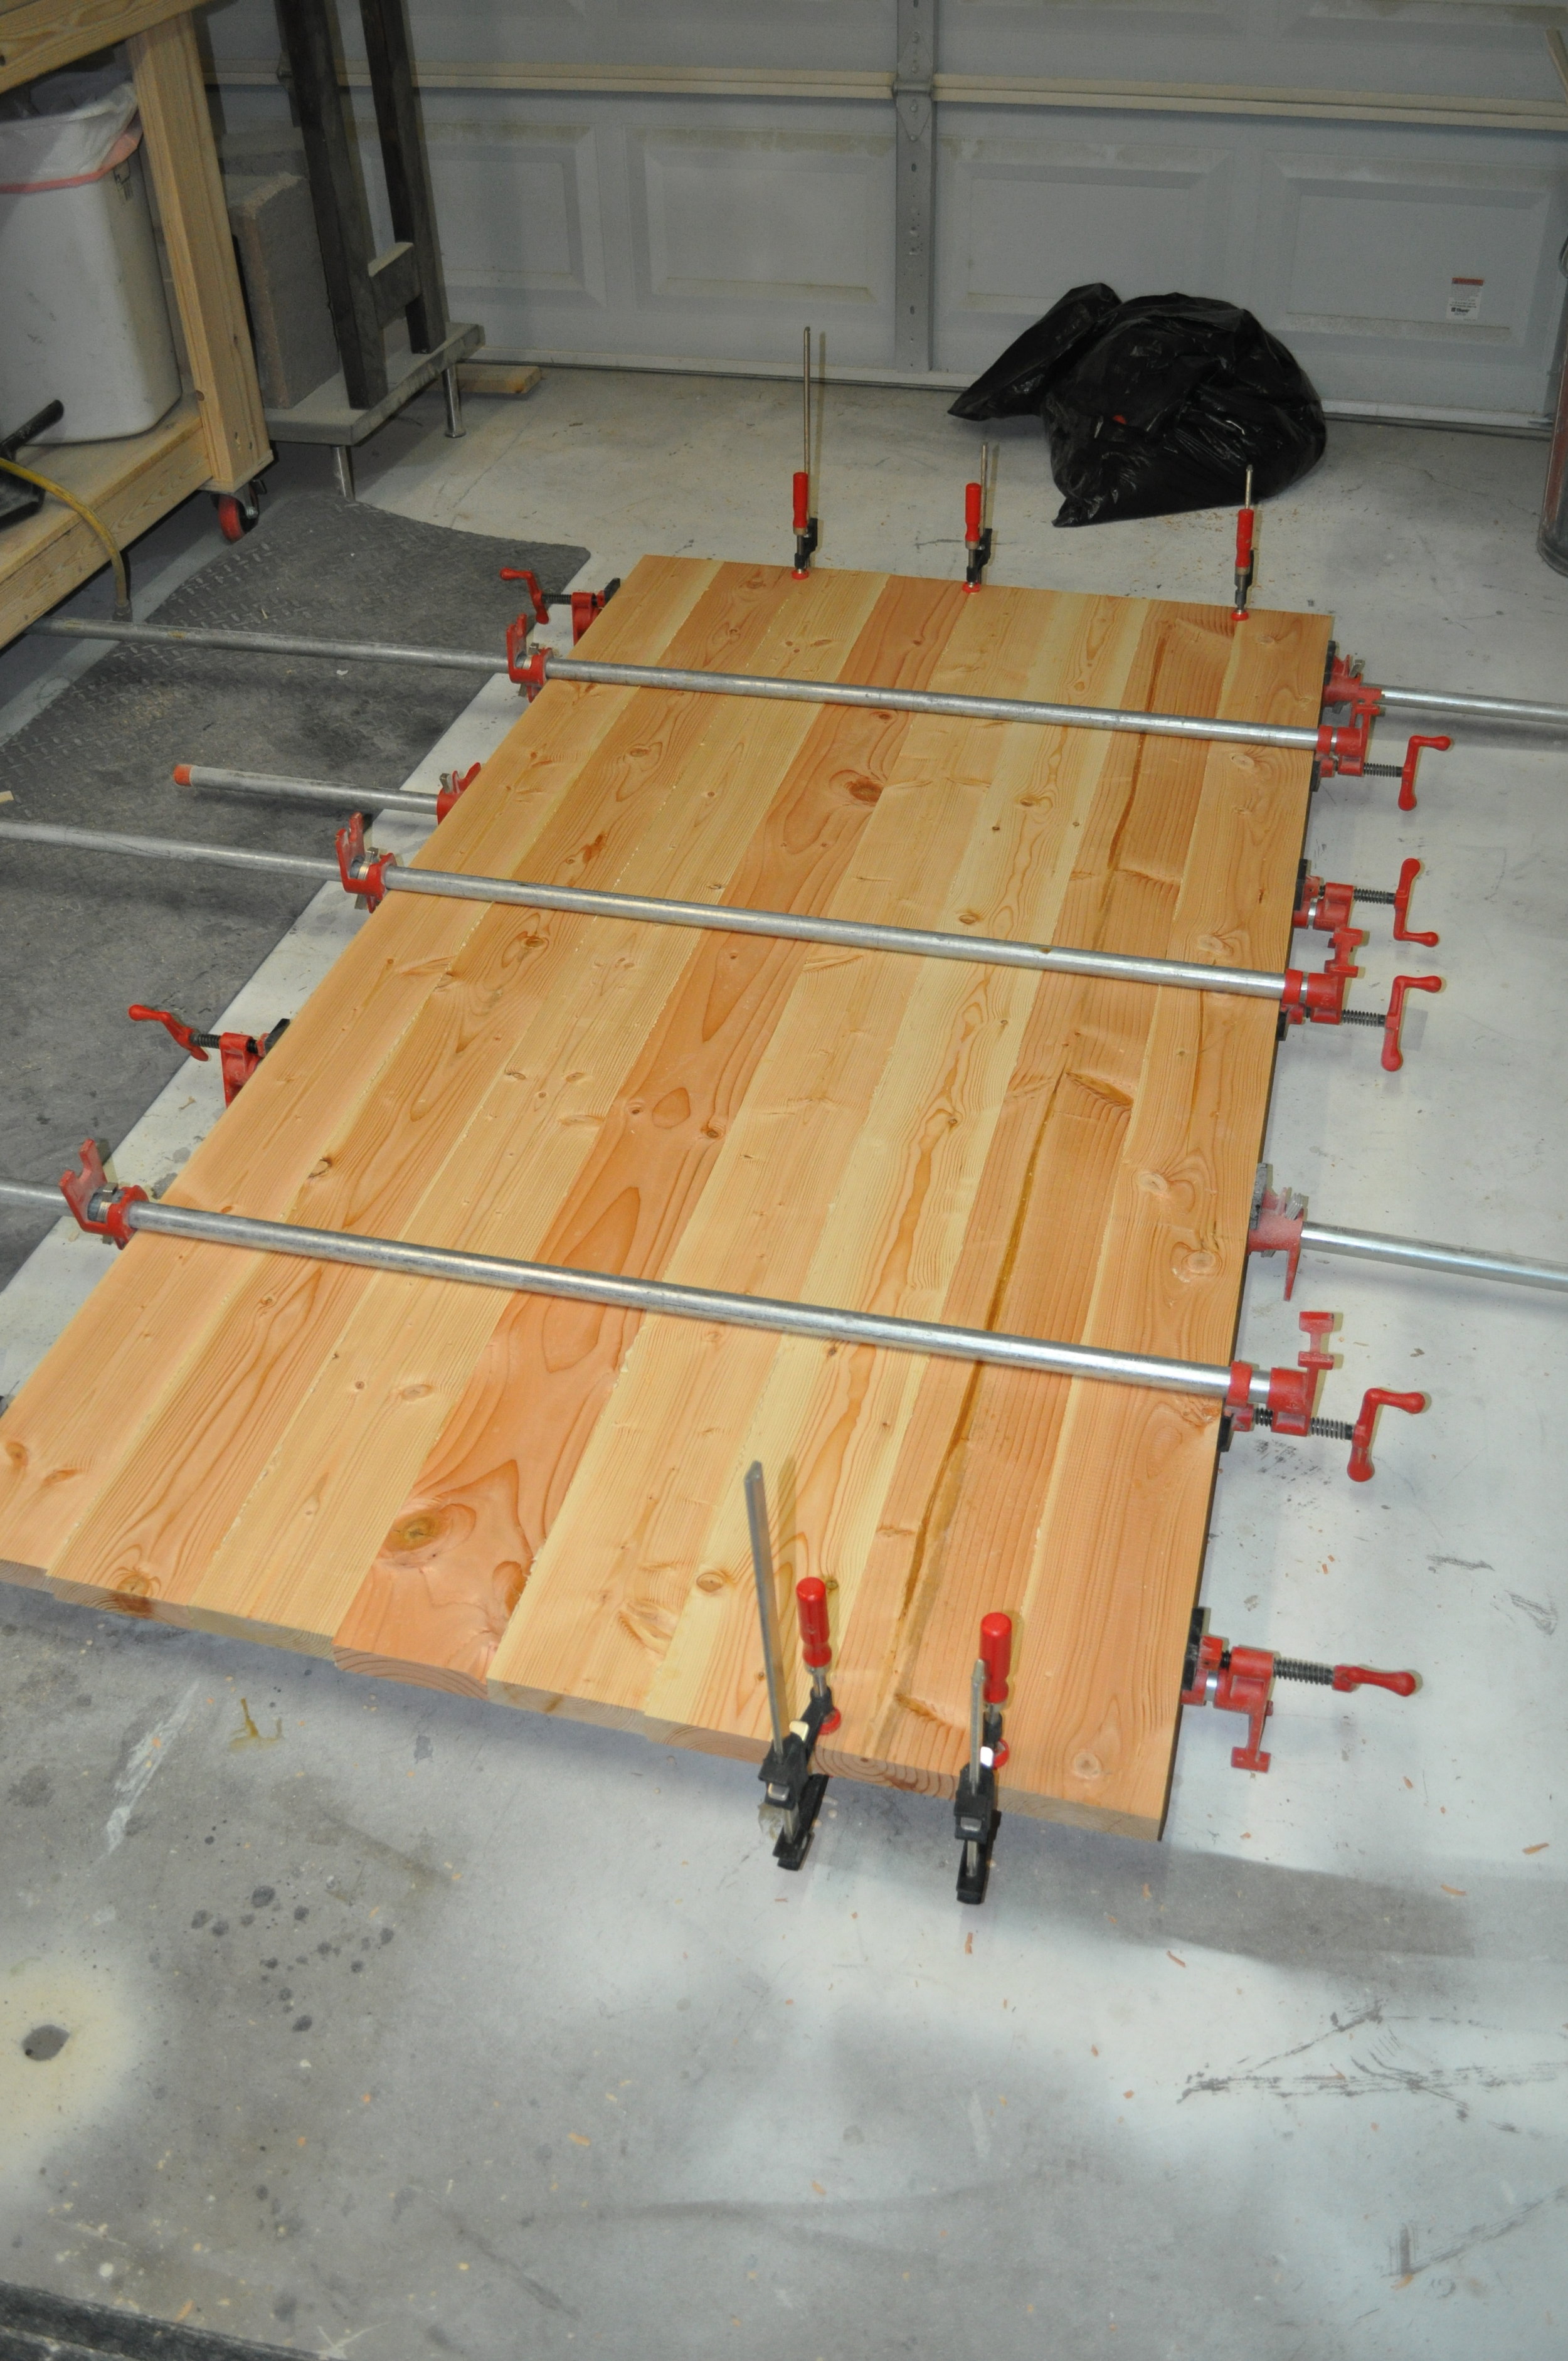
#4 - Glue-Up the Table Top. I use my Bessey Pipe Clamps for this. I don't have a workbench big enough to lay this big of a top out on, so I do it on the floor. I will put usually 4 clamps on the bottom evenly spaced and then the rest on the top. I also alternate the direction of the clamps, so that pressure is being applied in all directions. Once, the four bottom clamps are down I start laying out the wood. I alternate the end grain patterns. This is to help with the wood movement. If they were are the same direction the top would be more likely to cup. With alternating them each board would more so fight the other one and limit the amount of movement.
Plane for thickness.
Alternating end grain. Smiles Up, Smiles Down, Smiles Up, Smiles Down...
Once I have them laid out how I like, it is time for glue!!! I use Titebond III. I like it because it gives me a little bit more time for set-up. And with it being just me doing these glue-ups I need all the time I can get. I stand all the boards on side and apply glue all over the edge. I don't have a picture of this because I use my finger to spread the glue. I know I should buy a glue brush or something, but haven't gotten around to it. I recommend having a wet paper towel around to help clean your fingers, so when you move the boards around you aren't getting glue spots everywhere. You can sand the glue off, but it is a pain and if you don't get it all the glue doesn't stain the same way as the wood.
Boards all ready for glue!!!
Another reason I use Titebond III is it isn't as yellow as other glue, so you are less likely to see glue spot in the stain after sanding.
As you can see I don't use dominos or biscuits in my glue up process. They aren't necessary and no where have I read that they strengthen the top. Actually they reduce the surface area that the two edges have that glue together. BUT..... dominos and biscuits help with aligning the boards to reduce ridges and sanding time in the next step of the build. So maybe someday I'll add one of those tools to my collection and help speed up the sanding time, because nobody likes sanding forever!
Okay all clamped up! I have clamps on the bottom, clamps on the top, clamps different directions and clamps on the edges!!!! All of these help in different ways to ensure top is as flat as possible after glue up.
Now, let the top stay clamped overnight or about 24 hours or per the directions on the glue that you are using. Next up the base! It's all about the base and those legs!!!!
#5 - Build Base. On this type of table I generally have a 1" overhang on the sides and 2-3" overhang on the ends. So, with that is mind I need to figure out how to cut the apron.
Overall table top length minus (-) overhang (-) leg width (-) leg width (-) overhang
For example: Overall table length 72", Leg width 4", Overhang 2"
72 - (2"+4"+4"+2") = 60"
Apron Length = 60"
And then do that for the width and you know how long to cut your apron pieces. Once you have your apron pieces cut, I rip a dado the width of the kerf of the blade on the table saw. This is where I will insert the table top fasteners when attaching the table top. More on that later, but the dado is 1/2" deep and 7/8" in from the top of apron board. You can use your biscuit joiner, if you have one, and cut a biscuit slot to attached the table top fasteners.
Next up you need to break out one of my favorite tools...... The Kreg Pocket Hole Jig! This tool makes building so easy! We are going to use this to attached the apron pieces to the legs!!! Make sure that your jig is setup to the correct width of the material that you are joining, in this case 1 1/2". Then Drill two holes on the inside of the apron pieces (the same side that you just ripped the dado in).
Once you have pocket holes drilled, I usually sand each piece of my base. I find that it is easier to sand them before assembly and then just touch up after assembly. Having all the right tools/clamps make assembly easier. I love my Kreg right-angle clamp and bench top clamp for assembly, a square to help make sure everything is square before screwing it together, Kreg screws, and of course GLUE!!! If you don't have the right clamps, having a friend or spouse to help hold everything in place is a plus!
I inset my apron, so that it isn't flush with the outside of the leg. Usually I inset them 3/4", because it is easy to grab a scrap of 1x material and put it under the apron piece during assembly. Just make sure it is supported on both ends, especially on a long apron piece. Also, I like to assemble the short apron sides first and then attach the long apron pieces. I have found it easier this way.
Once assembled all four side your base with look like this! You will want to add cross supports from apron to apron for additional support. I usually do mine roughly 18" apart depending on the size of the table. I also did this for the bench. Better to have extra than not enough.
#6 Trimming and Sanding Table Top.
After taking the top out of the clamps, I use an old chisel to remove most of the excess glue spots. I also do this before trimming the top to square so that my level or straight edge will sit flat on the top.
To trim the table top to desired length.... Hmmm wait a sec! Not sure if I told you to cut your table top boards extra long so that after glue up youcould square them off??? So, if I didn't now I did. Also when glueing up not using dominos or biscuits it is really hard to keep the boards exactly where you want them when adding clamping pressure. So, now that we got that covered let's trim the top! I use my 4' level as a guide for my circular saw, but you can use anything that you know is straight. With my circular saw I have to add about 1 1/2" less than where I want the cut to be to compensate for my blade guard on the saw. Be sure to measure your saw, because each saw can be different. Do this to both sides and you are ready to start sanding!!!
For sanding I usually start with my Ridgid belt sander with a 60 grit belt on it. This will speed up the sanding process. I use this until all or any ridges or high spots are gone. Then I move on to my random orbital sander and sand the whole thing at 60 grit. I draw squiggly lines lightly all over the top, that way once I sand out the lines I know that I have sanded with that grit enough. 60 grit also makes removing any excess glue easy.
Once I have sanded to 60 grit I fill any void or big knots with epoxy. I am not going to go into how to do that in the article, but maybe in the future. I do this to one stabilize a big knot or fill a hole so crumbs don't get in it. I don't fill in every tiny tiny hole with epoxy. I am making rustic tables, and I think leaving some adds to the natural character of the table! Once the epoxy has cured I sand that flush to the top with 60 grit. And then finally I do the pencil marks again and sand the top with 120 grit. I also use the 120 grit the shape the edges and corners. Some use routers and stuff, but I have found a sanding technique that I like and works for me. I also sand both sides of the table top!!!
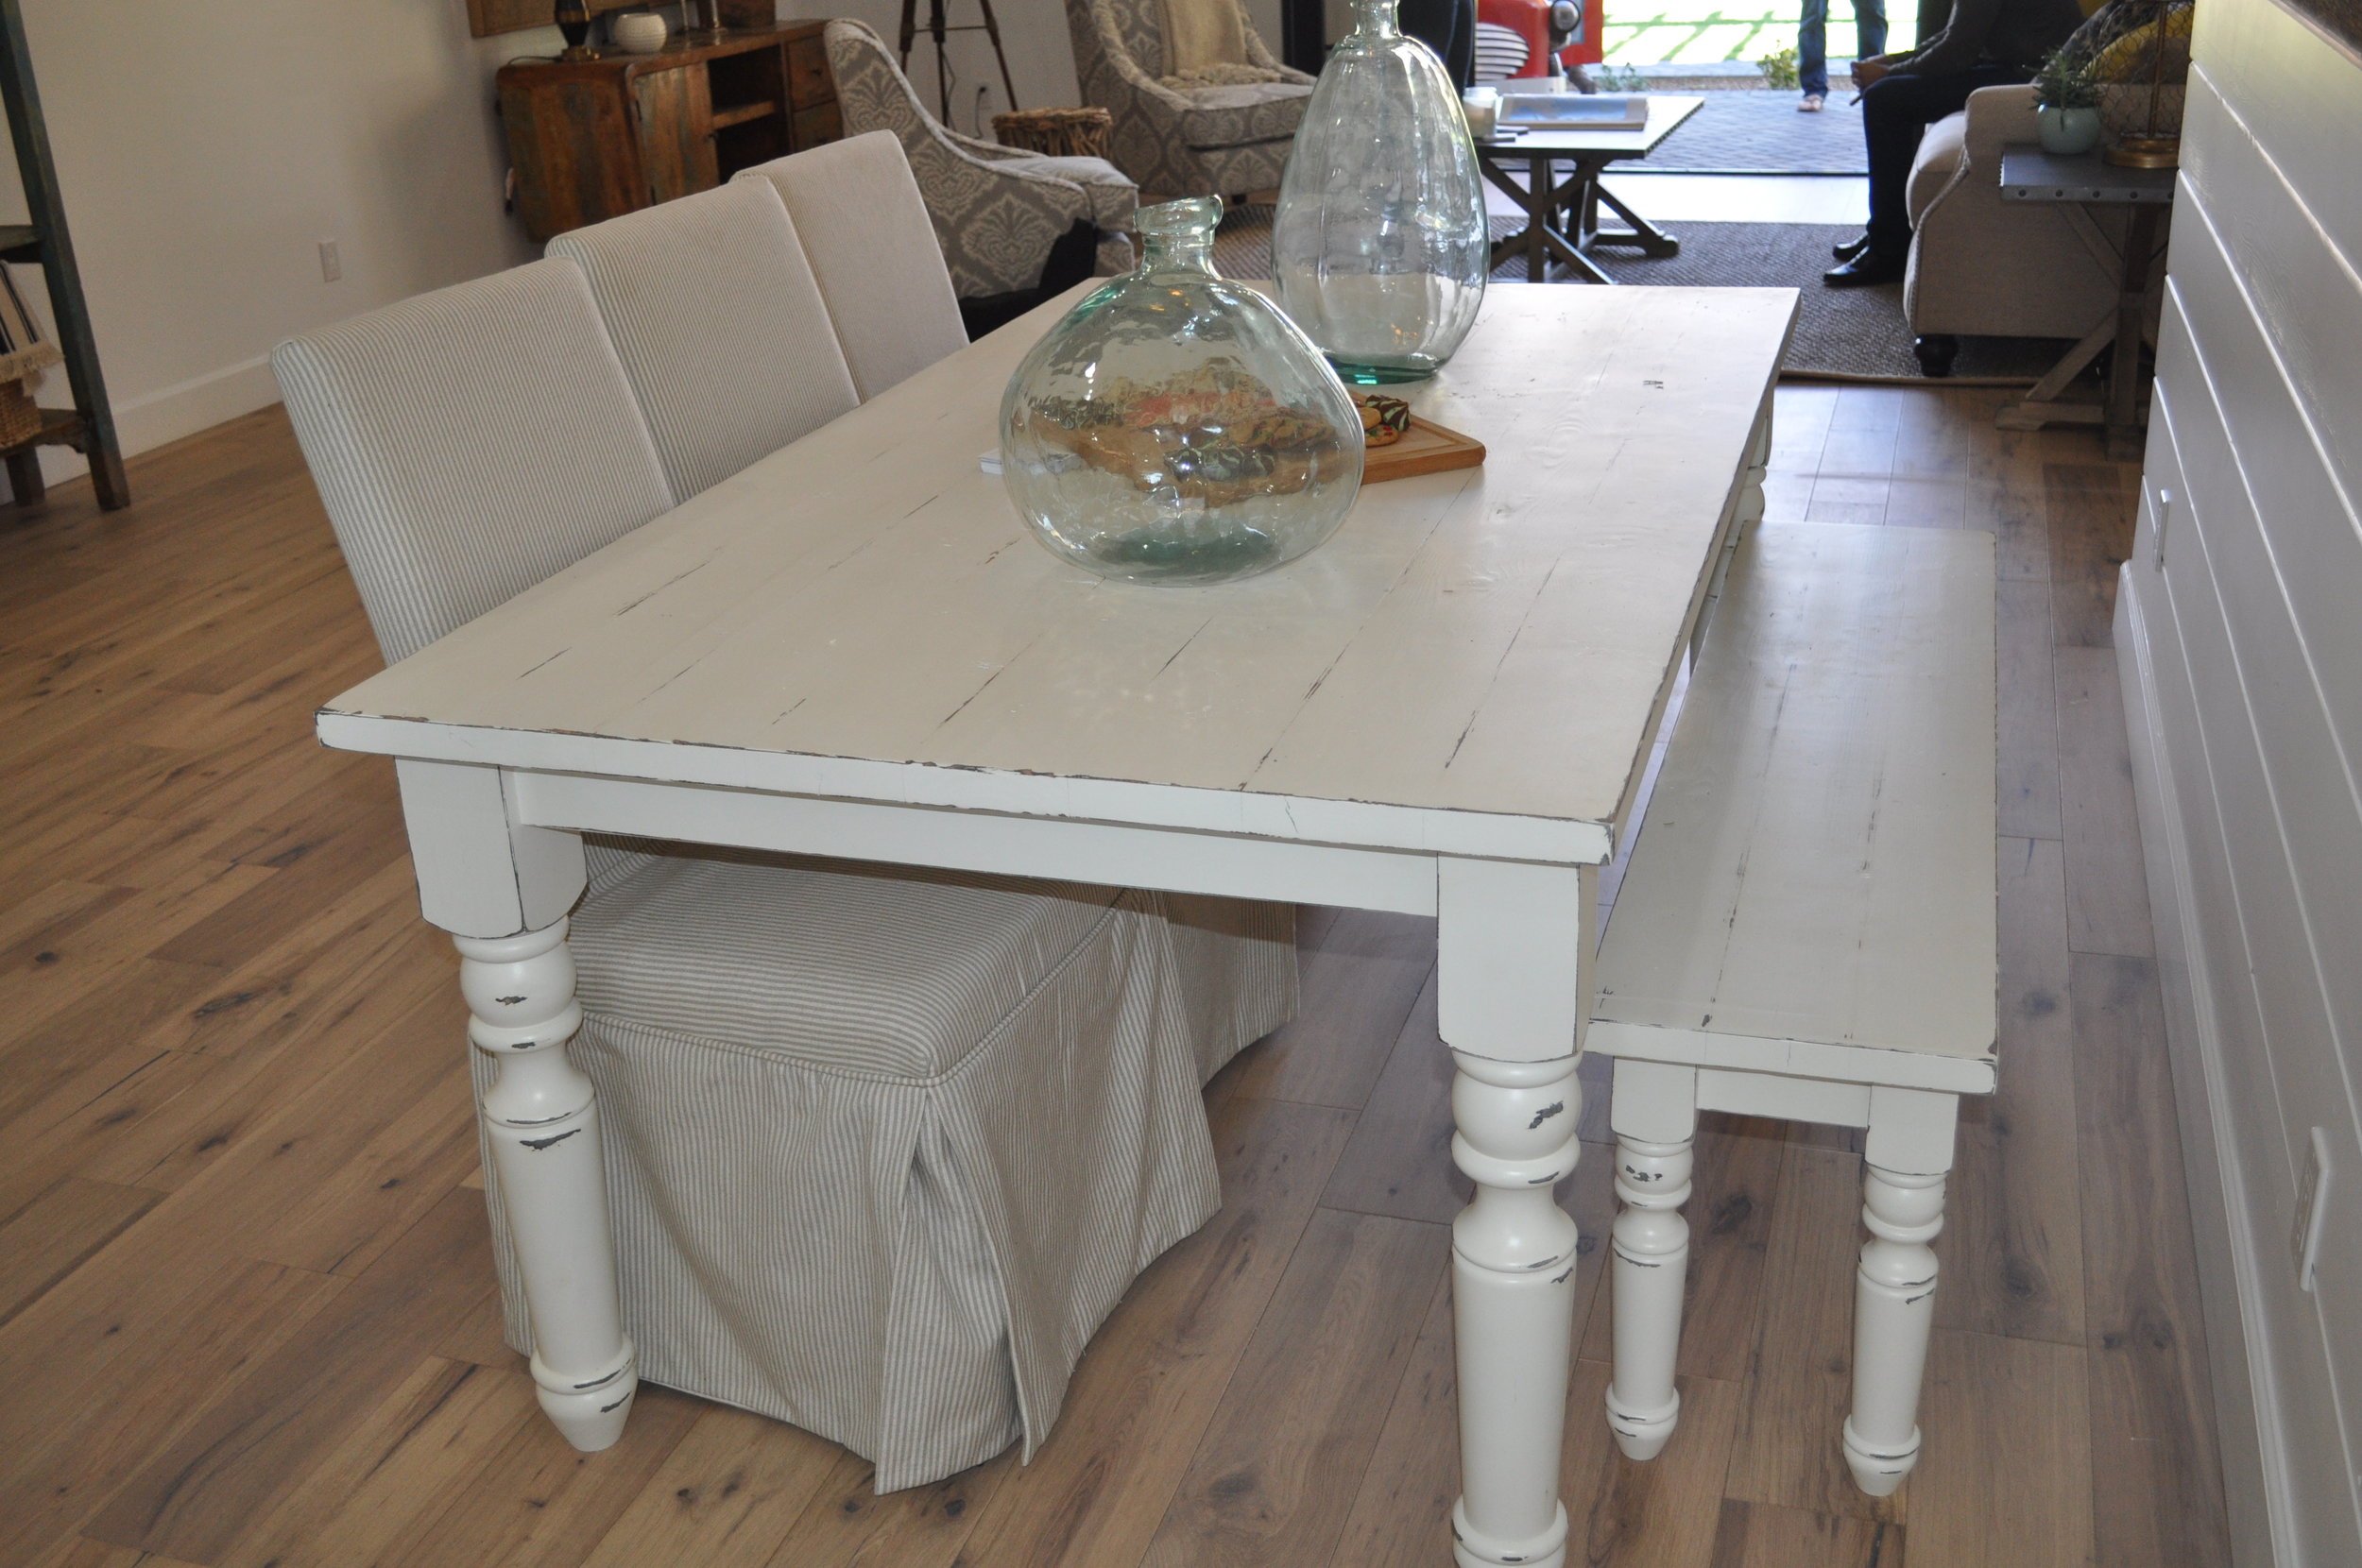
Now the top is ready for finish! If I am doing a two-tone table finish I will stain and paint the base apart. If it is all going to be the same finish, I attach the top to the base and then start finishing. In the case of this table and bench I did a distressed all white finish. To get that effect I first stained the entire pieces in Minwax Jacobean stain. Let that dry overnight and then paint it in flat SW Alabaster white. Once that was dry, sand away to get desired look. Then finally I spray a water-based poly of the entire piece. I usually do about 3 coats on the base and 4-5 coats on the tops. When I poly over white I use Minwax Polycrylic beacause I have found that it yellows the least. If you use light coats you shouldn't get any yellowing. It is only when I was heavy on spraying it that I got a little yellowing.
#7 Attaching the Table Top.
Set table base upside down on the bottom of table top. Measure to make sure table is centered and that you have the correct overhang on each side and then ends. Once I get it just right I clamp down a couple of sides so that it doesn't get bumped with screwing the base on. Then all that is left is inserting the table top fasteners in the dado slot in the apron and screwing it into the table top. I place these in the corners and thru-out the apron as desired/needed.
While I have the table upside down comes the favorite part of every build for me...... adding my sticker! Makes me smile every time.
Now flip your table over and admire your work!!!
Oh so pretty! And it all started with picking out those AWESOME Portsmouth legs from Osborne Wood Products!
I hope this helps you build your very own AWESOME farmhouse table! Or if you want me to build your dining room table, I hope this shows you what goes into making an AWESOME piece of furniture.
Thanks for following my journey! Have an AWESOME day!
-Sadie Mae
*This post contains affiliate links


